Hello, and congratulations on your new UHK! Thanks so much for your support!
Let's unbox your UHK and split the halves by pulling them apart in opposite directions:
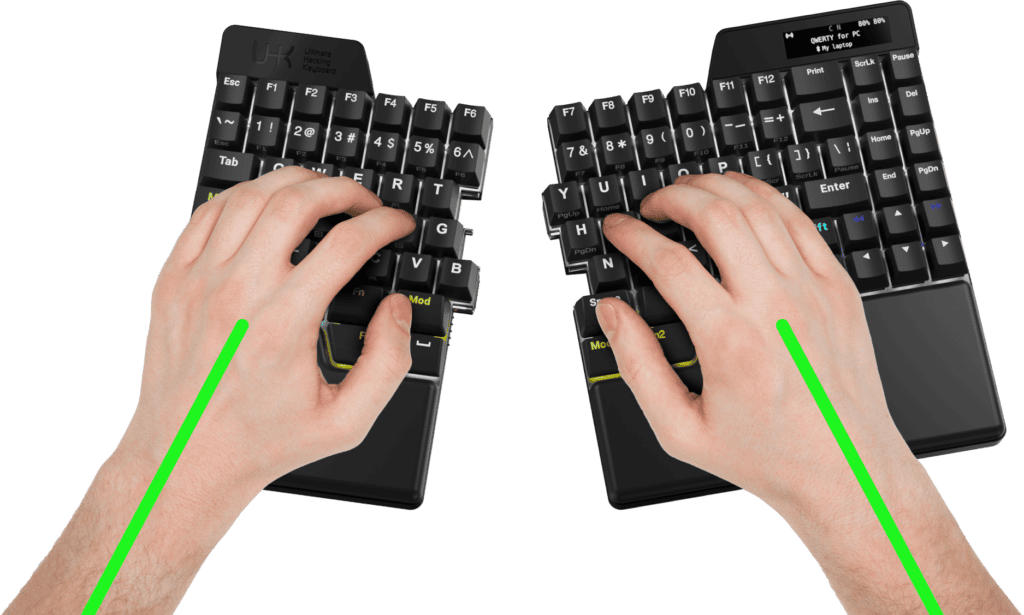
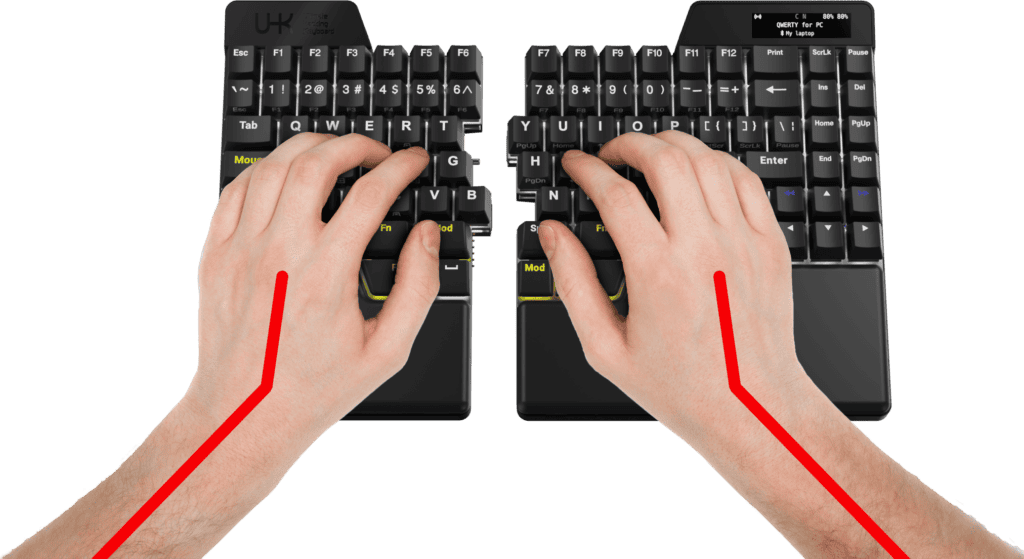
It's up to you how much space you leave between the halves, but your wrists should be aligned straight-on with each half:
Good posture
Bad posture
Connectivity
USB: Connect the right half via USB and connect the halves via the spiral cable. If your UHK has batteries, the spiral cable is unnecessary as the halves will communicate wirelessly, but it's convenient to avoid regular charging.
BLE: Select "UHK 80" on the host device and enter the pairing code on your UHK. If "UHK 80" doesn't appear in the Bluetooth devices list, you may have an older host that only supports the older Bluetooth Classic standard instead of the newer BLE (Bluetooth Low Energy) standard. Only BLE is supported by the UHK 80.
Dongle: Pair the dongle with your UHK.
Switching between connections
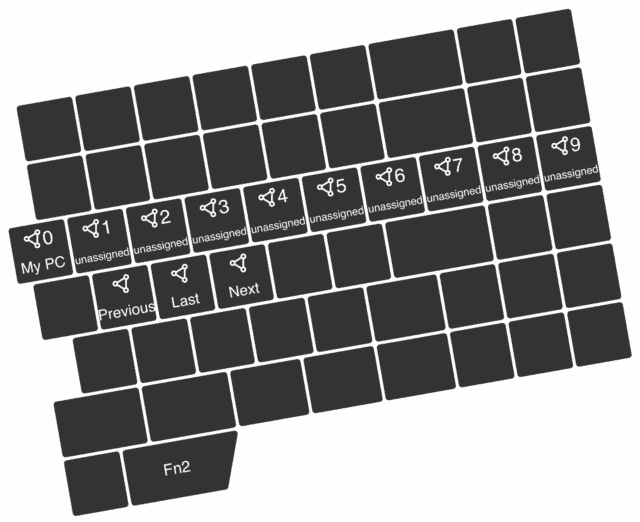
Use the following default mappings of the Fn2 layer for connection switching. The top row mappings enable absolute connection switching, while the bottom row allows for relative connection switching.
Putting the UHK to sleep
The UHK 80 doesn't have dedicated power switches by design, but it does have a sleep mode that disables the keys, backlight, and wireless features to preserve battery, which is useful for transportation or storage. You can enter sleep mode with Fn2+Pause and wake up the left half with S+F and the right half with J+L.
OLED display content

- The top left icon indicates the connection between the keyboard halves, which can be wireless or wired.
- The icon to the right of the connection icon indicates whether your UHK is advertising via BLE (connectable by other devices, such as your phone).
- The top center icons indicate the status of Caps Lock and Num Lock.
- If your UHK 80 contains batteries, the top right percentages indicate their charge levels, which are 74% for the left half and 99% for the right half.
- The middle row displays the name of the current keymap (QWERTY for PC) and the current non-base layer (mod) in a smaller font.
- The bottom row shows the name of the current connection.
Charging
The two halves should be charged via separate USB cables for maximum charging speed. Alternatively, a single USB cable is sufficient if the other half is connected via the bridge cable, in which case the half not directly connected via USB will charge slower.
Setup
If you have a Riser 80, see the Riser 80 manual for its setup.
If you don't have a Riser 80 but only the included flip-out feet, see the tenting, negative tilting, and positive tilting setup instructions. These instructions were made for the UHK 60, but the setup is identical for the UHK 80.
Where to go from here?
We have a nice tutorial to familiarize yourself with the keymaps, layers, and mouse keys of your UHK 80, and we strongly recommend you read it. This tutorial was made for the UHK 60, but it also applies to your UHK 80.
Finally, install Agent and customize your UHK to your needs.