
You purchase the gadget of your dreams and open the box with excitement - it’s beautiful, functional, well-designed and puts a smile on your face. It’s hard to imagine that at one point, your gadget was nothing more than a big mess of wires. The final product has come a long way, and in many stages, from wires to being ready for a campaign.
Engineers shed blood and tears working out endless technical challenges all for the sake of a fully functional and reliably working prototype. This is our condensed story of trials and tribulations.
Prototype 1
The basic goals were clear - build a truly split, compact mechanical keyboard that merges as one piece. This is a good start, but still pretty vague. So it’s not surprising that our first prototype ended up like this:
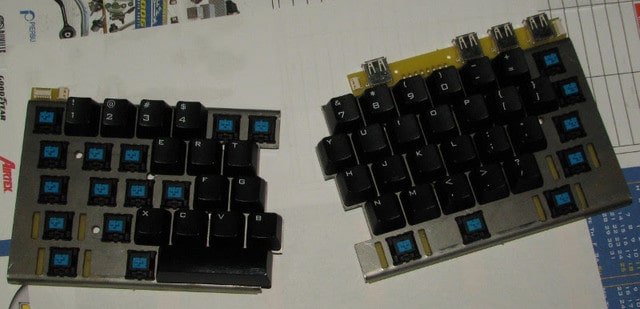
As you can see, we were flirting with the idea of building a USB hub into the UHK, which was ditched later on because of the lack of space. Small Molex connectors were used to connect the two keyboard halves, which saved space but they lacked robustness and repeatability, so they had to go.
The above PCB (printed circuit board) didn’t have any wires, so it wasn’t functional by any means. We really just wanted to get an idea how the keyboard would look. Making the electronics work started on a breadboard like this one:
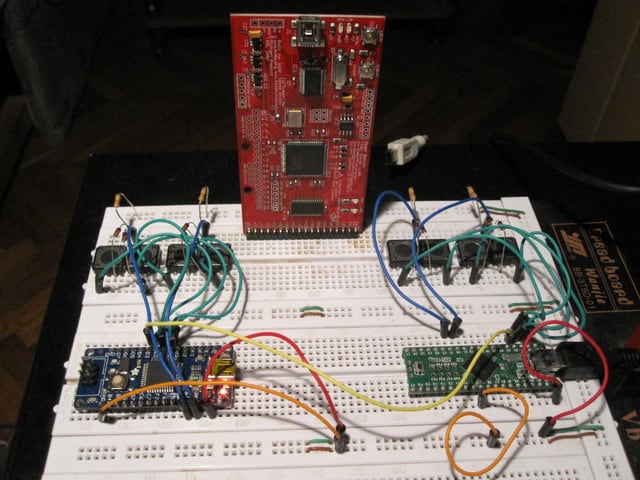
The development boards at the bottom are the brains of the left and right keyboard halves. The buttons above them implement a 2x2 key matrix, yielding 4 keys per keyboard half. The boards are connected by a wire, making the left board able to send key press and key release events to the right half. The massive board at the top is an Open Bench Logic Sniffer, enabling me to see the communication between the two boards for troubleshooting purposes.
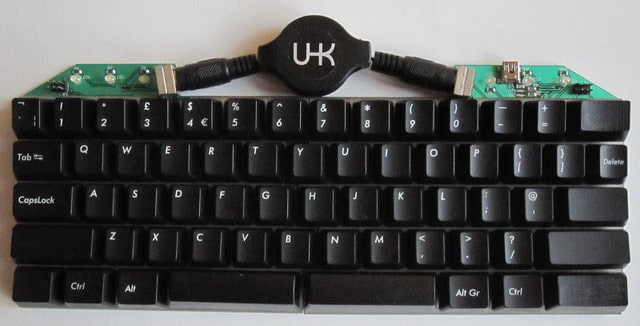
Prototype 2
Finishing the electronics breadboarding, it was time to turn the wires into traces on a PCB to have a functional prototype. This time, we tried a retractable S-Video cable to connect the keyboard halves. The bulkiness of the plugs is obvious, but what you can’t tell is their lack of reliability. 3 LEDs were used per keyboard half to display status information just because it was a simple solution to implement at that time.
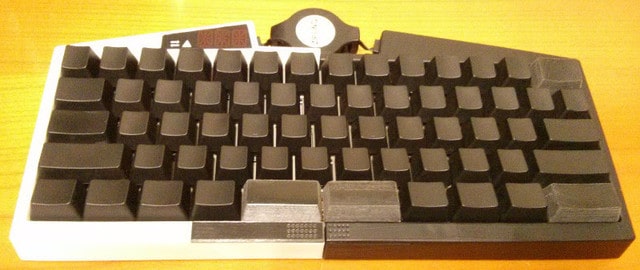
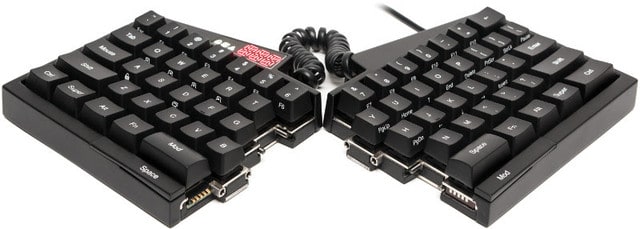
Prototype 3
With the PCB started, it was finally time to come up with the final shape of the UHK and get its case 3D printed. On the following picture, the left half was printed using an EOS SLS (selective laser synthesis) machine and the right half was printed on an Objet polyjet. Unlike the left half, the right half is painted and polished. We ended up using SLS for our prototypes because even though it has lower resolution than polyjets, its shape reflects the shape of the CAD model more accurately, and its mechanical qualities are better. This time we switched to an RJ11 retractable cable, which is a lot less bulky than the previous S-Video cable - but it turned out to be similarly unreliable.
Prototype 4
Apart from fixing a lot of errors on the PCB, we added stainless steel inserts to this prototype, letting users to mount the keyboard halves onto many objects. The other day, a disabled person emailed us who will use the inserts to mount the keyboard halves onto his armchair. We’re very glad that our keyboard supports such scenarios out of the box.
At this point, we realized that retractable cables of all kinds are supremely unreliable, and only a cord cable would do the job.
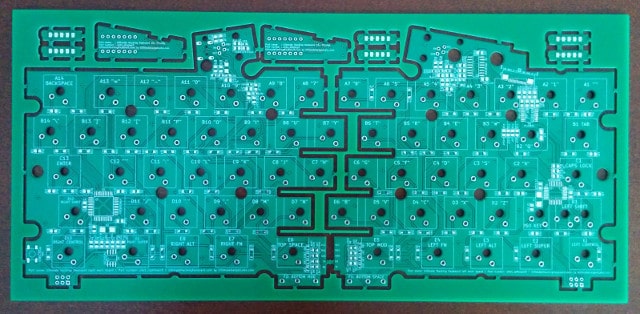
The inclusion of stainless steel inserts reshaped the contour of the PCB quite a bit, as you can see below:
Prototype 5
Our last generation prototype featured only very minor improvements to the PCB. We also found a super talented professional who polished and painted the 3D printed case to make it resemble the final look of the injection molded plastic case.
During the course of working on the UHK, we put more than 10,000 hours into it, and failed numerous times. Every failure taught us a lesson - a way to do something better. There is an industry term called MVP, which stands for Minimum Viable Prototype. The UHK is already far beyond this point.
The prototyping is done, but it’s not quite the end of the story. We have yet to unveil some one-of-a-kind, game changing addons. Stay tuned!