The following is an official repair guide for the Ultimate Hacking Keyboard. Since repair extends product lifespan and saves natural resources, we're dedicated to providing product repair guides. We do respect the two-year warranty period of our products regardless. We even provide post-warranty repairs.
Please note that new UHKs are not affected by this issue. Read on for details.
When we started to manufacture the UHK in early 2018, we didn't ground the steel plates of it. As time went by, it became apparent that the lack of grounding made the UHK susceptible to electrostatic discharge (ESD) damage. According to our feedback, about 1% of the UHKs have been affected by this issue. The susceptibility of this issue highly depends on the environment, so it will never happen for most, and it'll happen to all UHKs of some.
The symptoms are easy to notice as ESD damages a pin of a microcontroller that is wired to a column or, very rarely, the row of the keyboard matrix. This makes the keys of the affected columns or rows not work. The following image shows the keyboard matrix of the UHK.
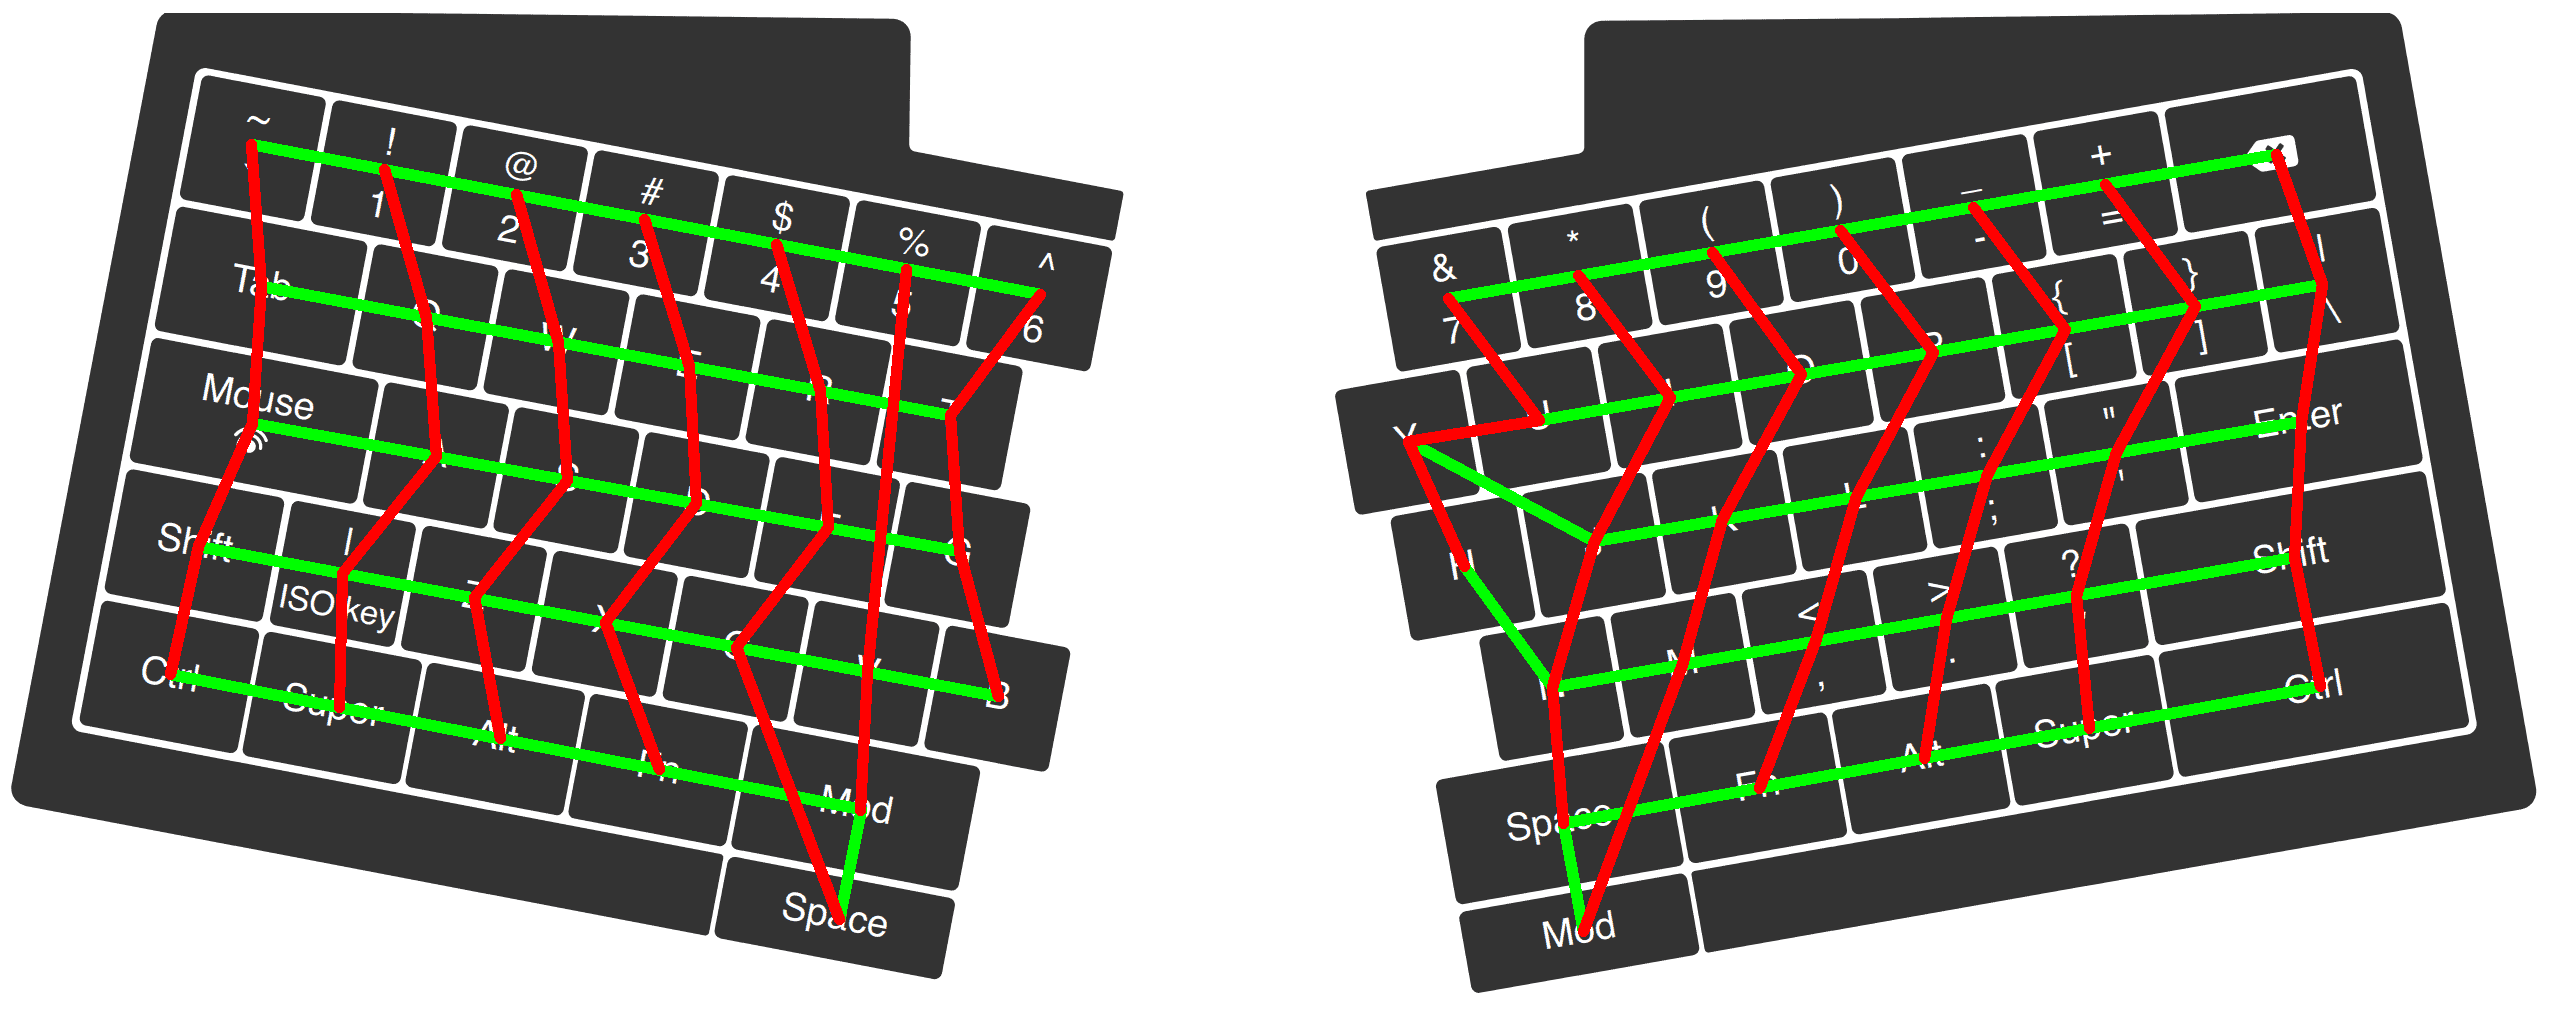
The column containing the 8, I, J, N, right space keys is the most frequently affected, the 7, Y, U, H column is the second most affected, and the 5, V, left Mod column is rarely affected. Very rarely, other columns or sometimes rows are affected, but the nature of the issue is the same.
Fixing damaged UHKs involves replacing the affected microprocessors, but this guide is not about fixing them. It's about preventing the issue from happening, which involves grounding the metal plates of the UHK.
Is your UHK grounded?
First up, let's figure out whether your UHK is grounded.
- Starting from 2019-02-11, we've been grounding the right steel plate of manufactured and repaired UHKs.
- Starting from 2020-02-24, we've been grounding both steel plates of repaired UHKs.
- Starting from 2020-03-10, we've been grounding both steel plates of manufactured UHKs.
If your UHK was ordered/repaired on or after these dates, the above applies to you. If only the right plate is grounded, the left half is unprotected against ESD. If both halves are grounded, both are protected against ESD.
A multimeter is a surefire way to check whether your UHK is grounded. Put your multimeter into continuity test mode. When touching the two probes together, your multimeter should beep.
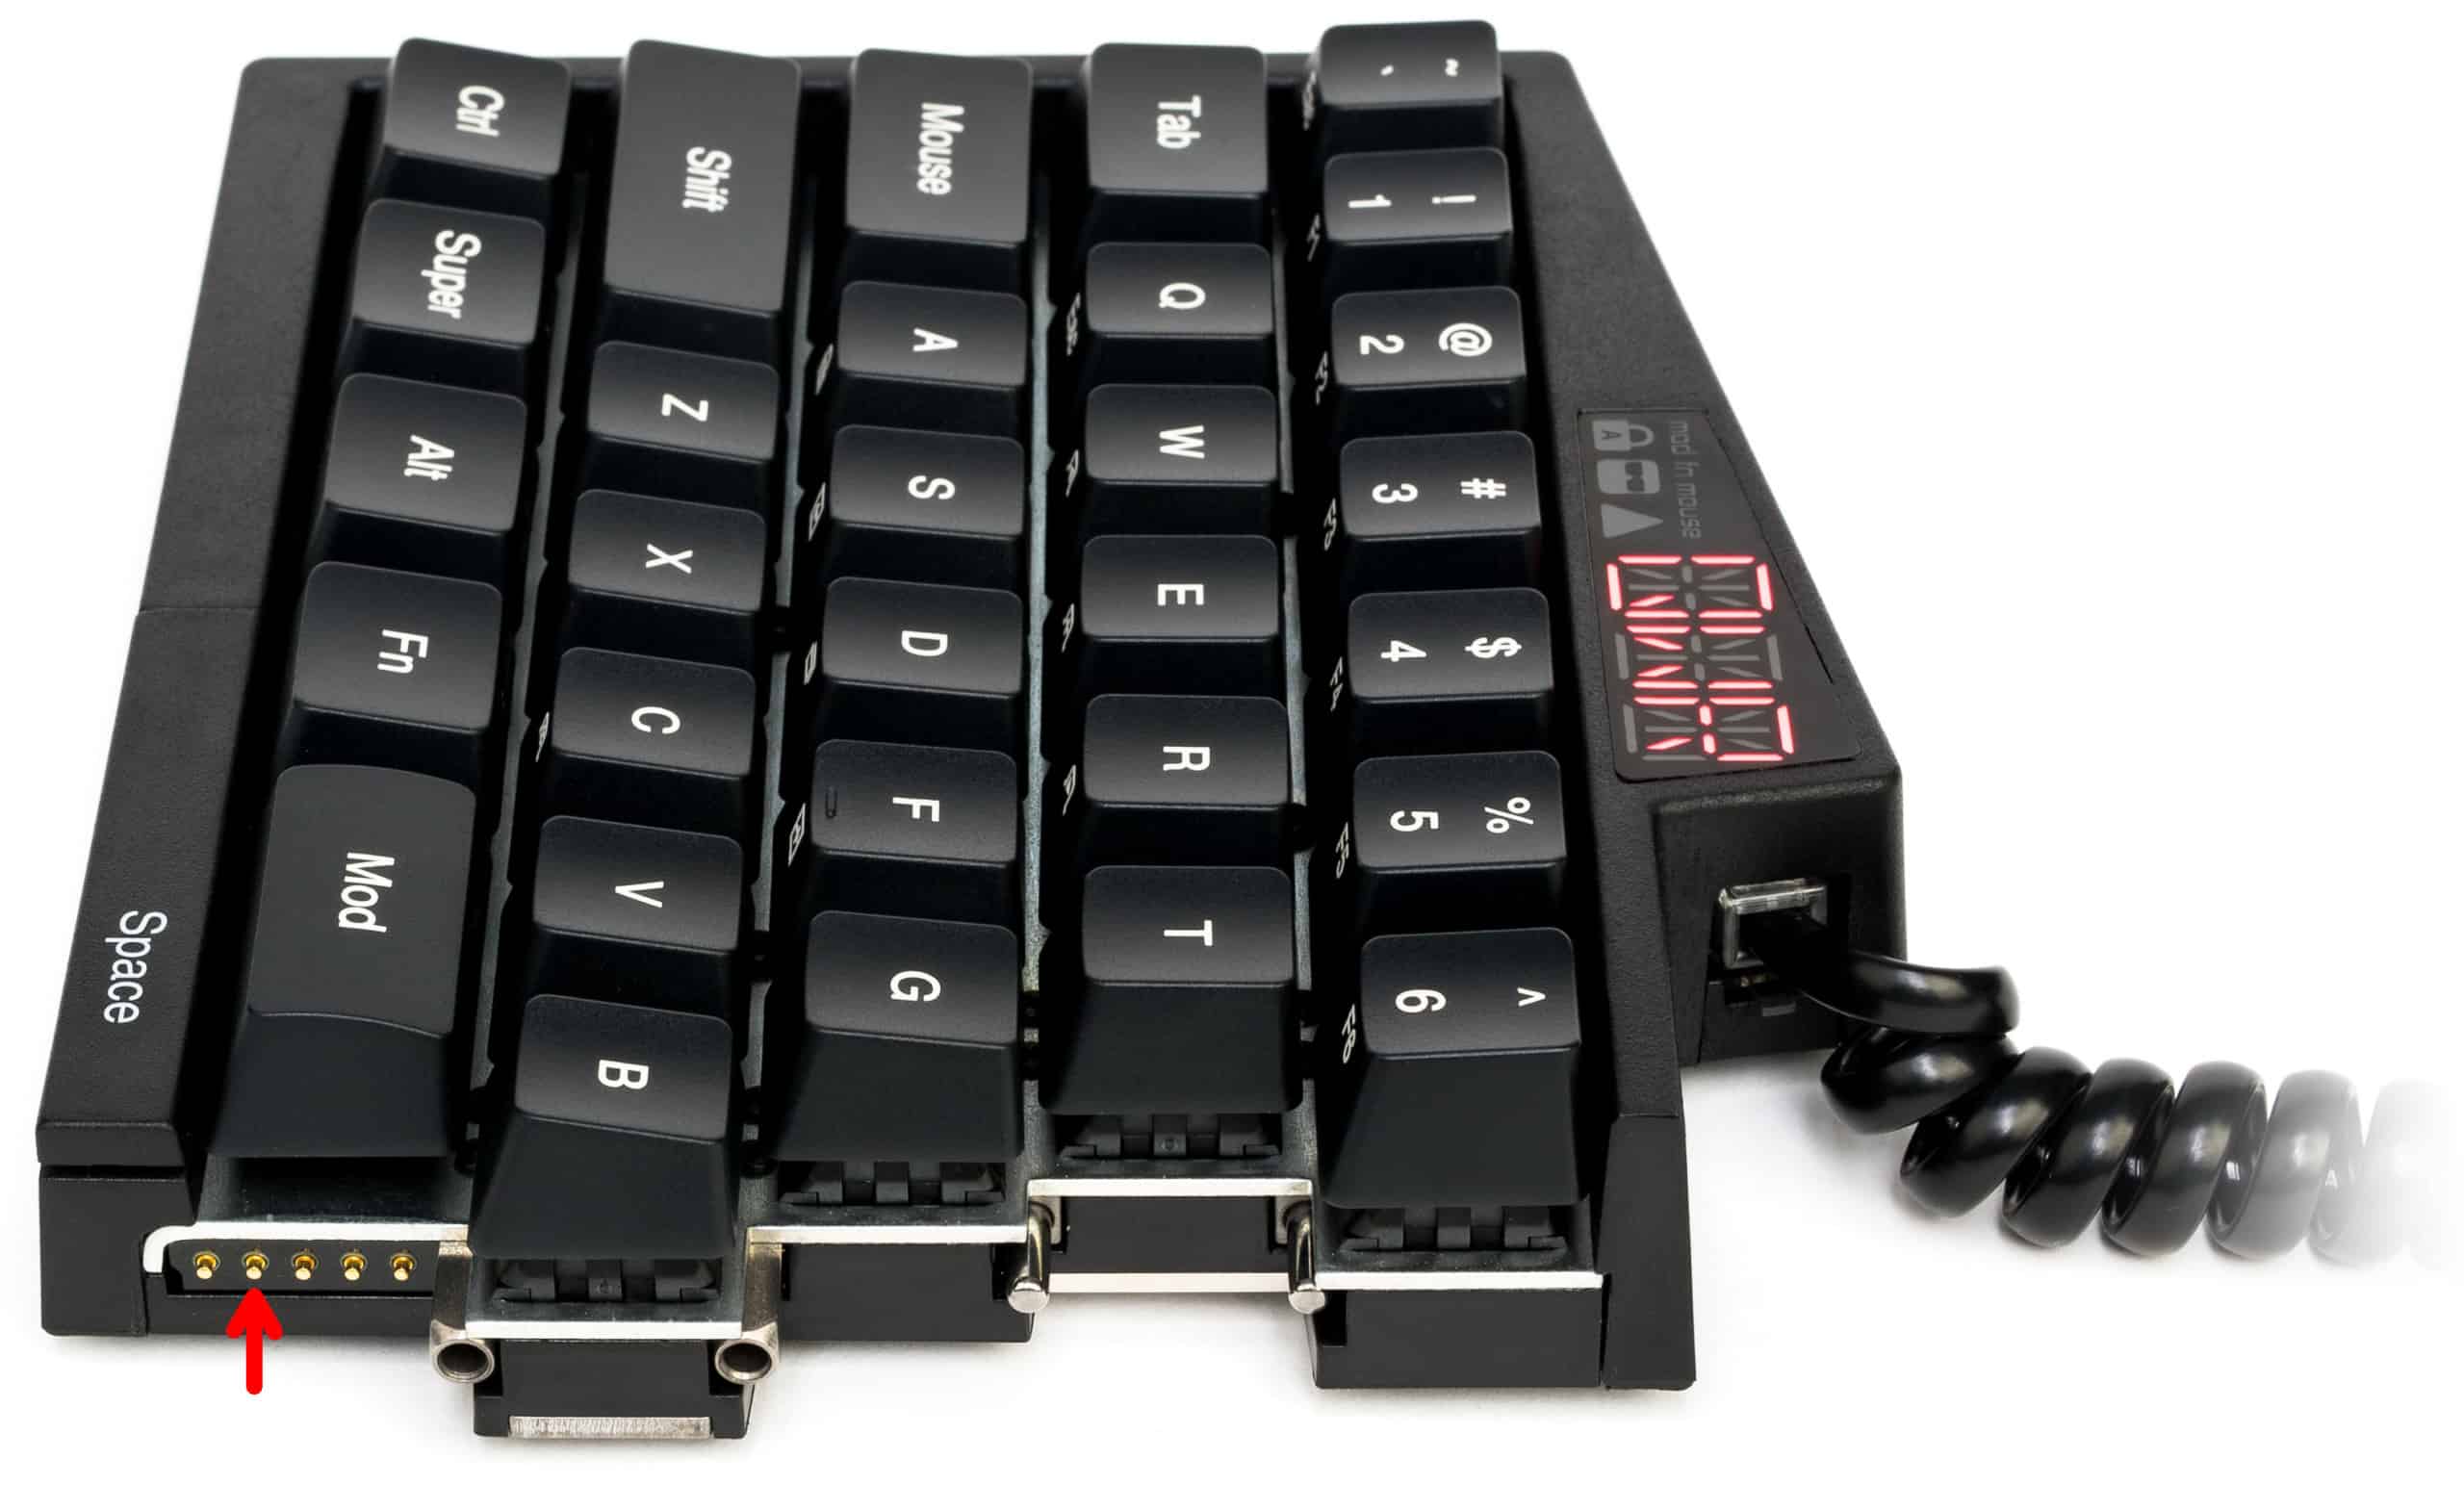
Now touch the left ground pin, marked by the red arrow, with a probe, and touch the left steel plate with the other probe. If the left keyboard half is grounded, you should hear a beep.
As for the right keyboard half, touch its steel plate with a probe and the outer metal part of the USB connector with the other probe. Again, you should hear a beep.
Grounding your UHK
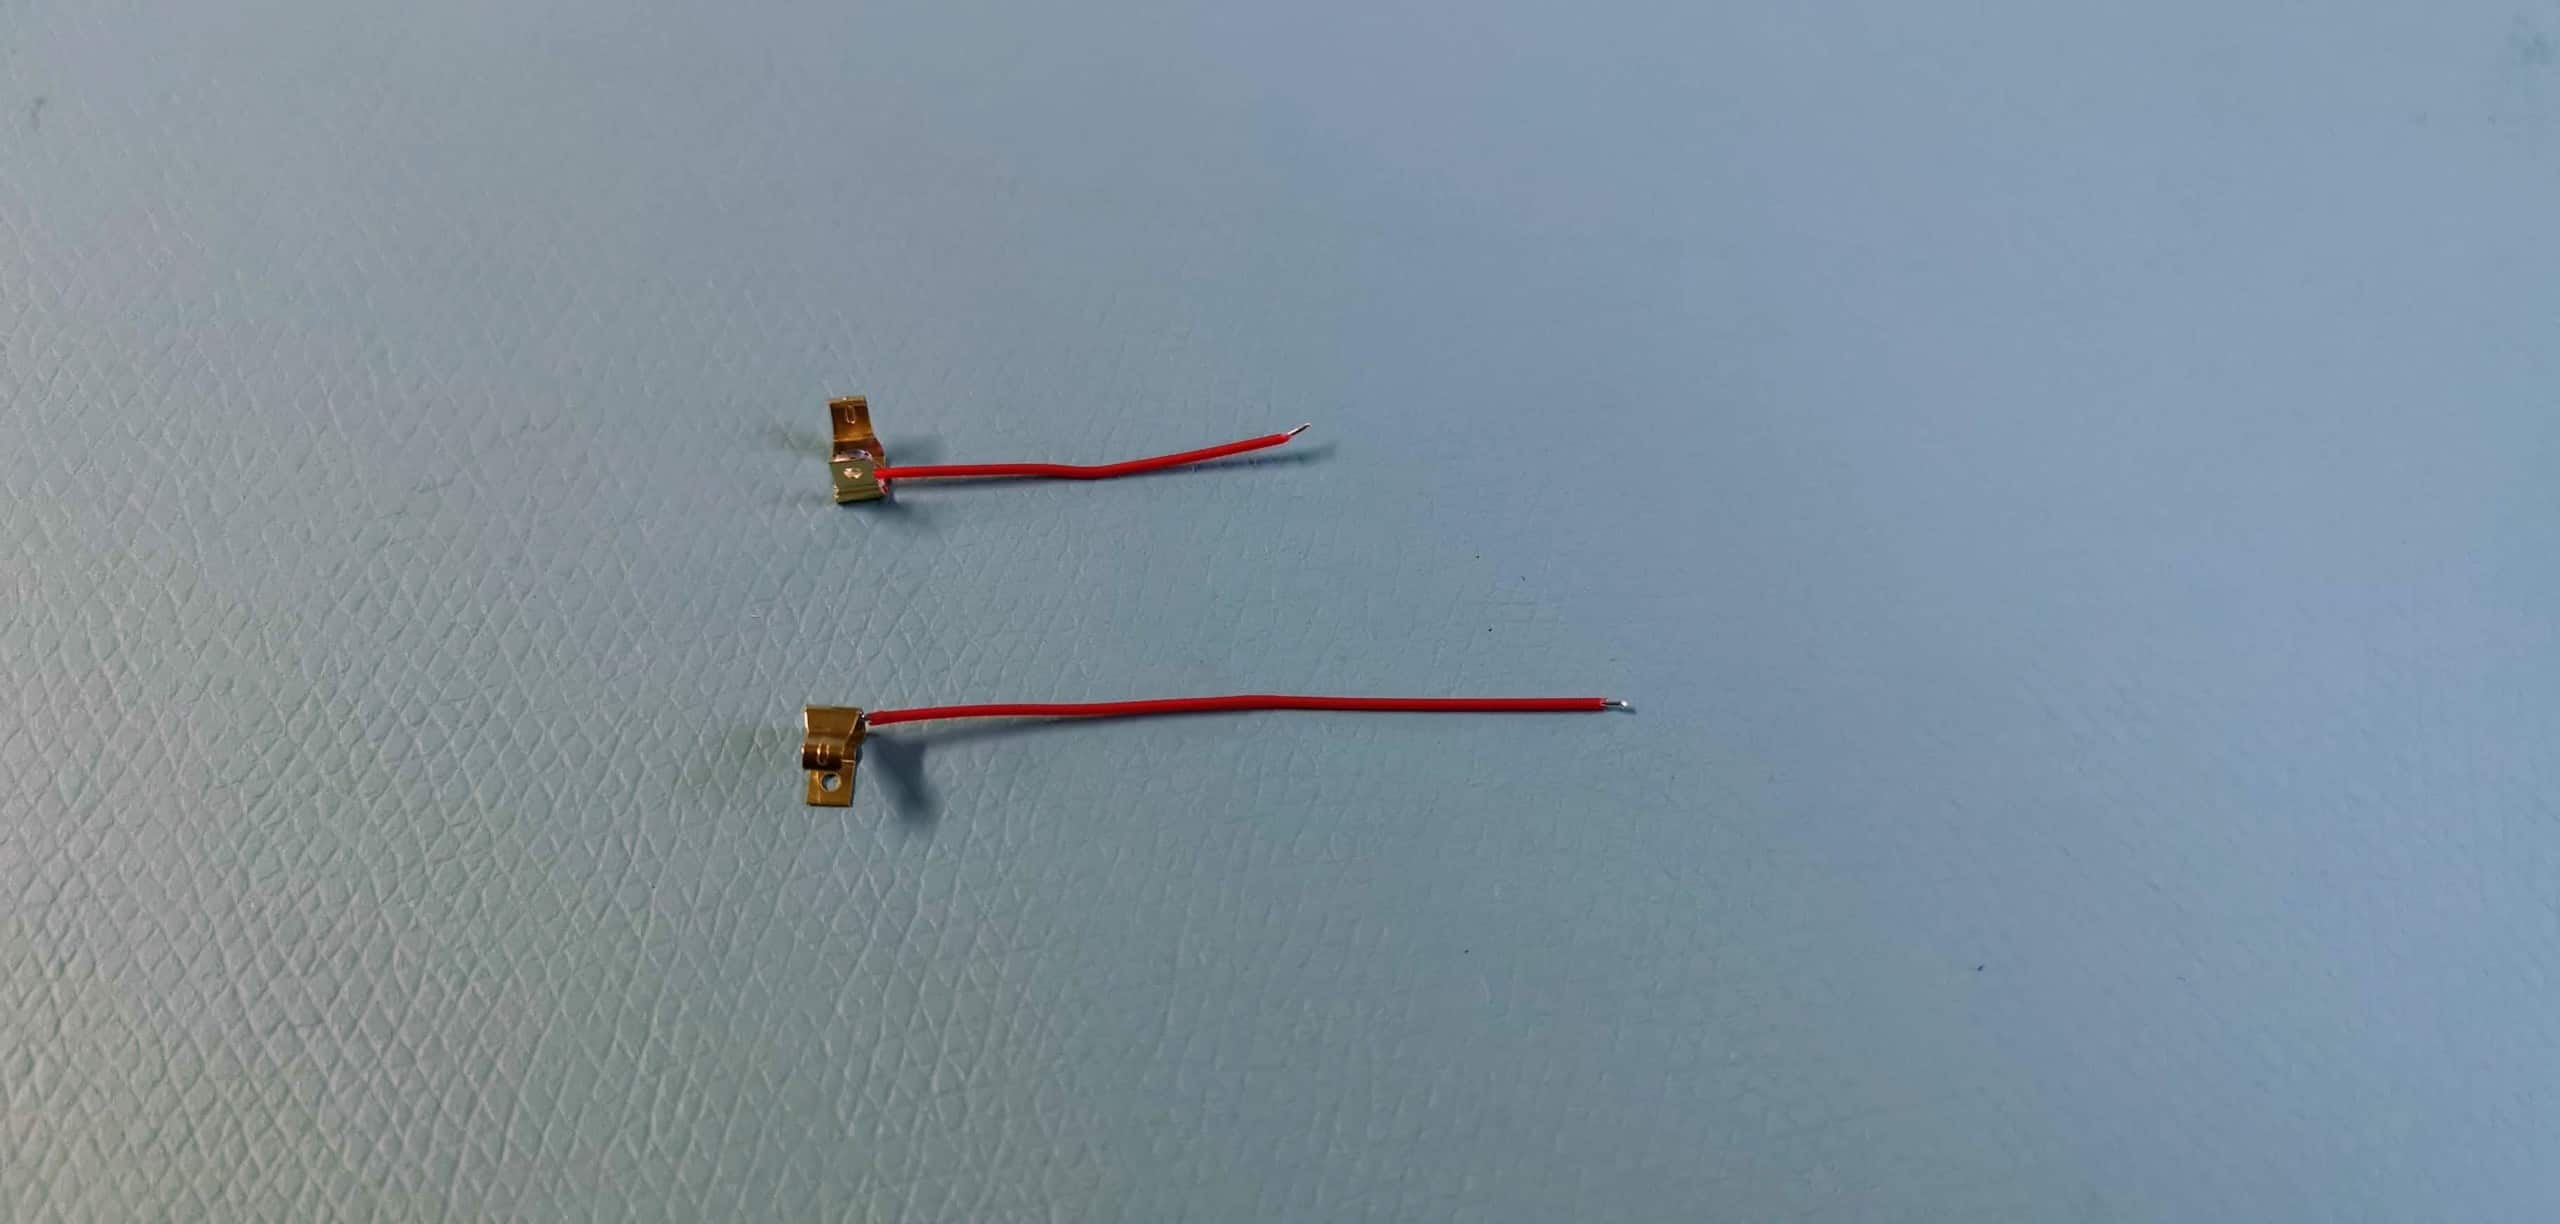
You'll need two 855-S7191-45R spring contacts and a 10 cm long wire. We use 26 AWG wire, but the diameter isn't critical as long as it's relatively thin. We use the 801-R26R wire, but its length is a tad overkill for a single repair.
First up, you need to cut the wire to sizes. Make the left wire 27 mm long and the right wire 44 mm long. Solder the spring contacts to the ends of the wires. This is how they should look:
Next up, solder the left wire to the left PCB this way:
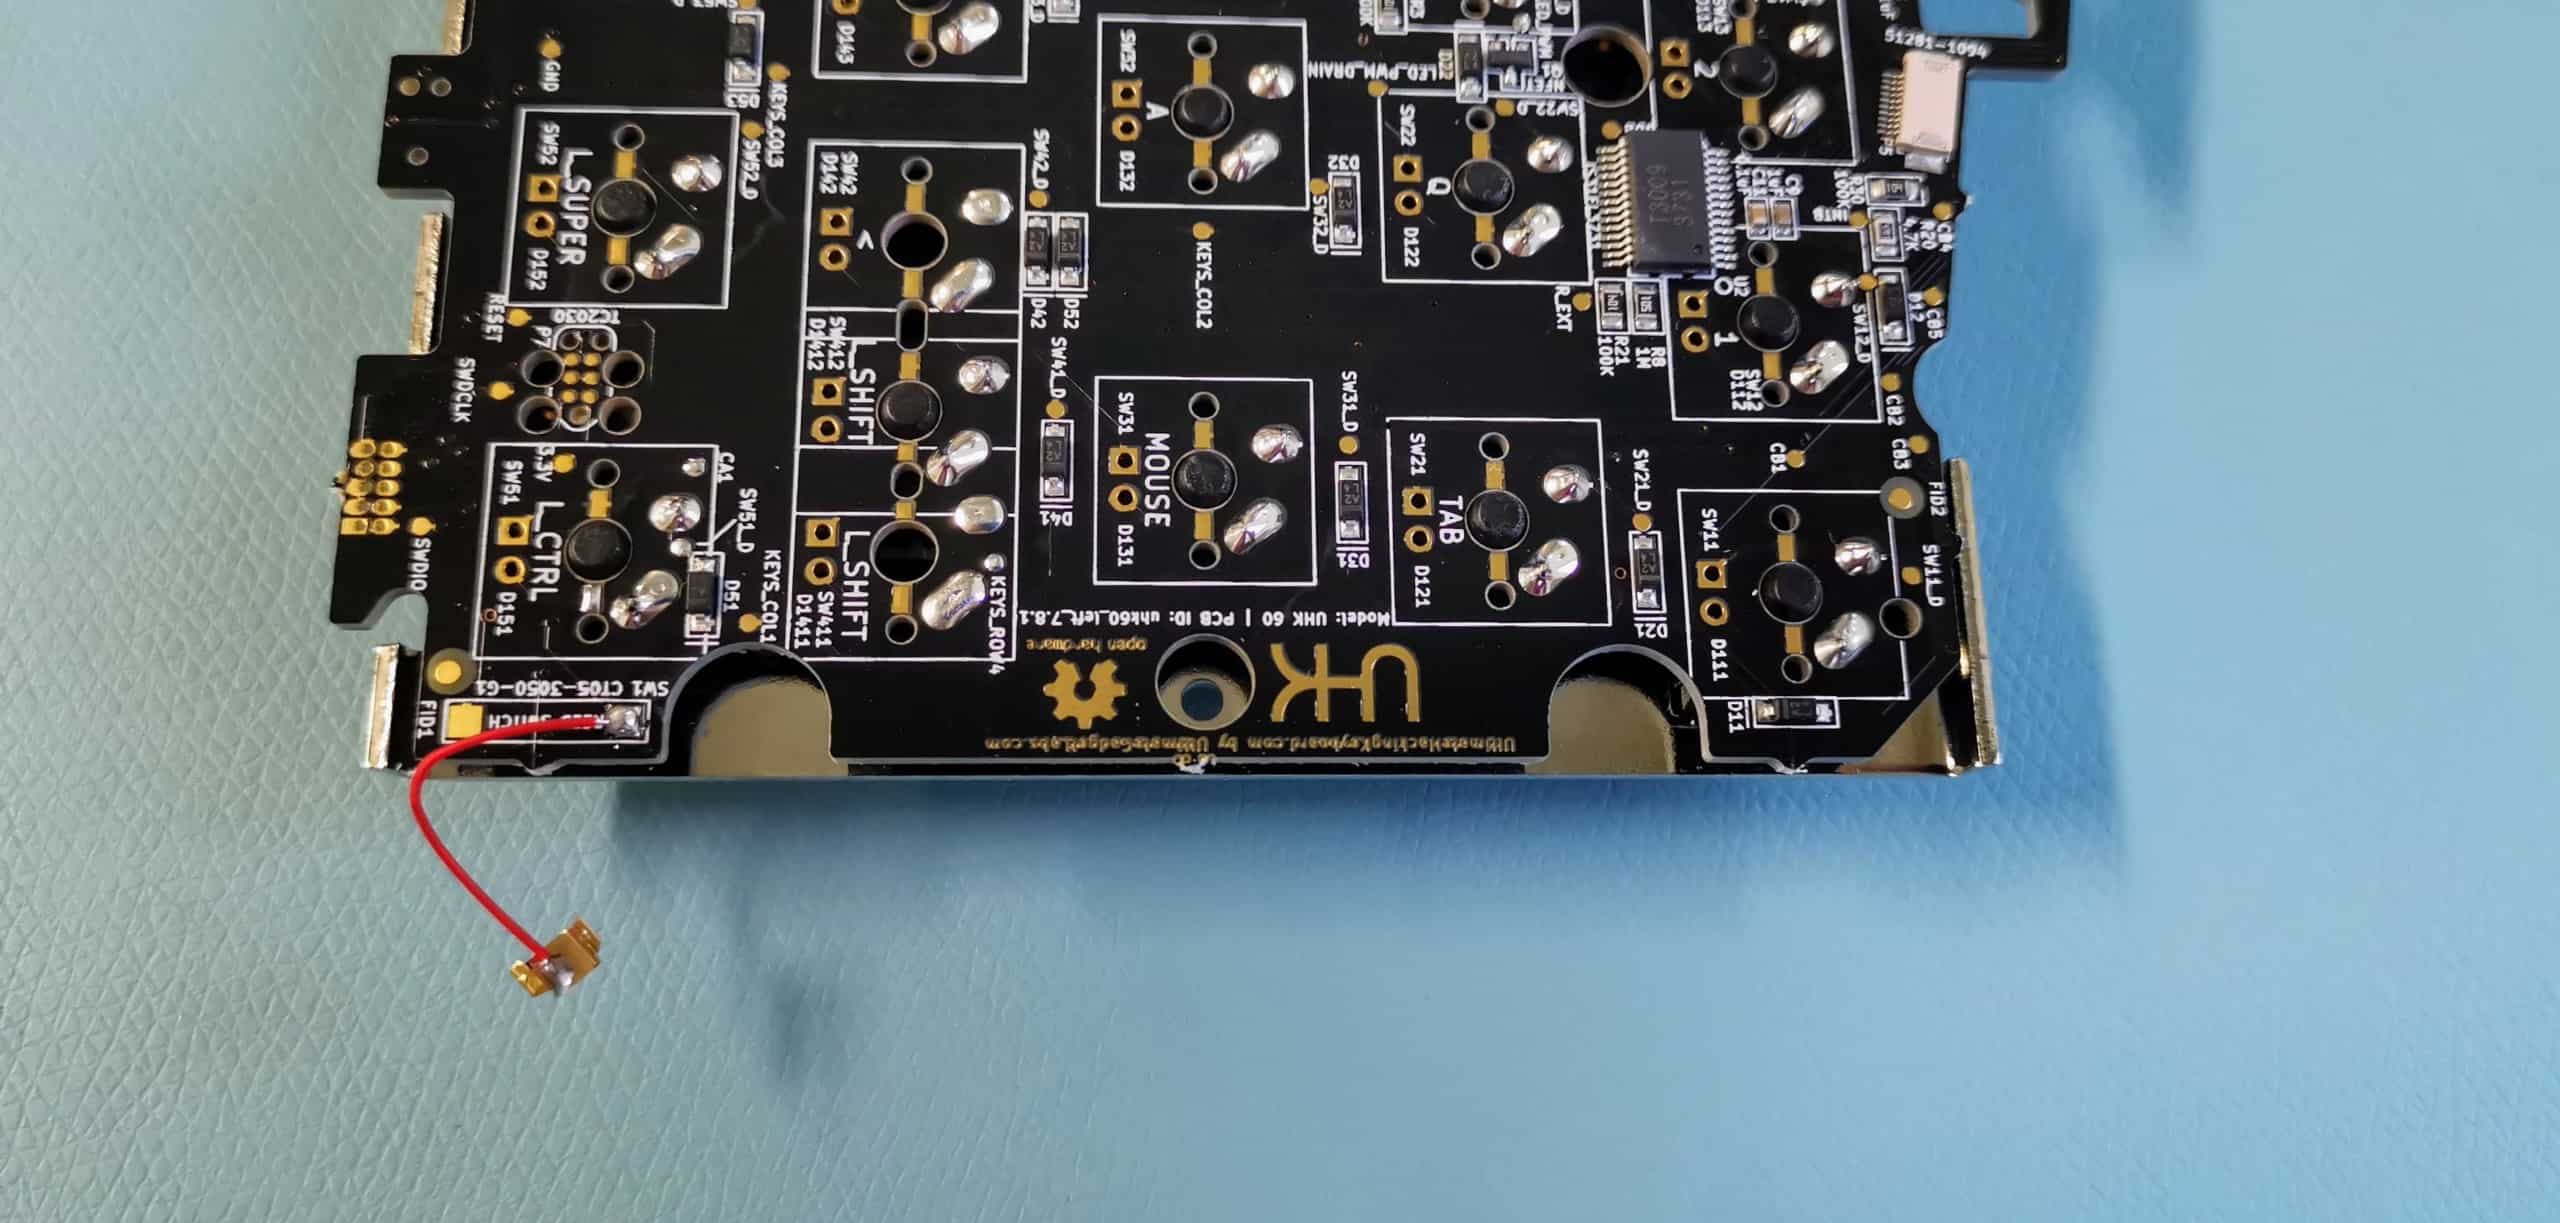
Then arrange the left wire neatly so the spring contact touches the plate:
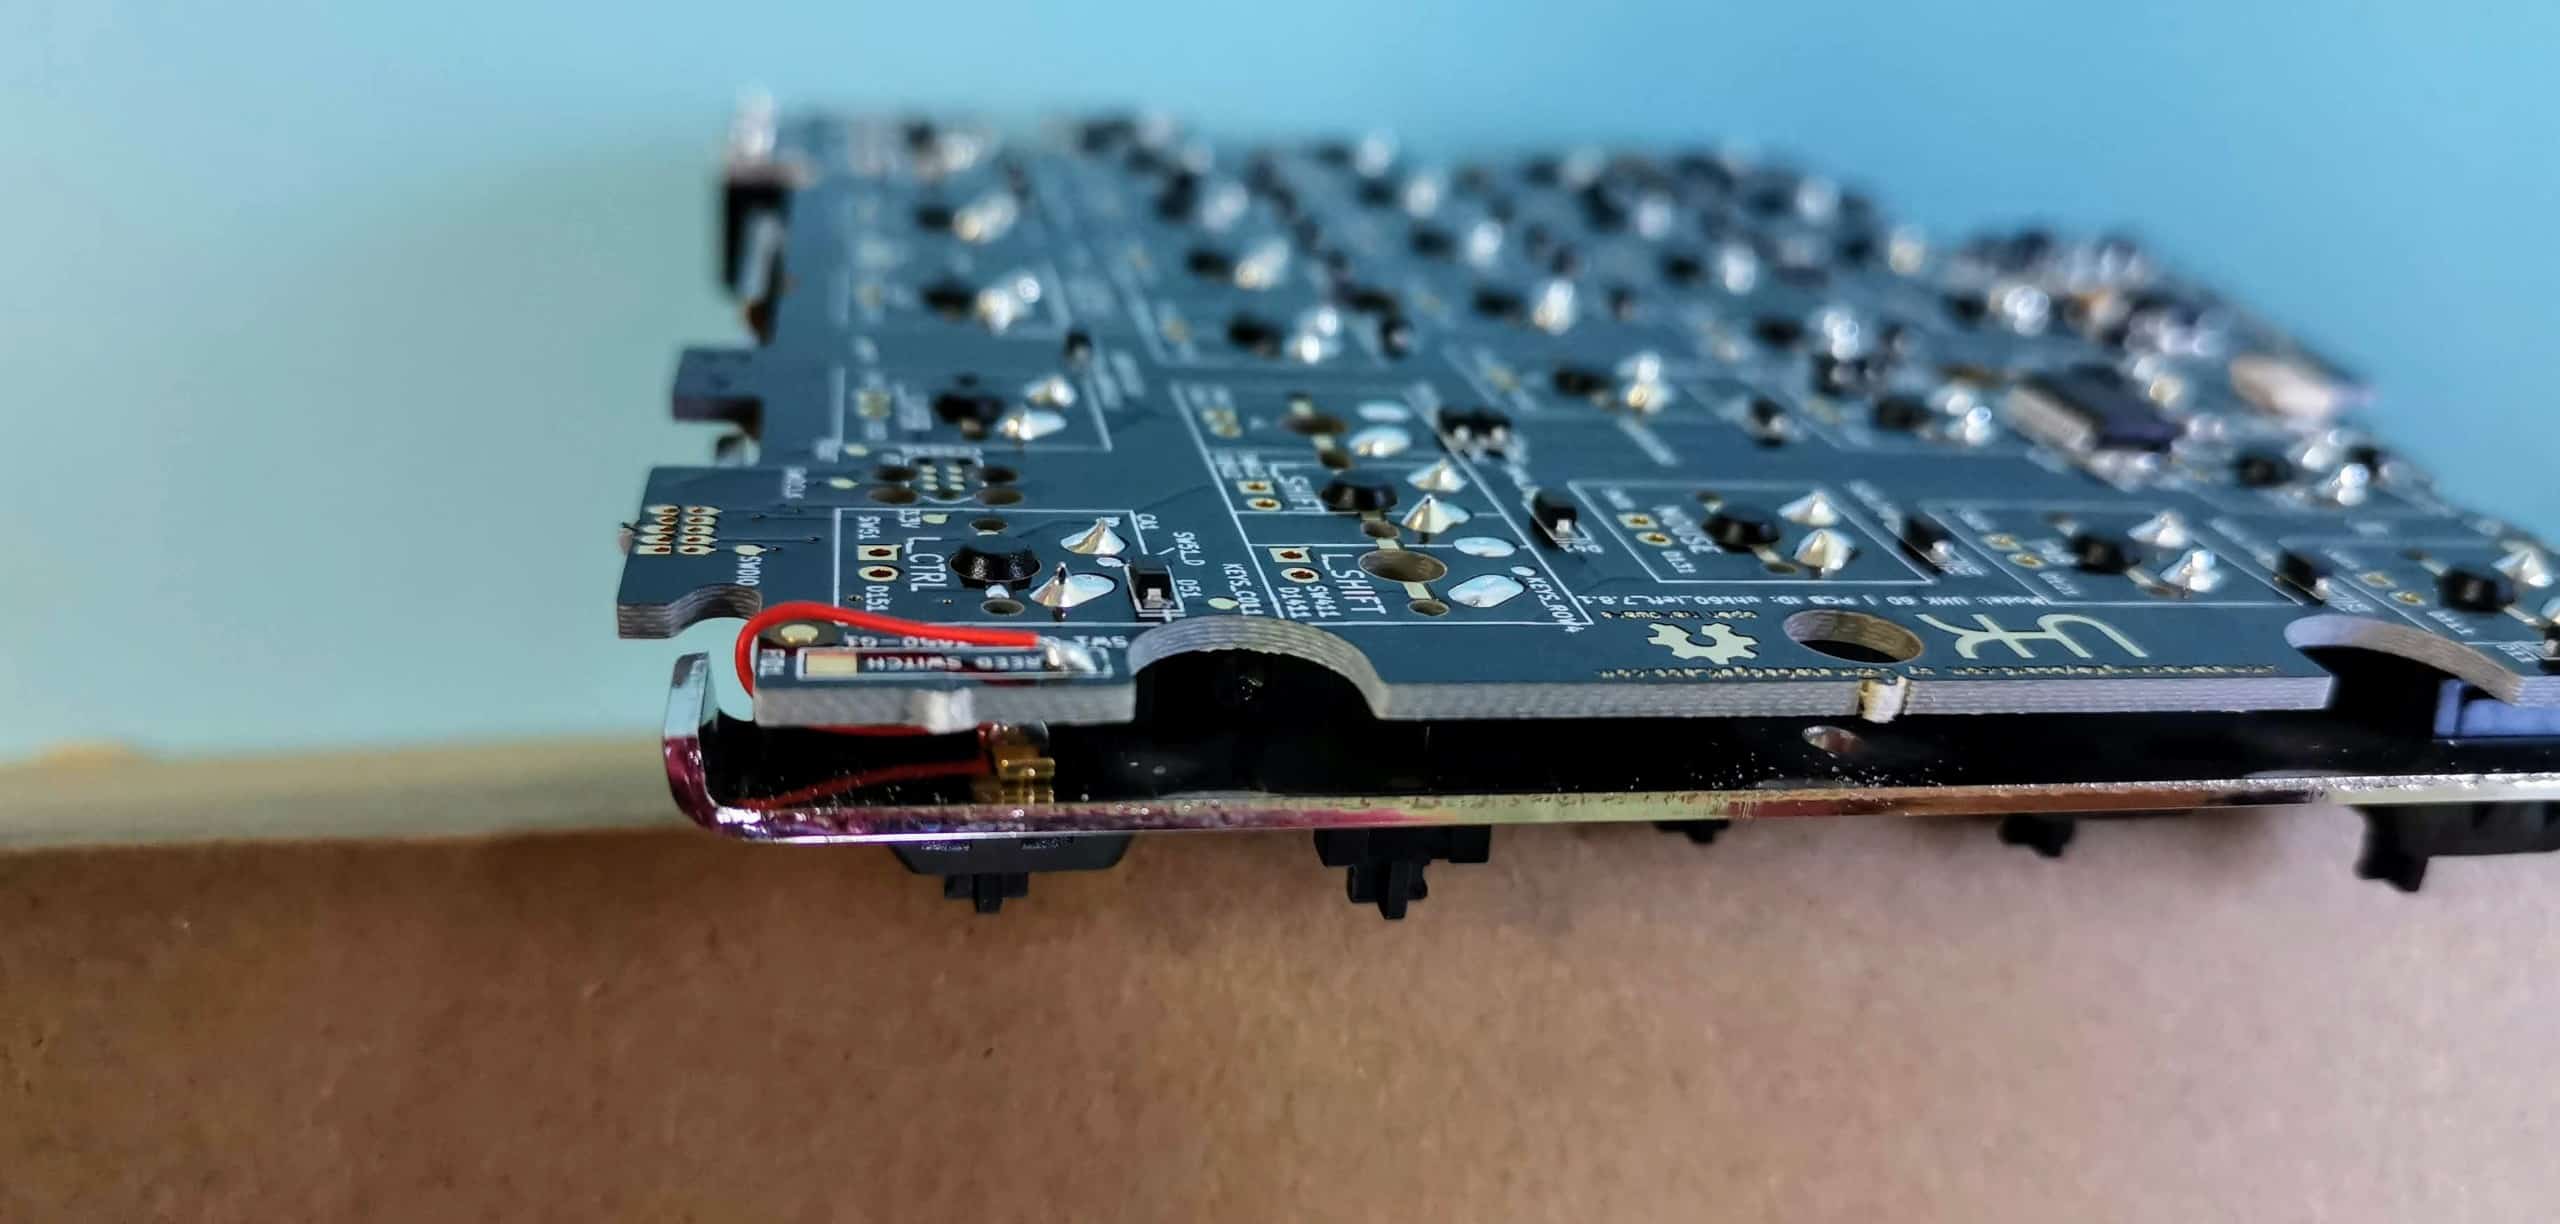
Next up, solder the right wire to the right PCB this way:
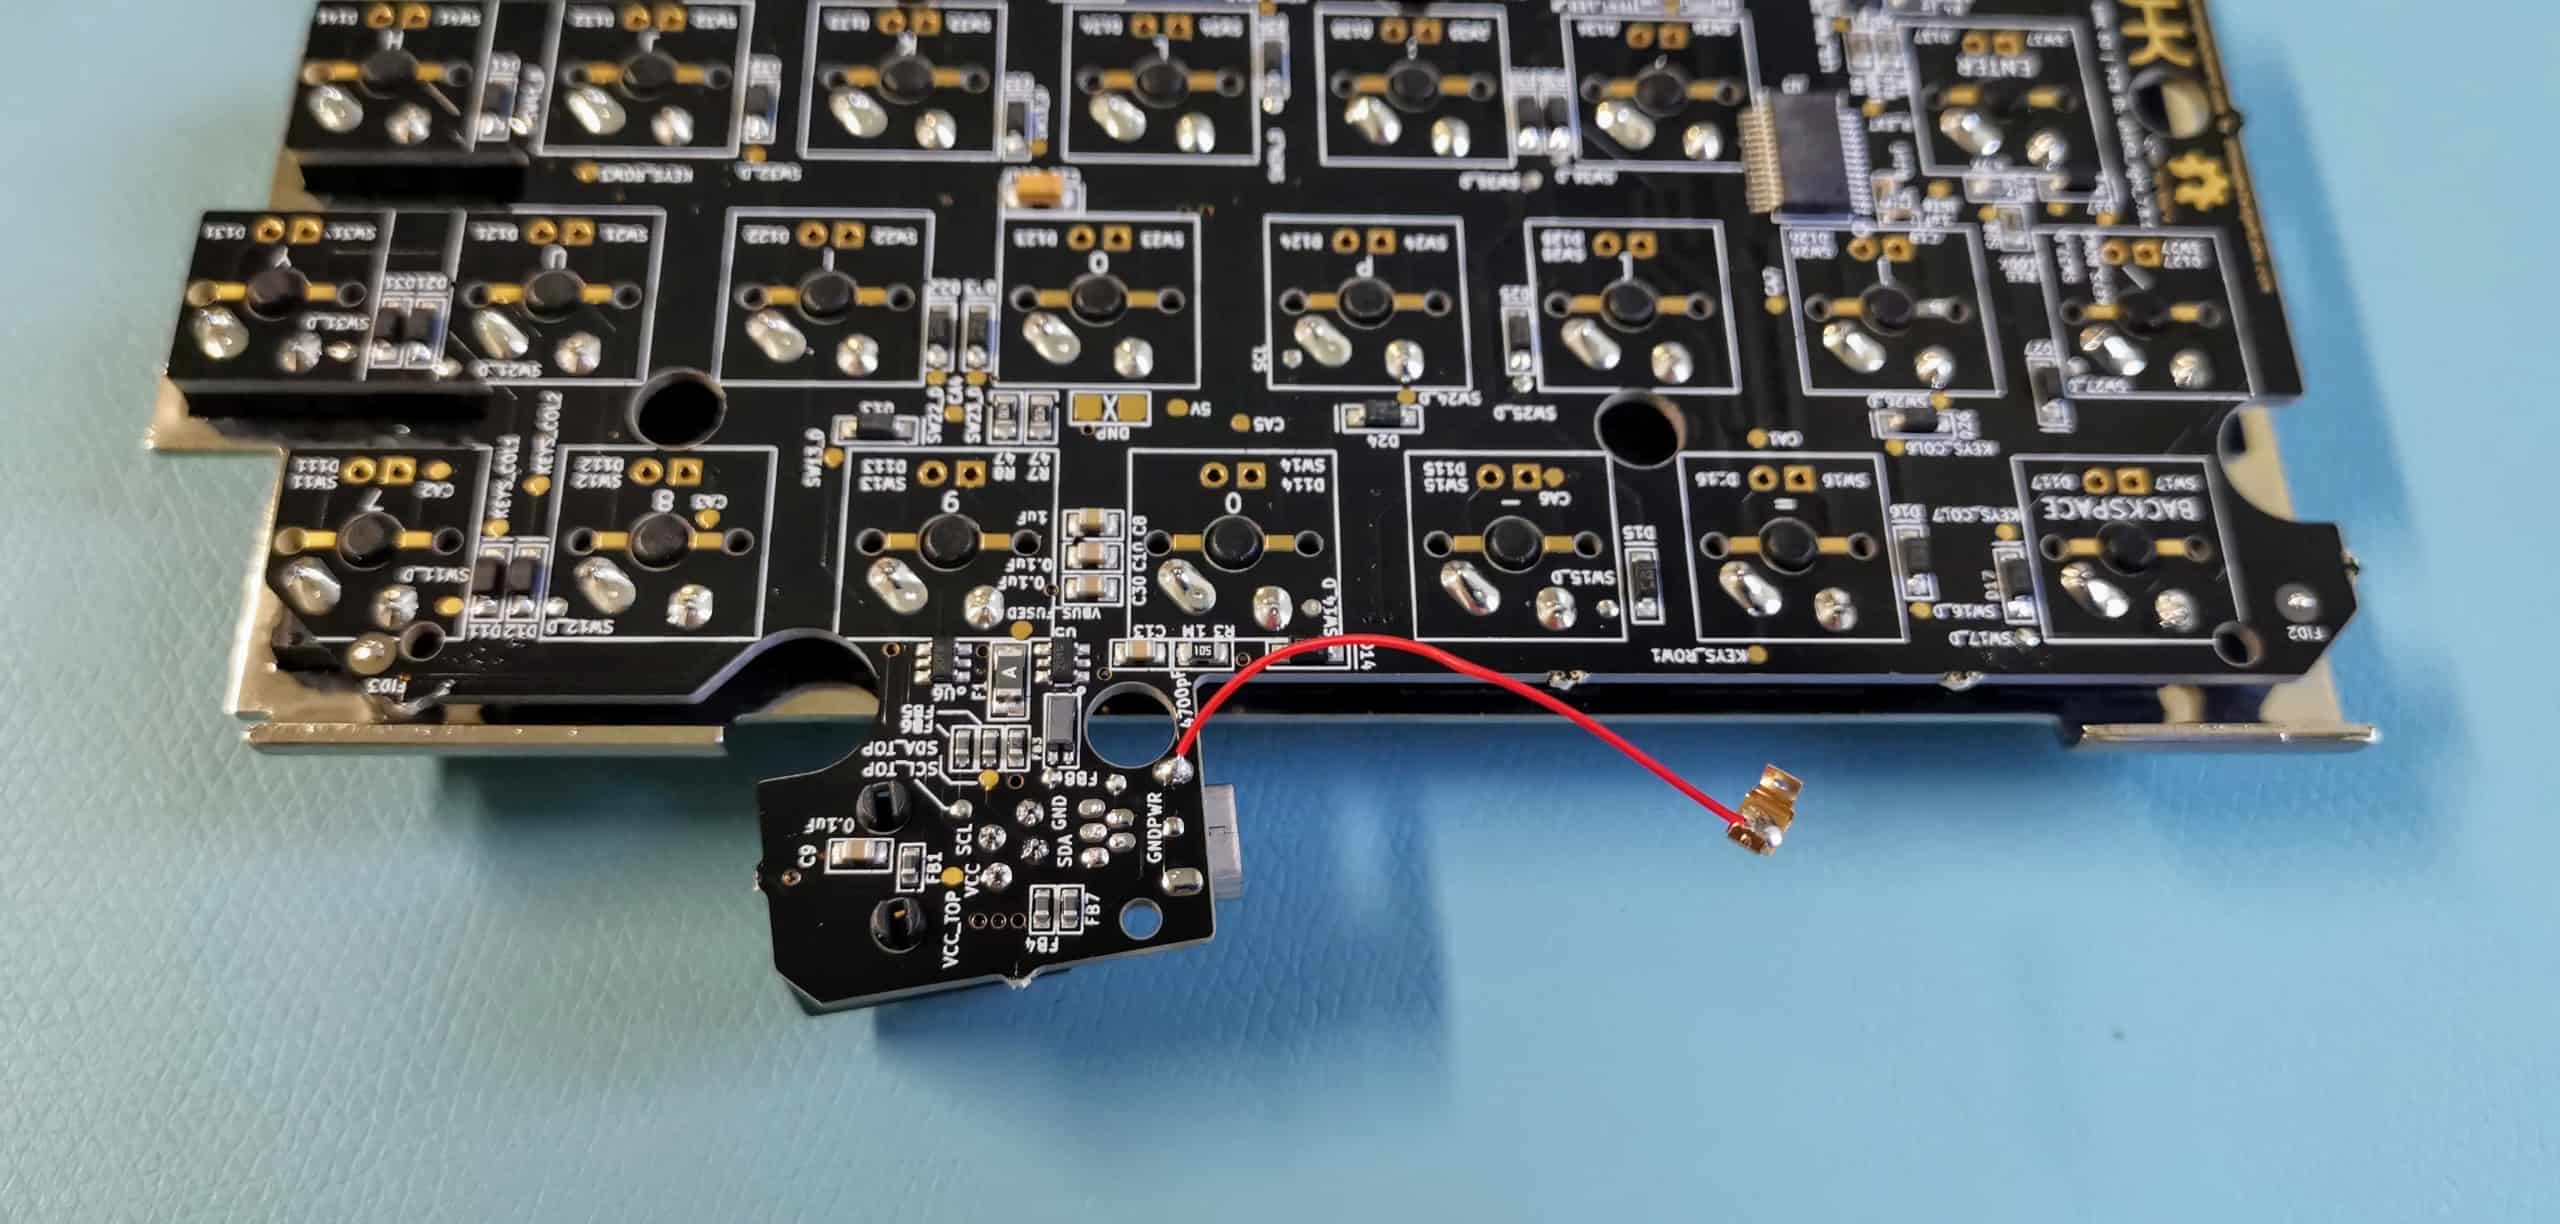
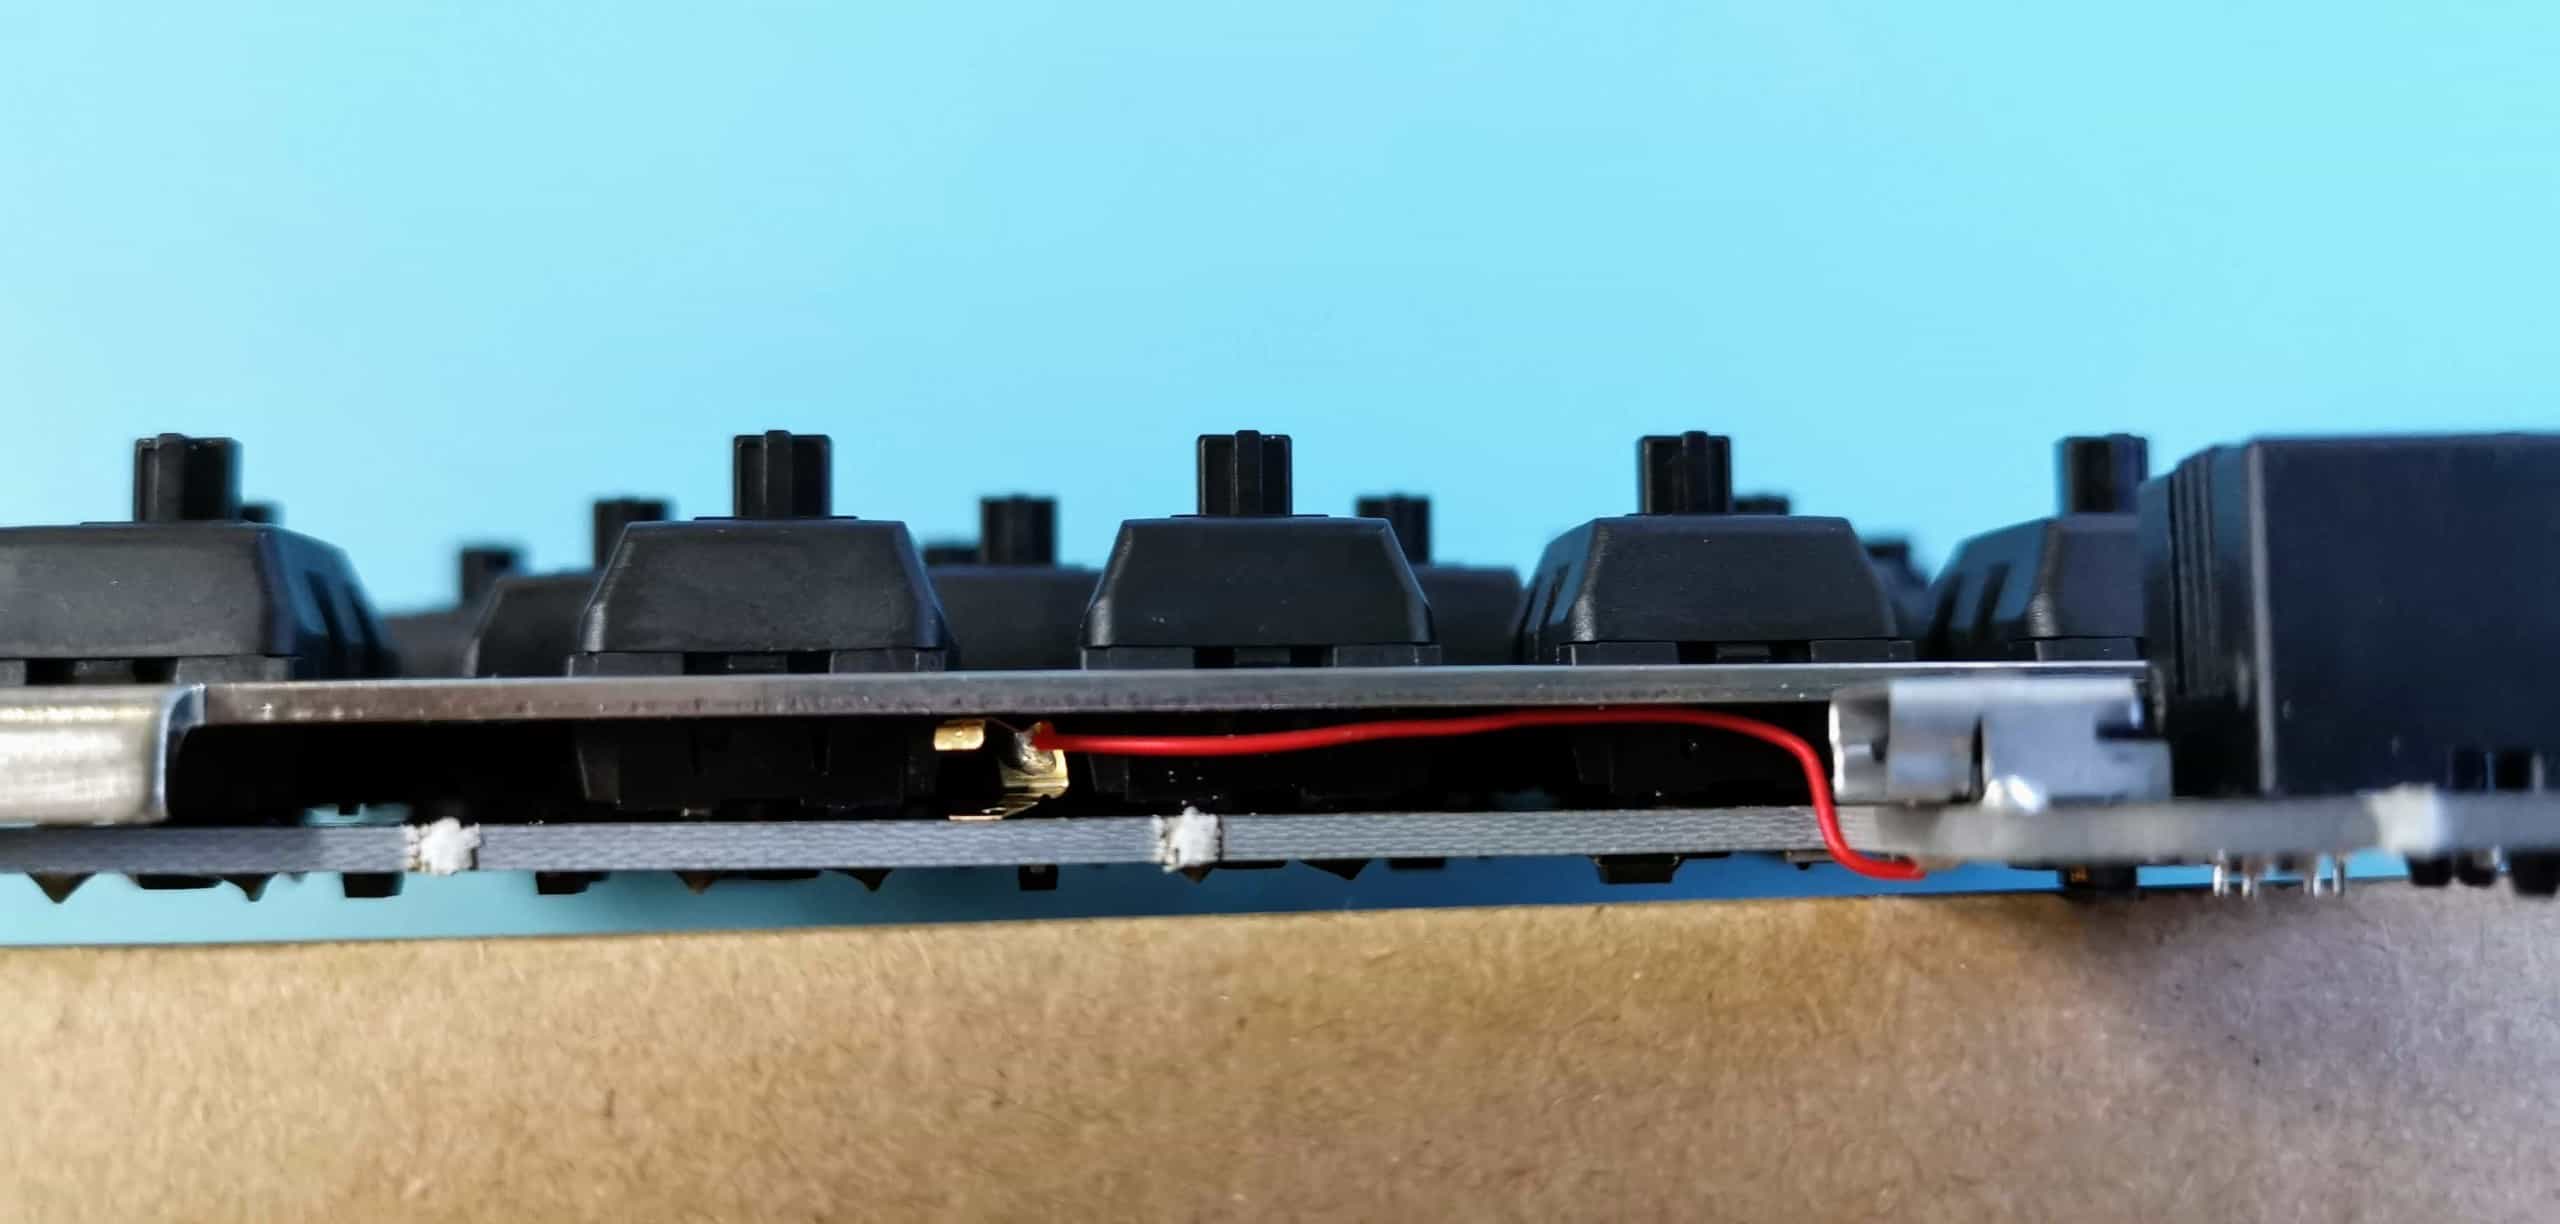
Finally, arrange the right wire neatly so the spring contact touches the plate:
Congratulations, you've just grounded your UHK!