This guide describes how to disassemble and reassemble your UHK 60, which is especially useful for replacing your case with one of a different color. Let’s do it!
You’ll need:
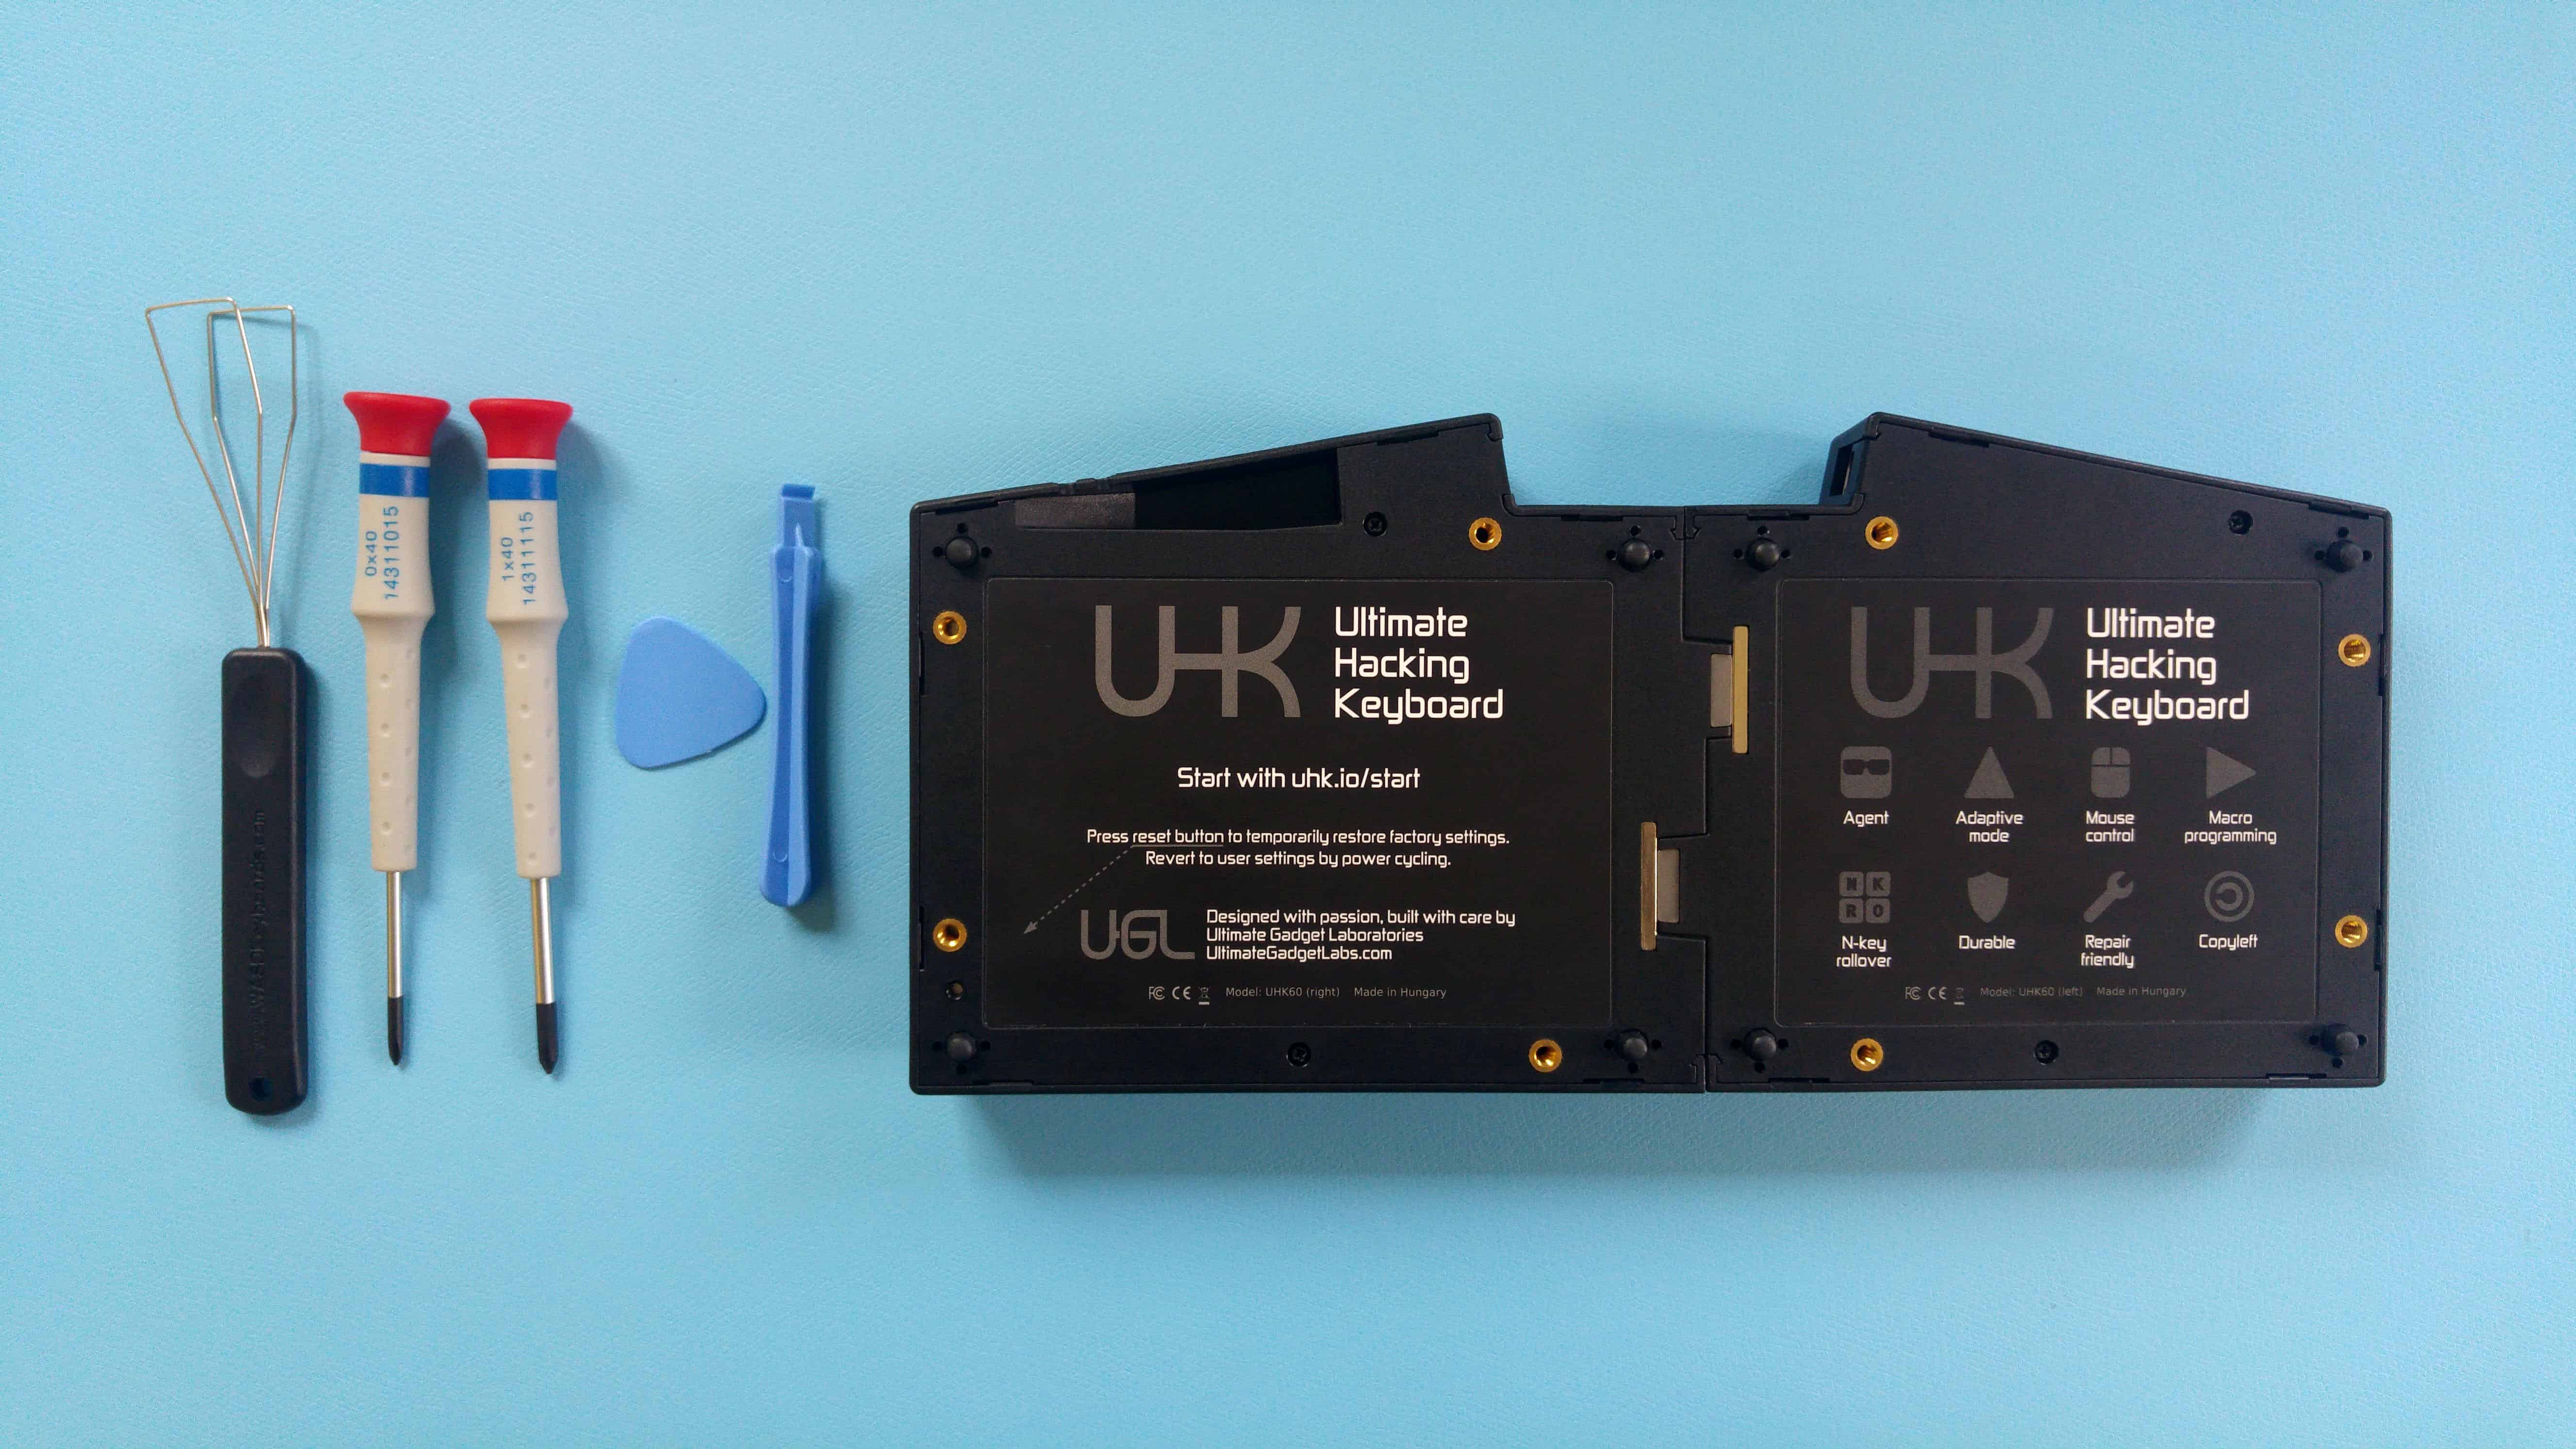
- a keycap puller, possibly a DIY keycap puller
- a PH0 screwdriver
- a PH1 screwdriver - only for the UHK 60 v1
- prying tools
Disassembly
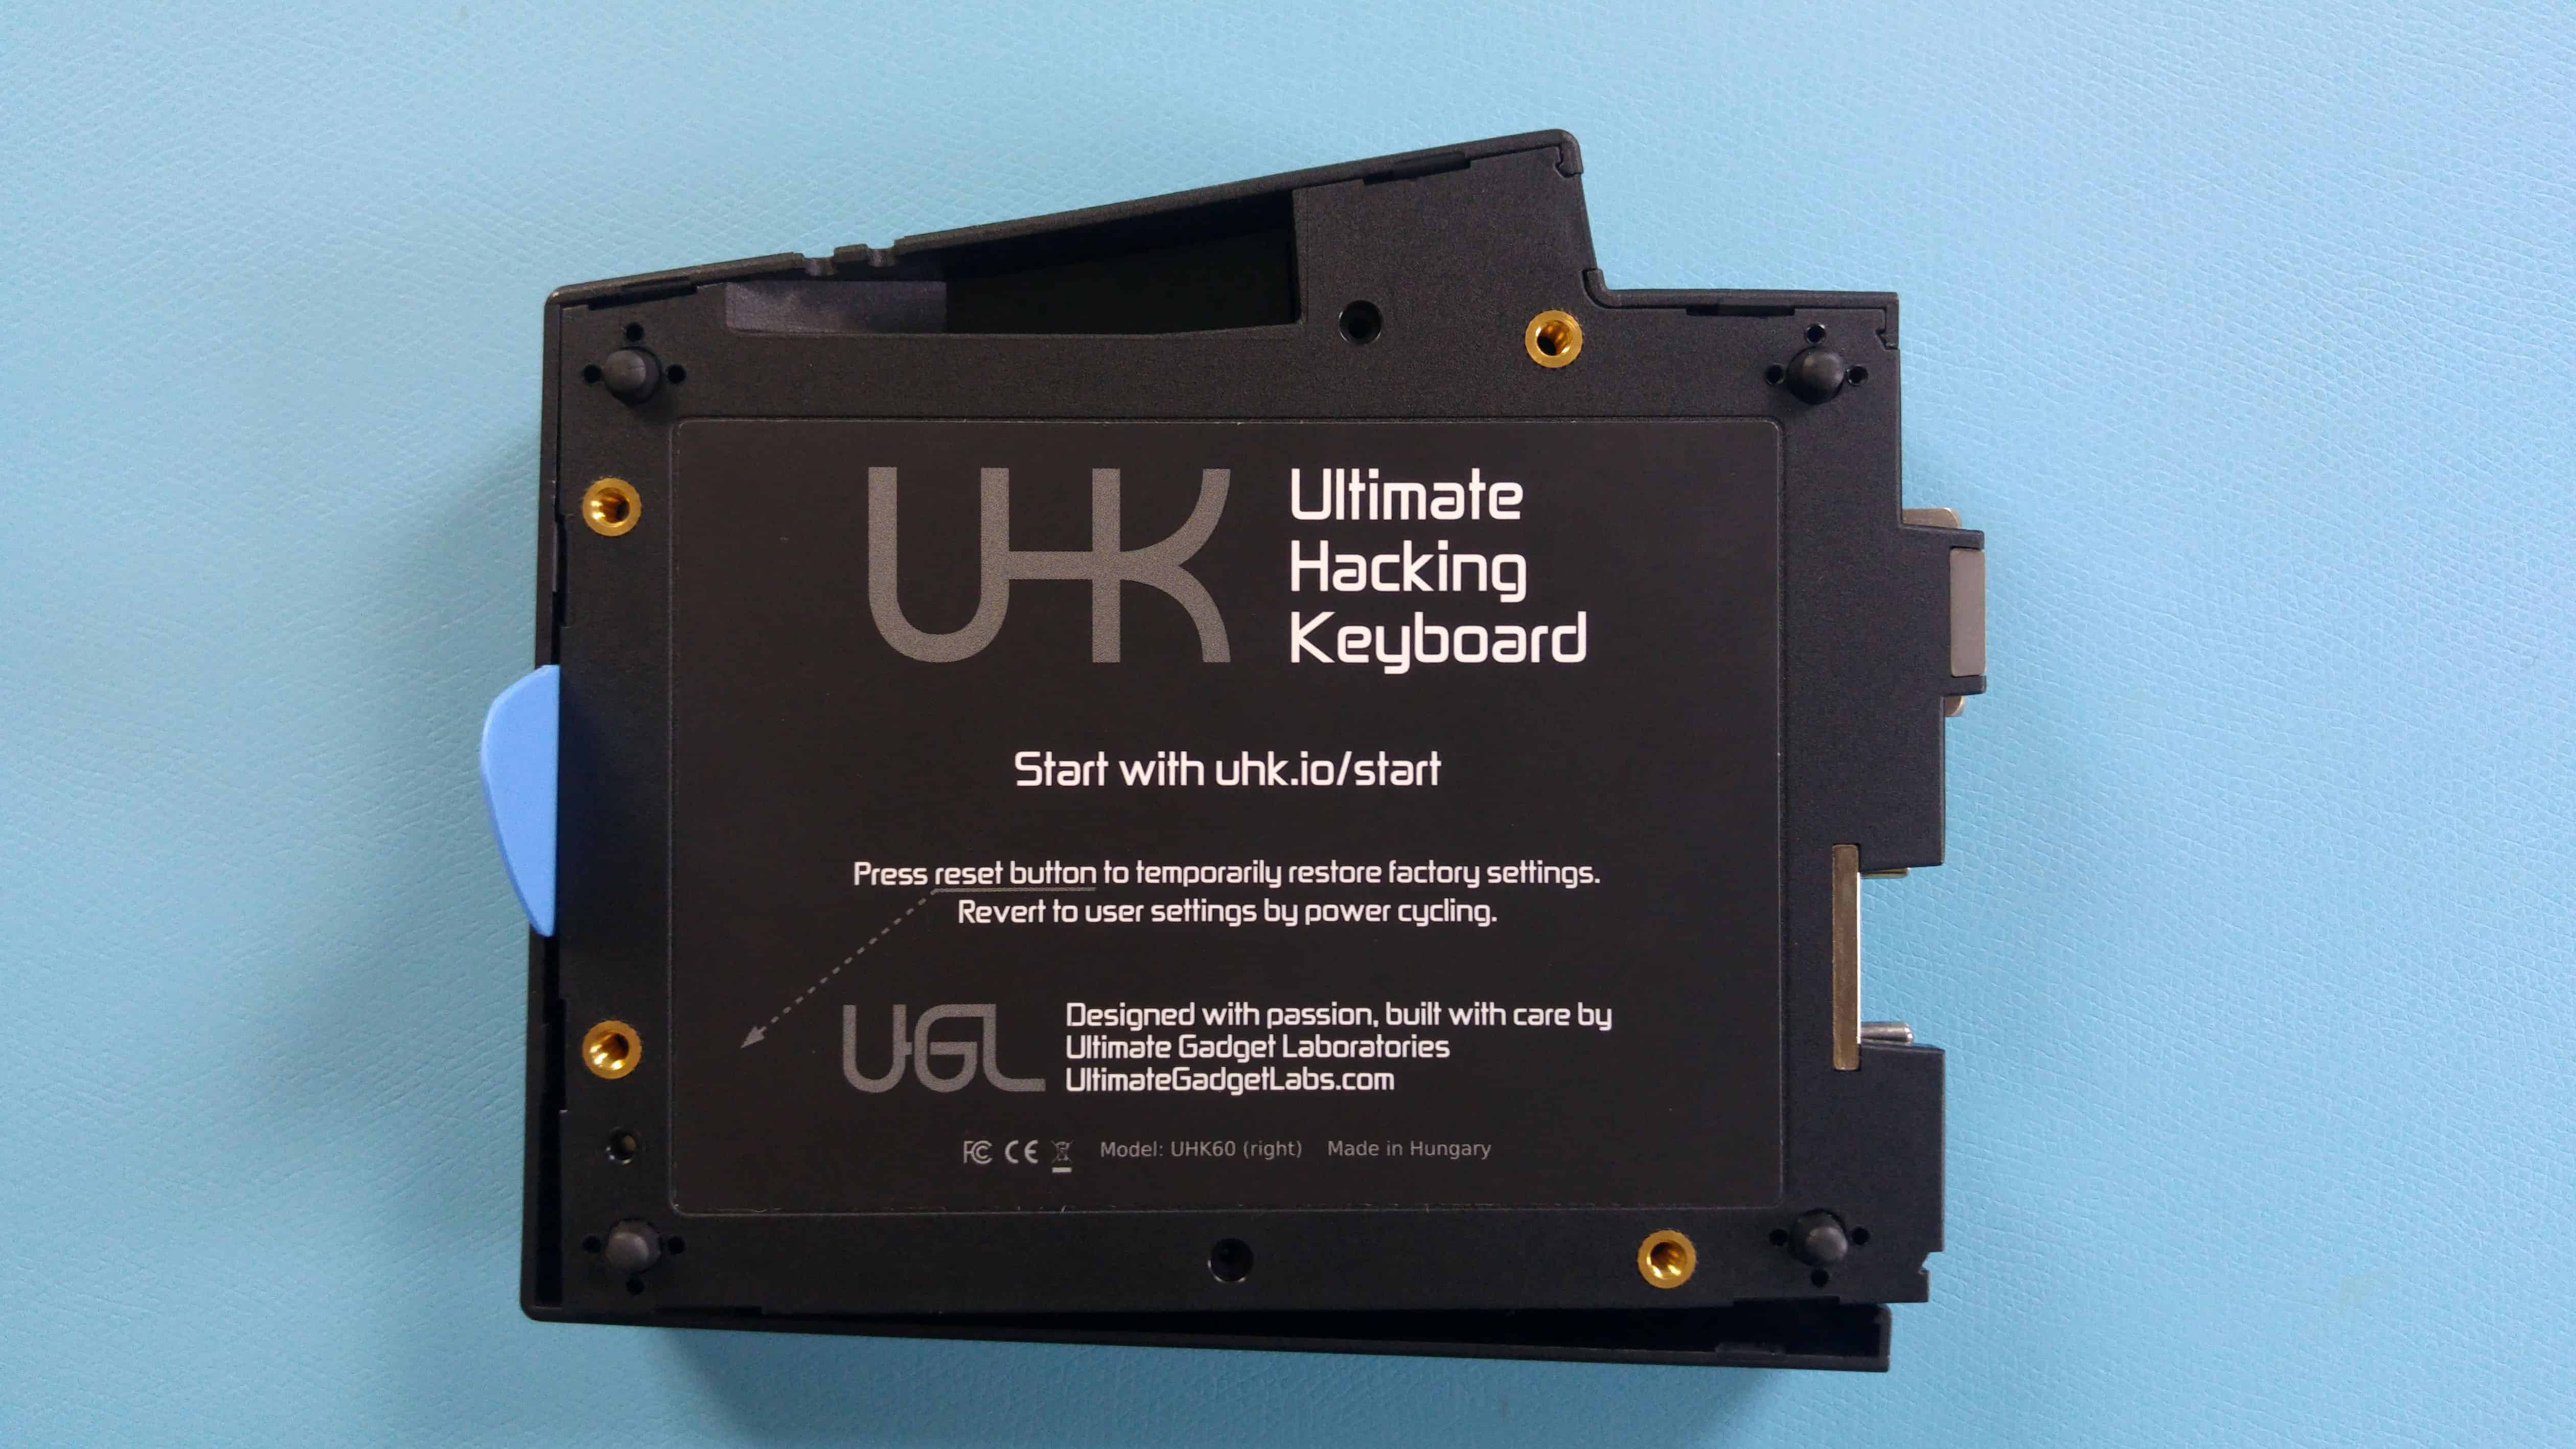
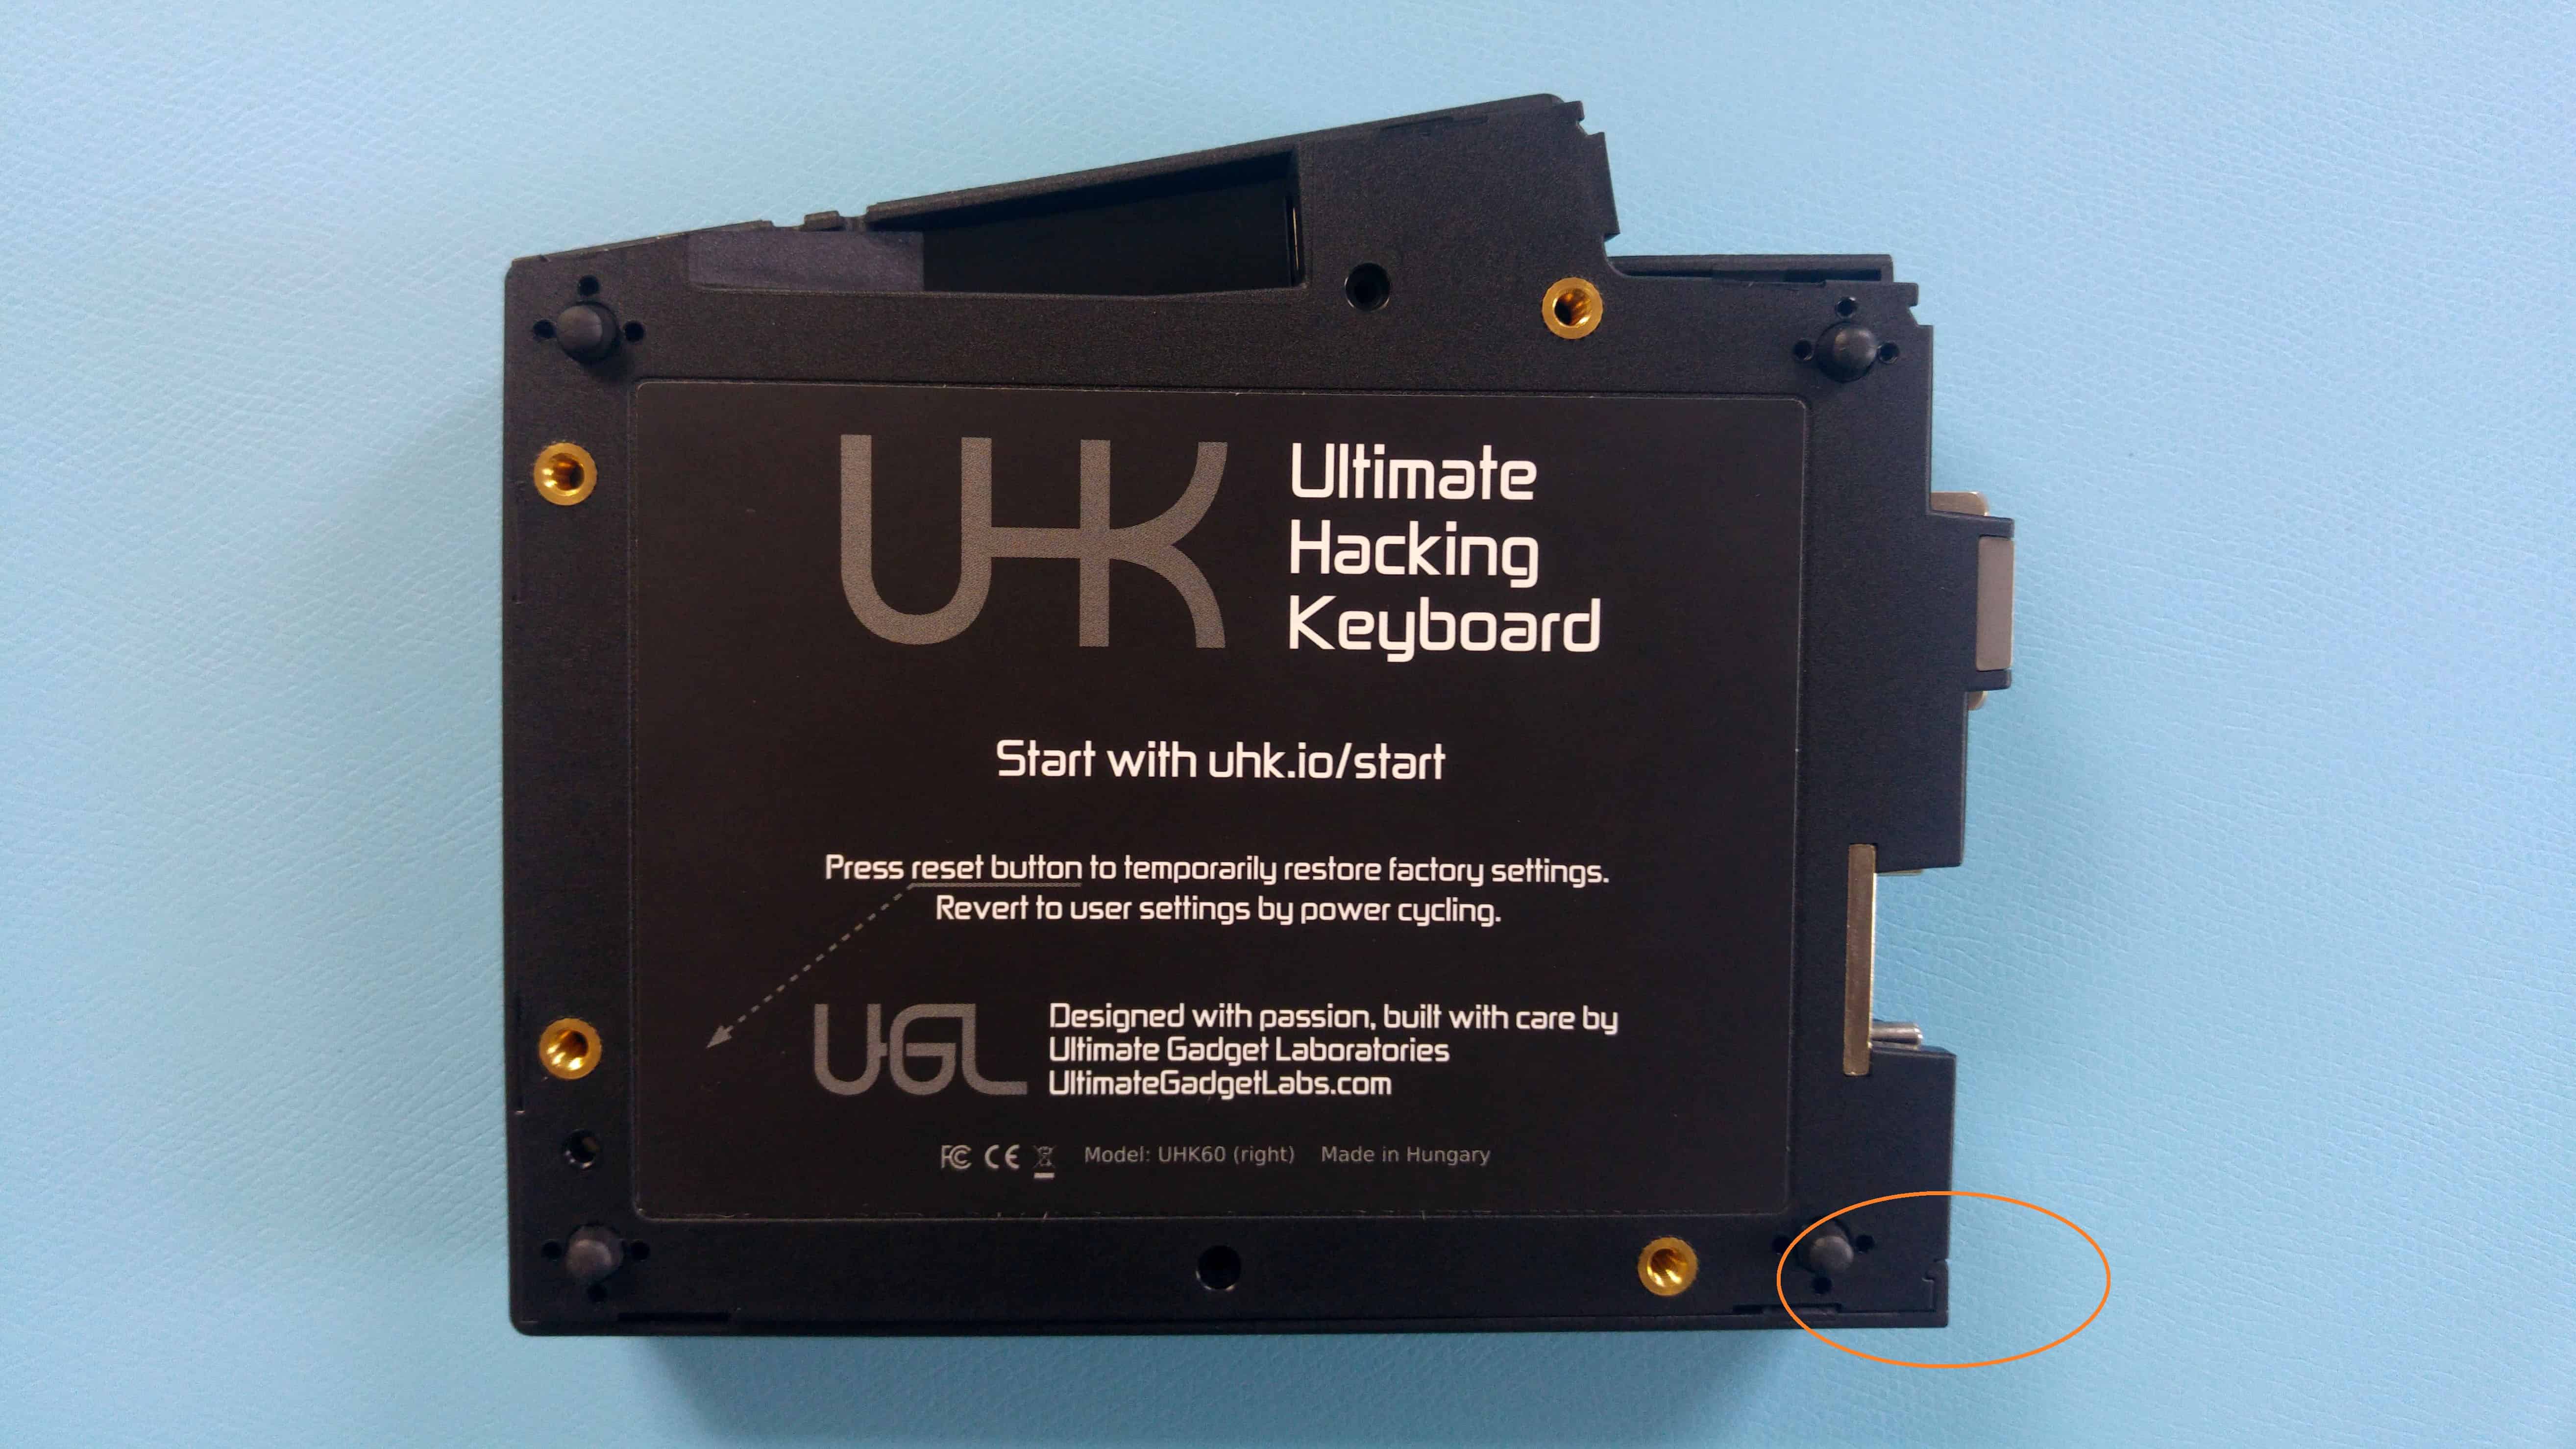
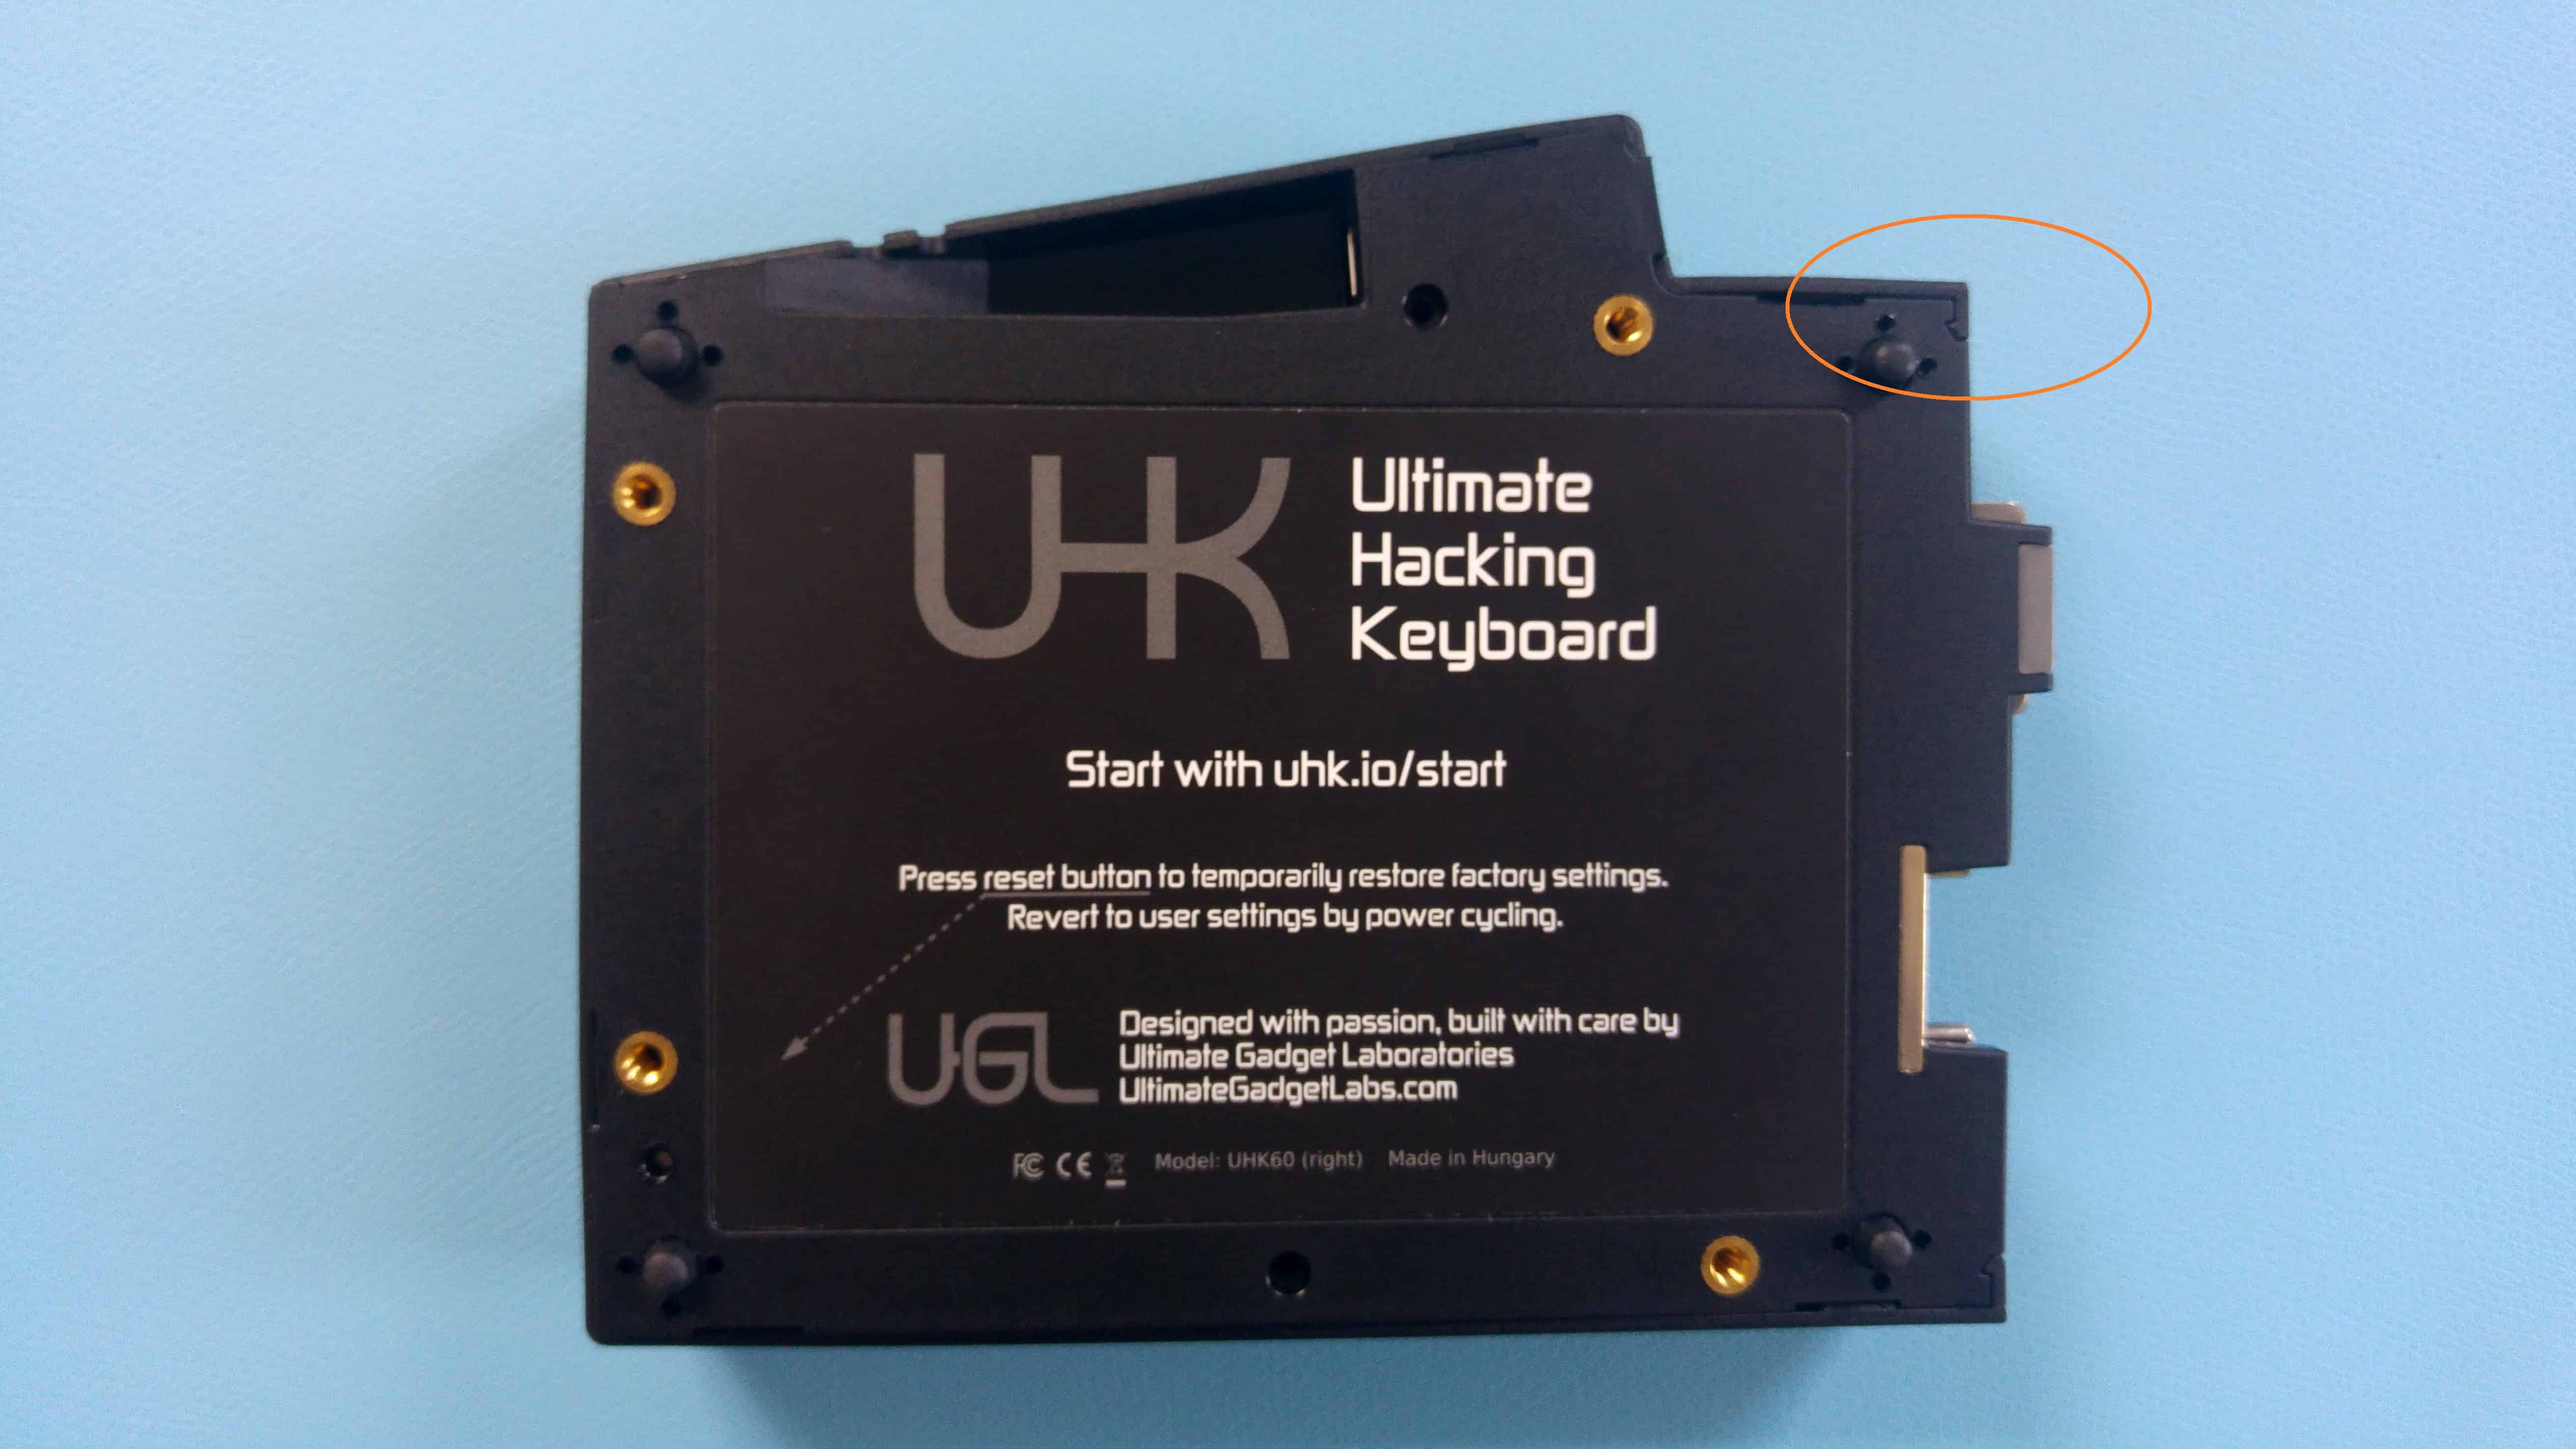
We’ll start with the right keyboard half. Unscrew the 2 screws (PH0 for the UHK 60 v2 and PH1 for the UHK 60 v1), then use a prying tool to separate the back and front parts of the case. Start with the tab located at the bottom right.

Work your way clockwise until you unsnap all seven tabs.
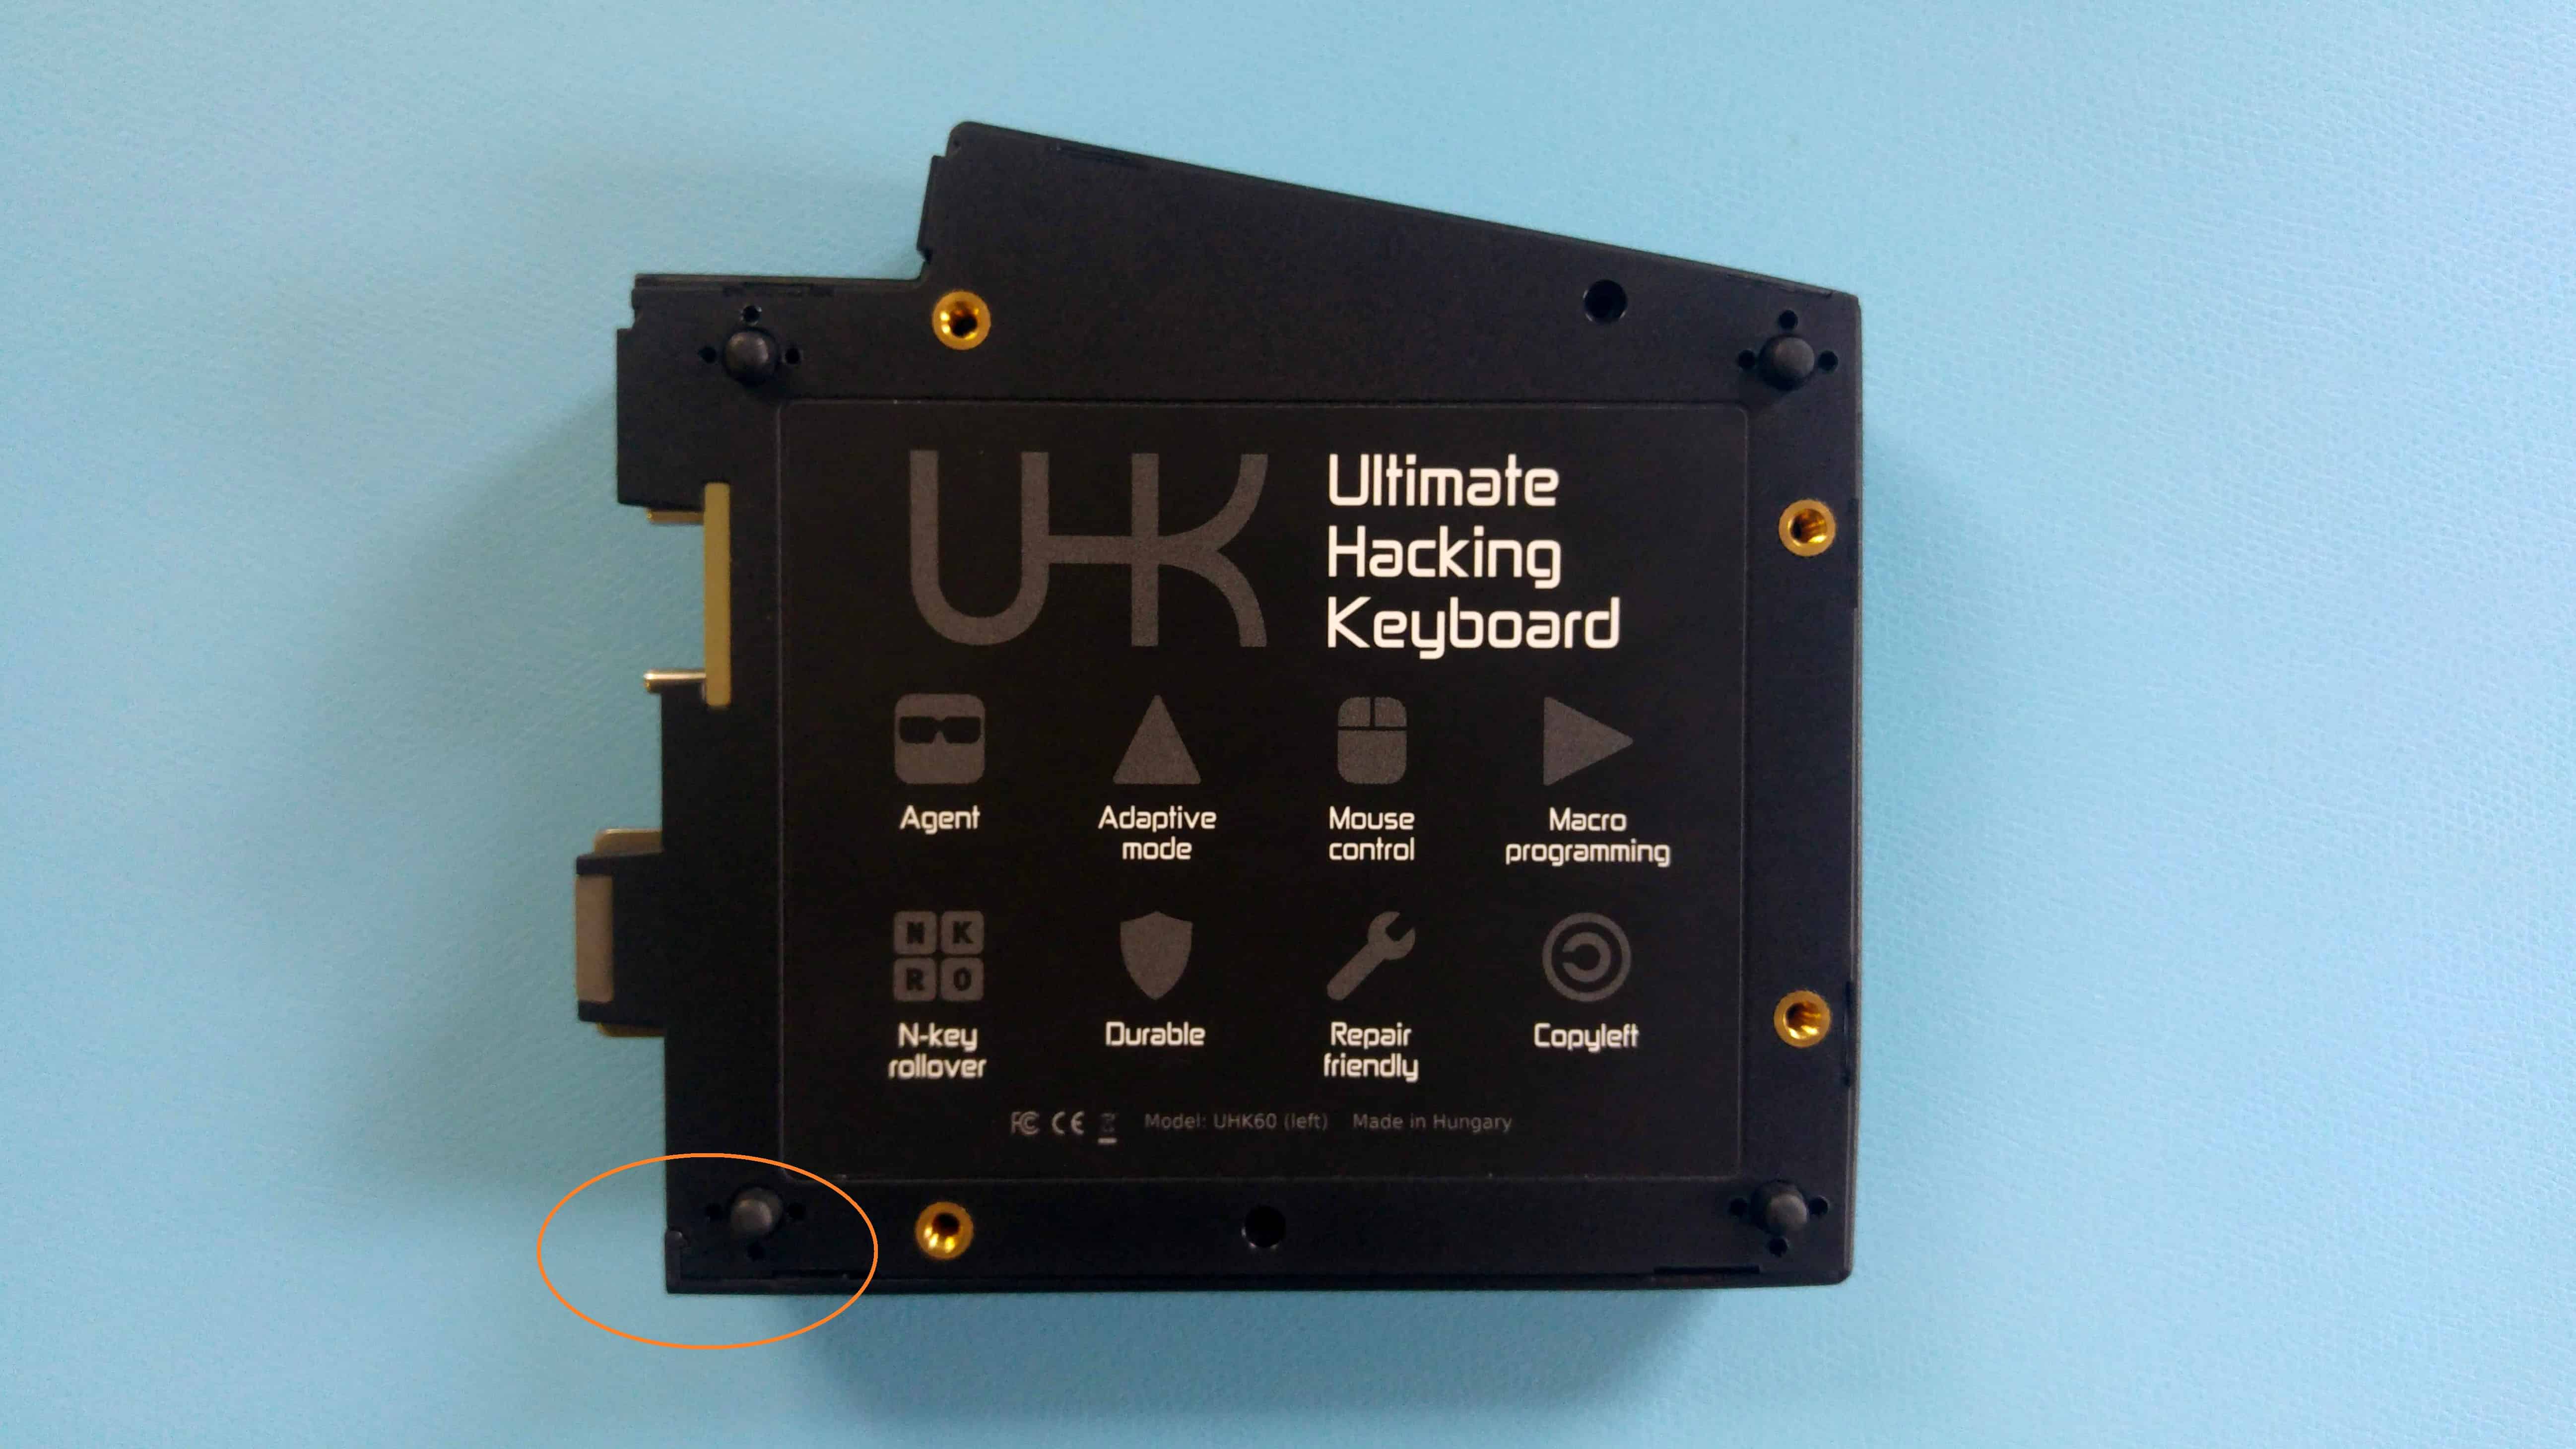
The procedure is the same for the left keyboard half, except that you should start at the bottom-left tab and proceed counter-clockwise.
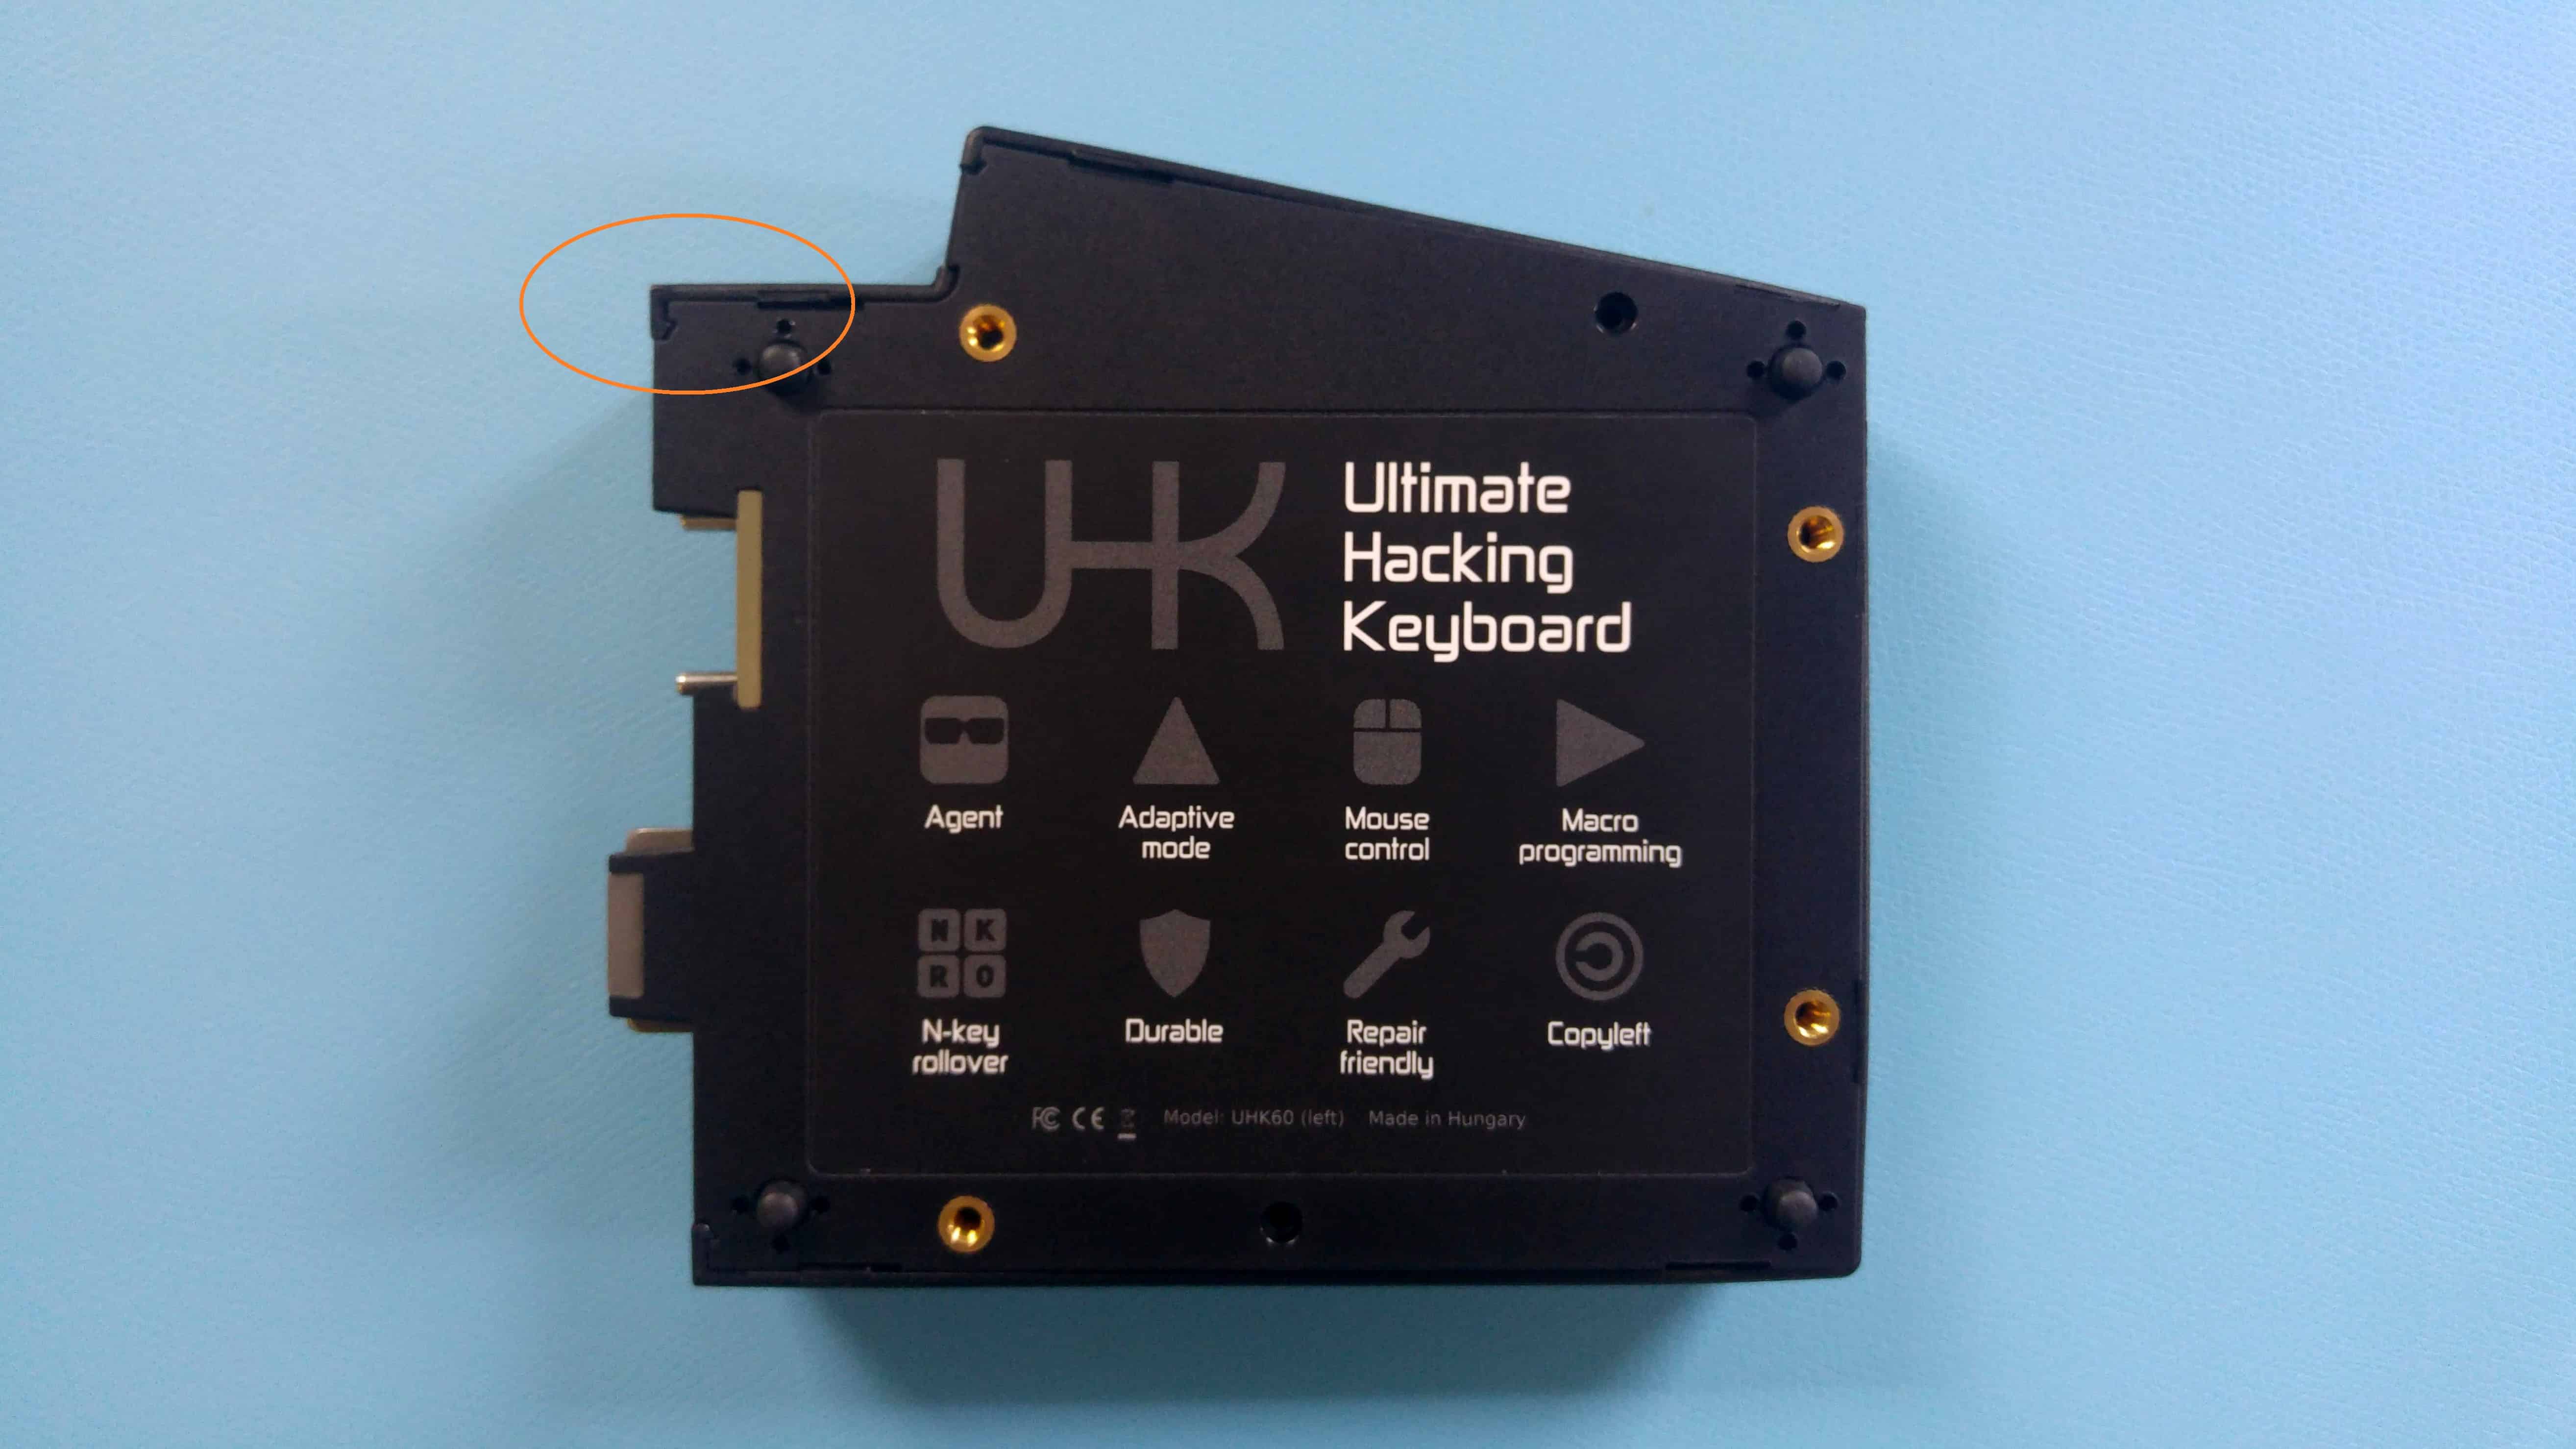
If you have a UHK 60 v1, there is almost certainly a small spacer included for each keyboard half. If it's there, ensure it remains in place when reassembling your UHK.
![]()
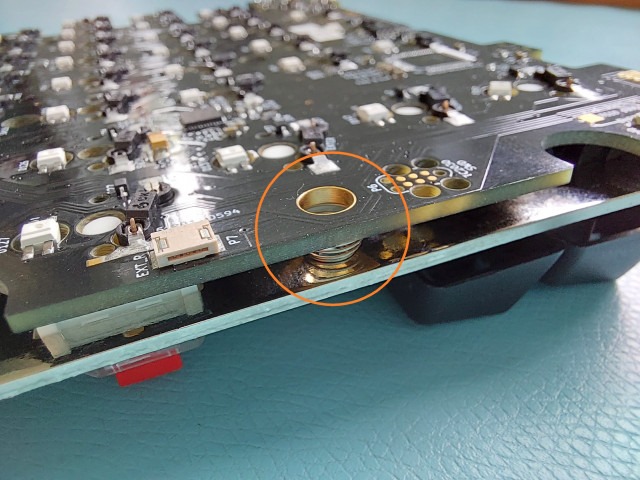
If you have a UHK 60 v2, a spring should be included for each keyboard half. Ensure it remains in place when reassembling your UHK.
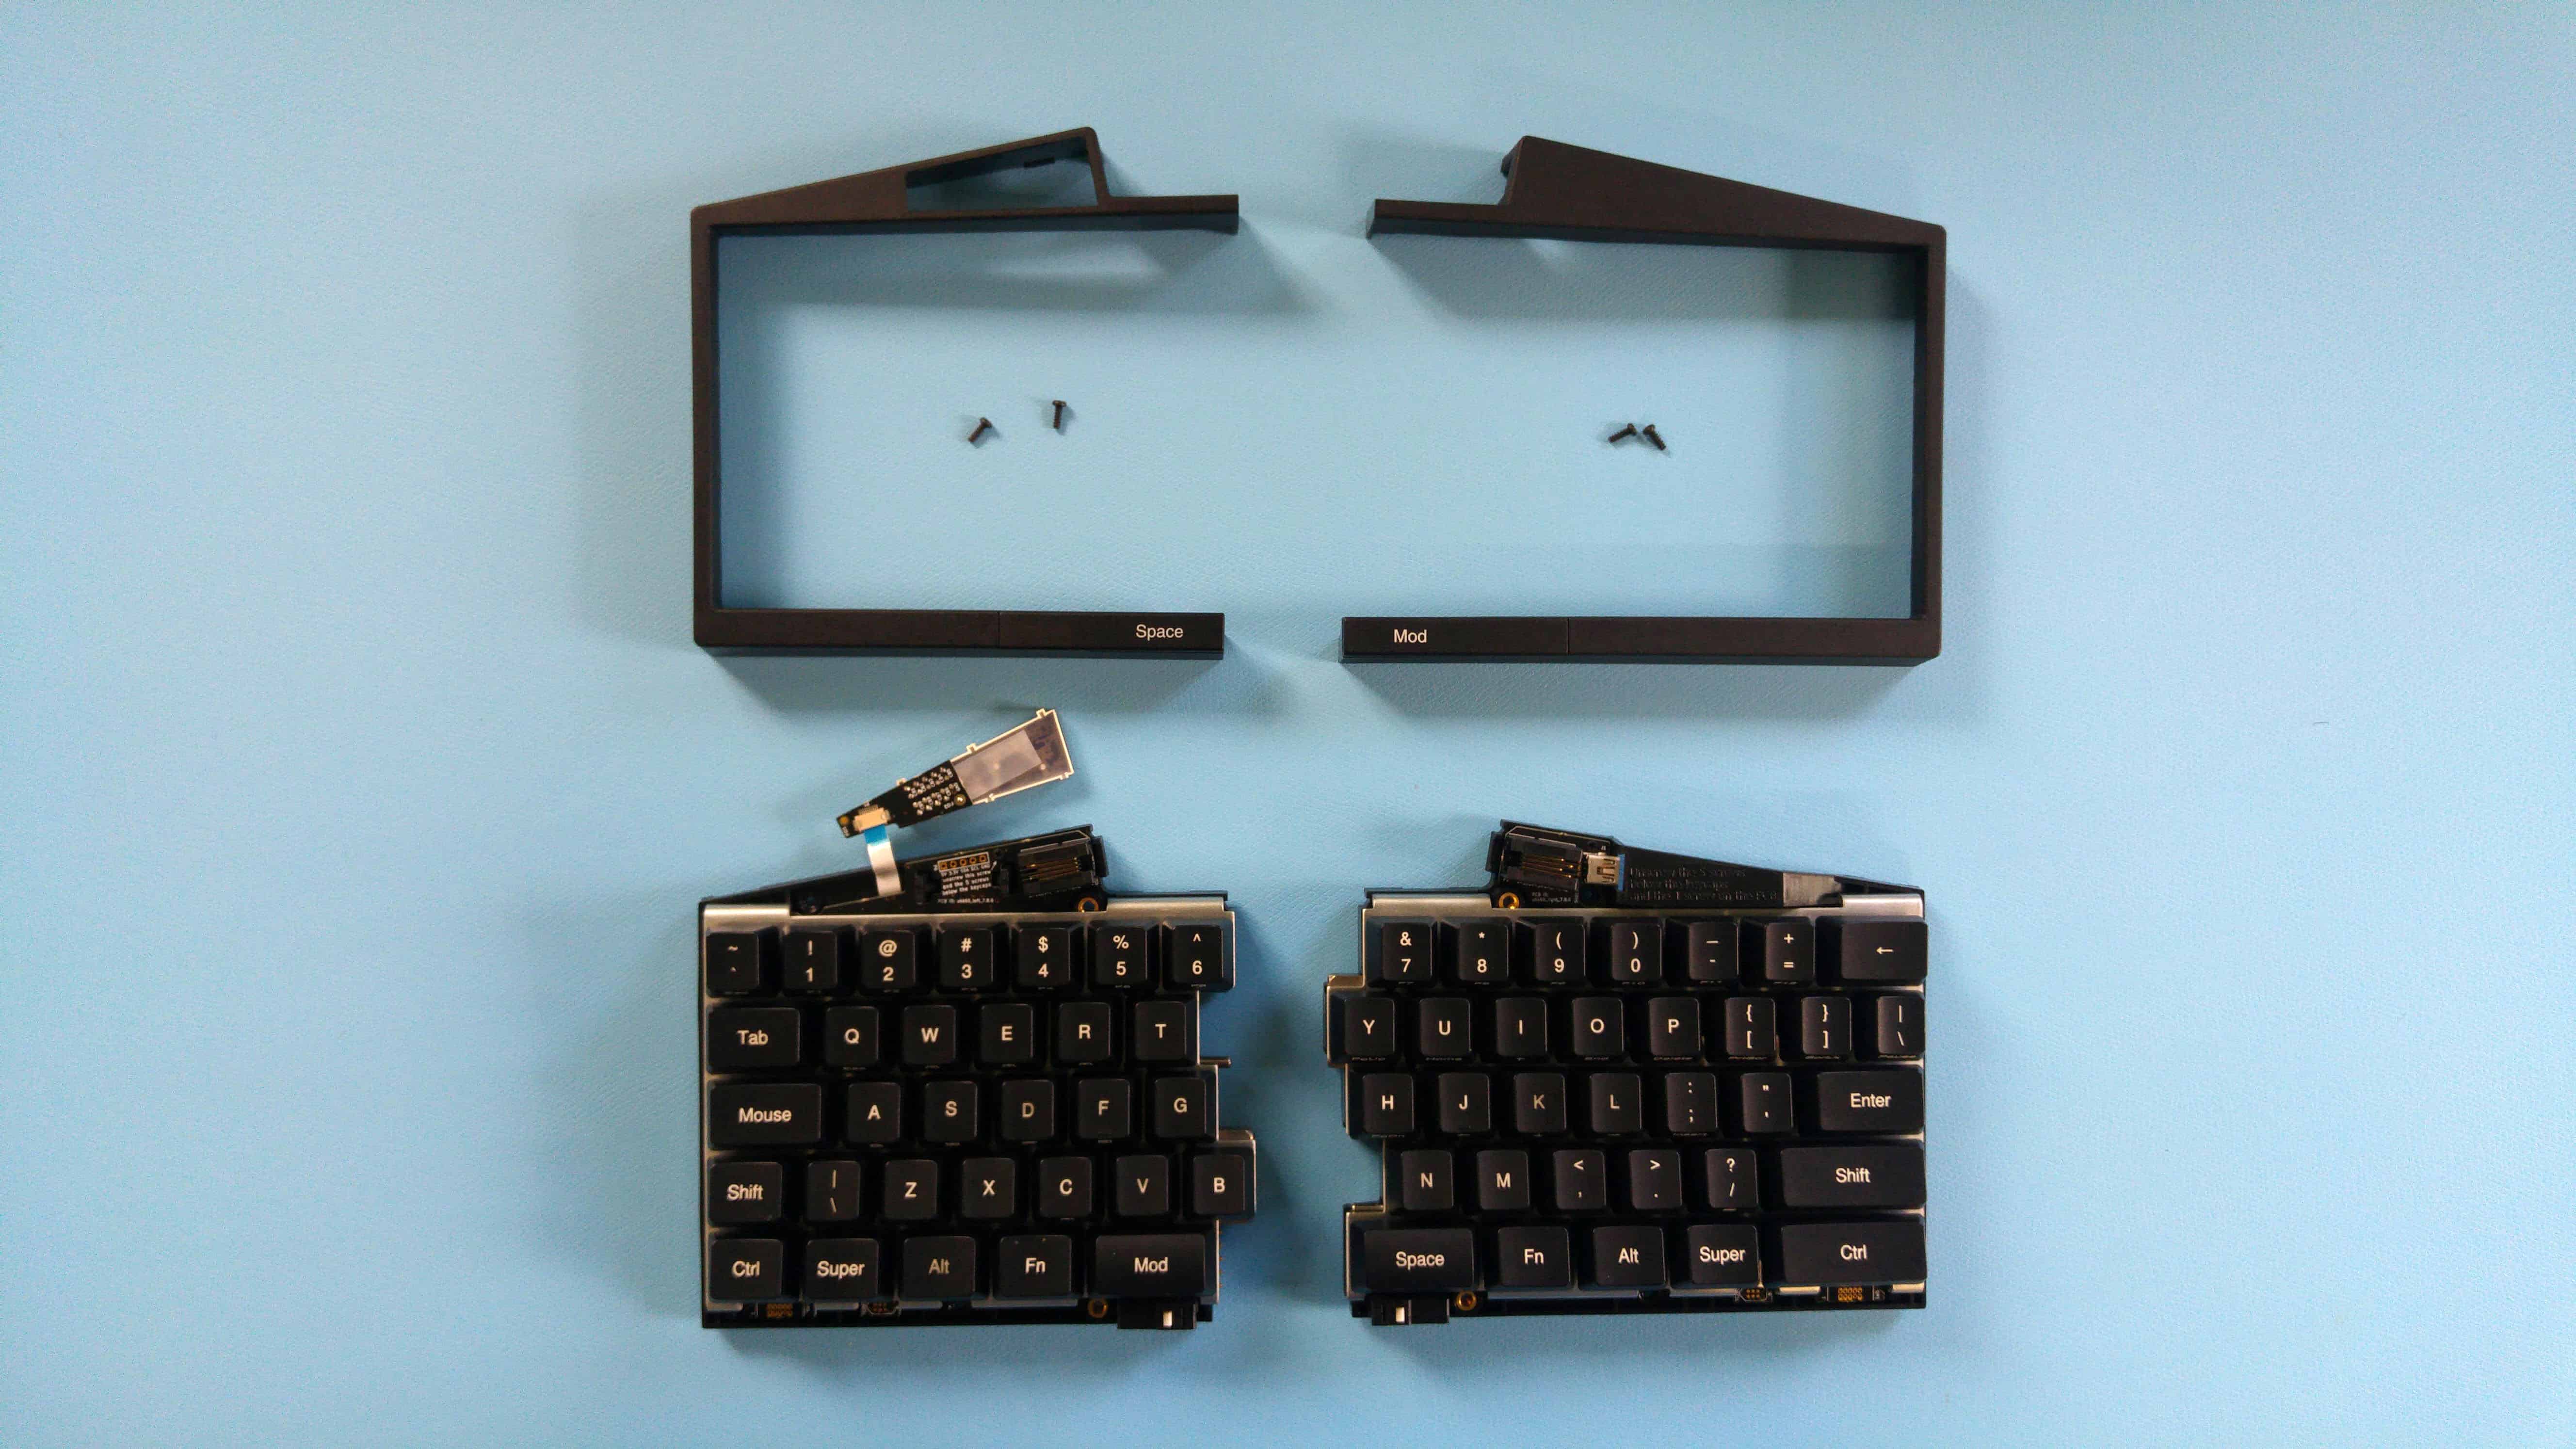
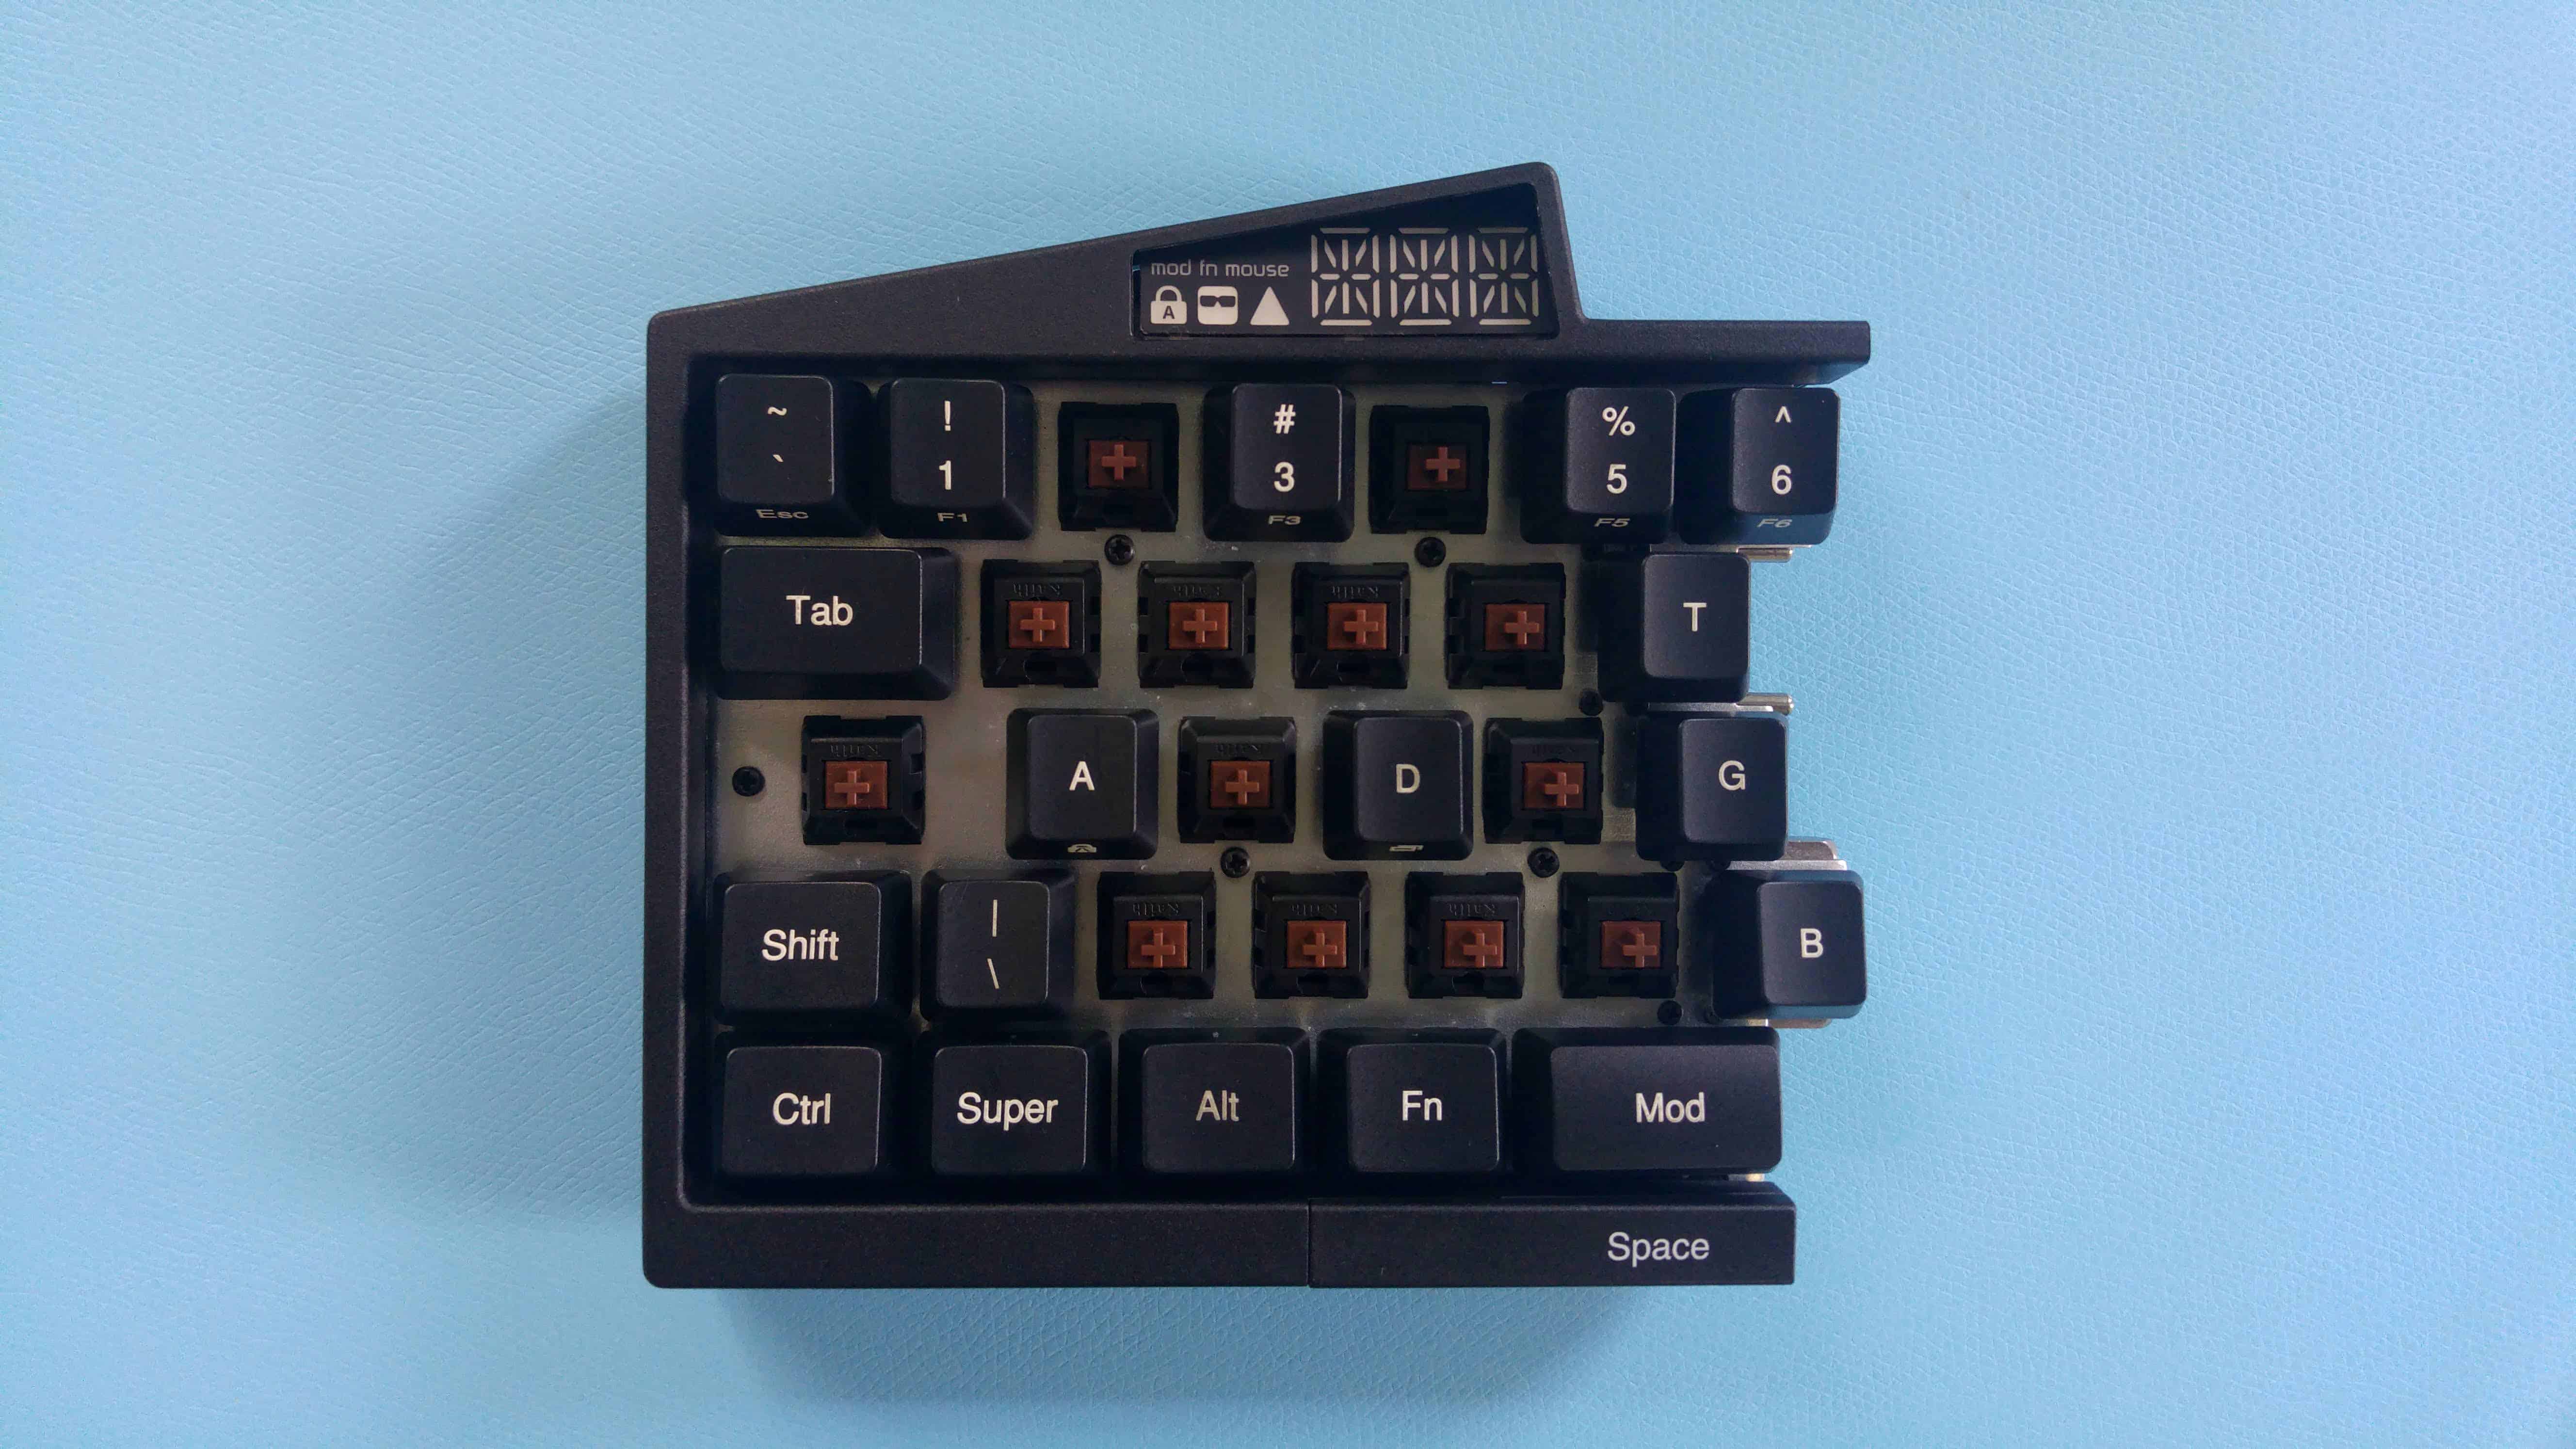
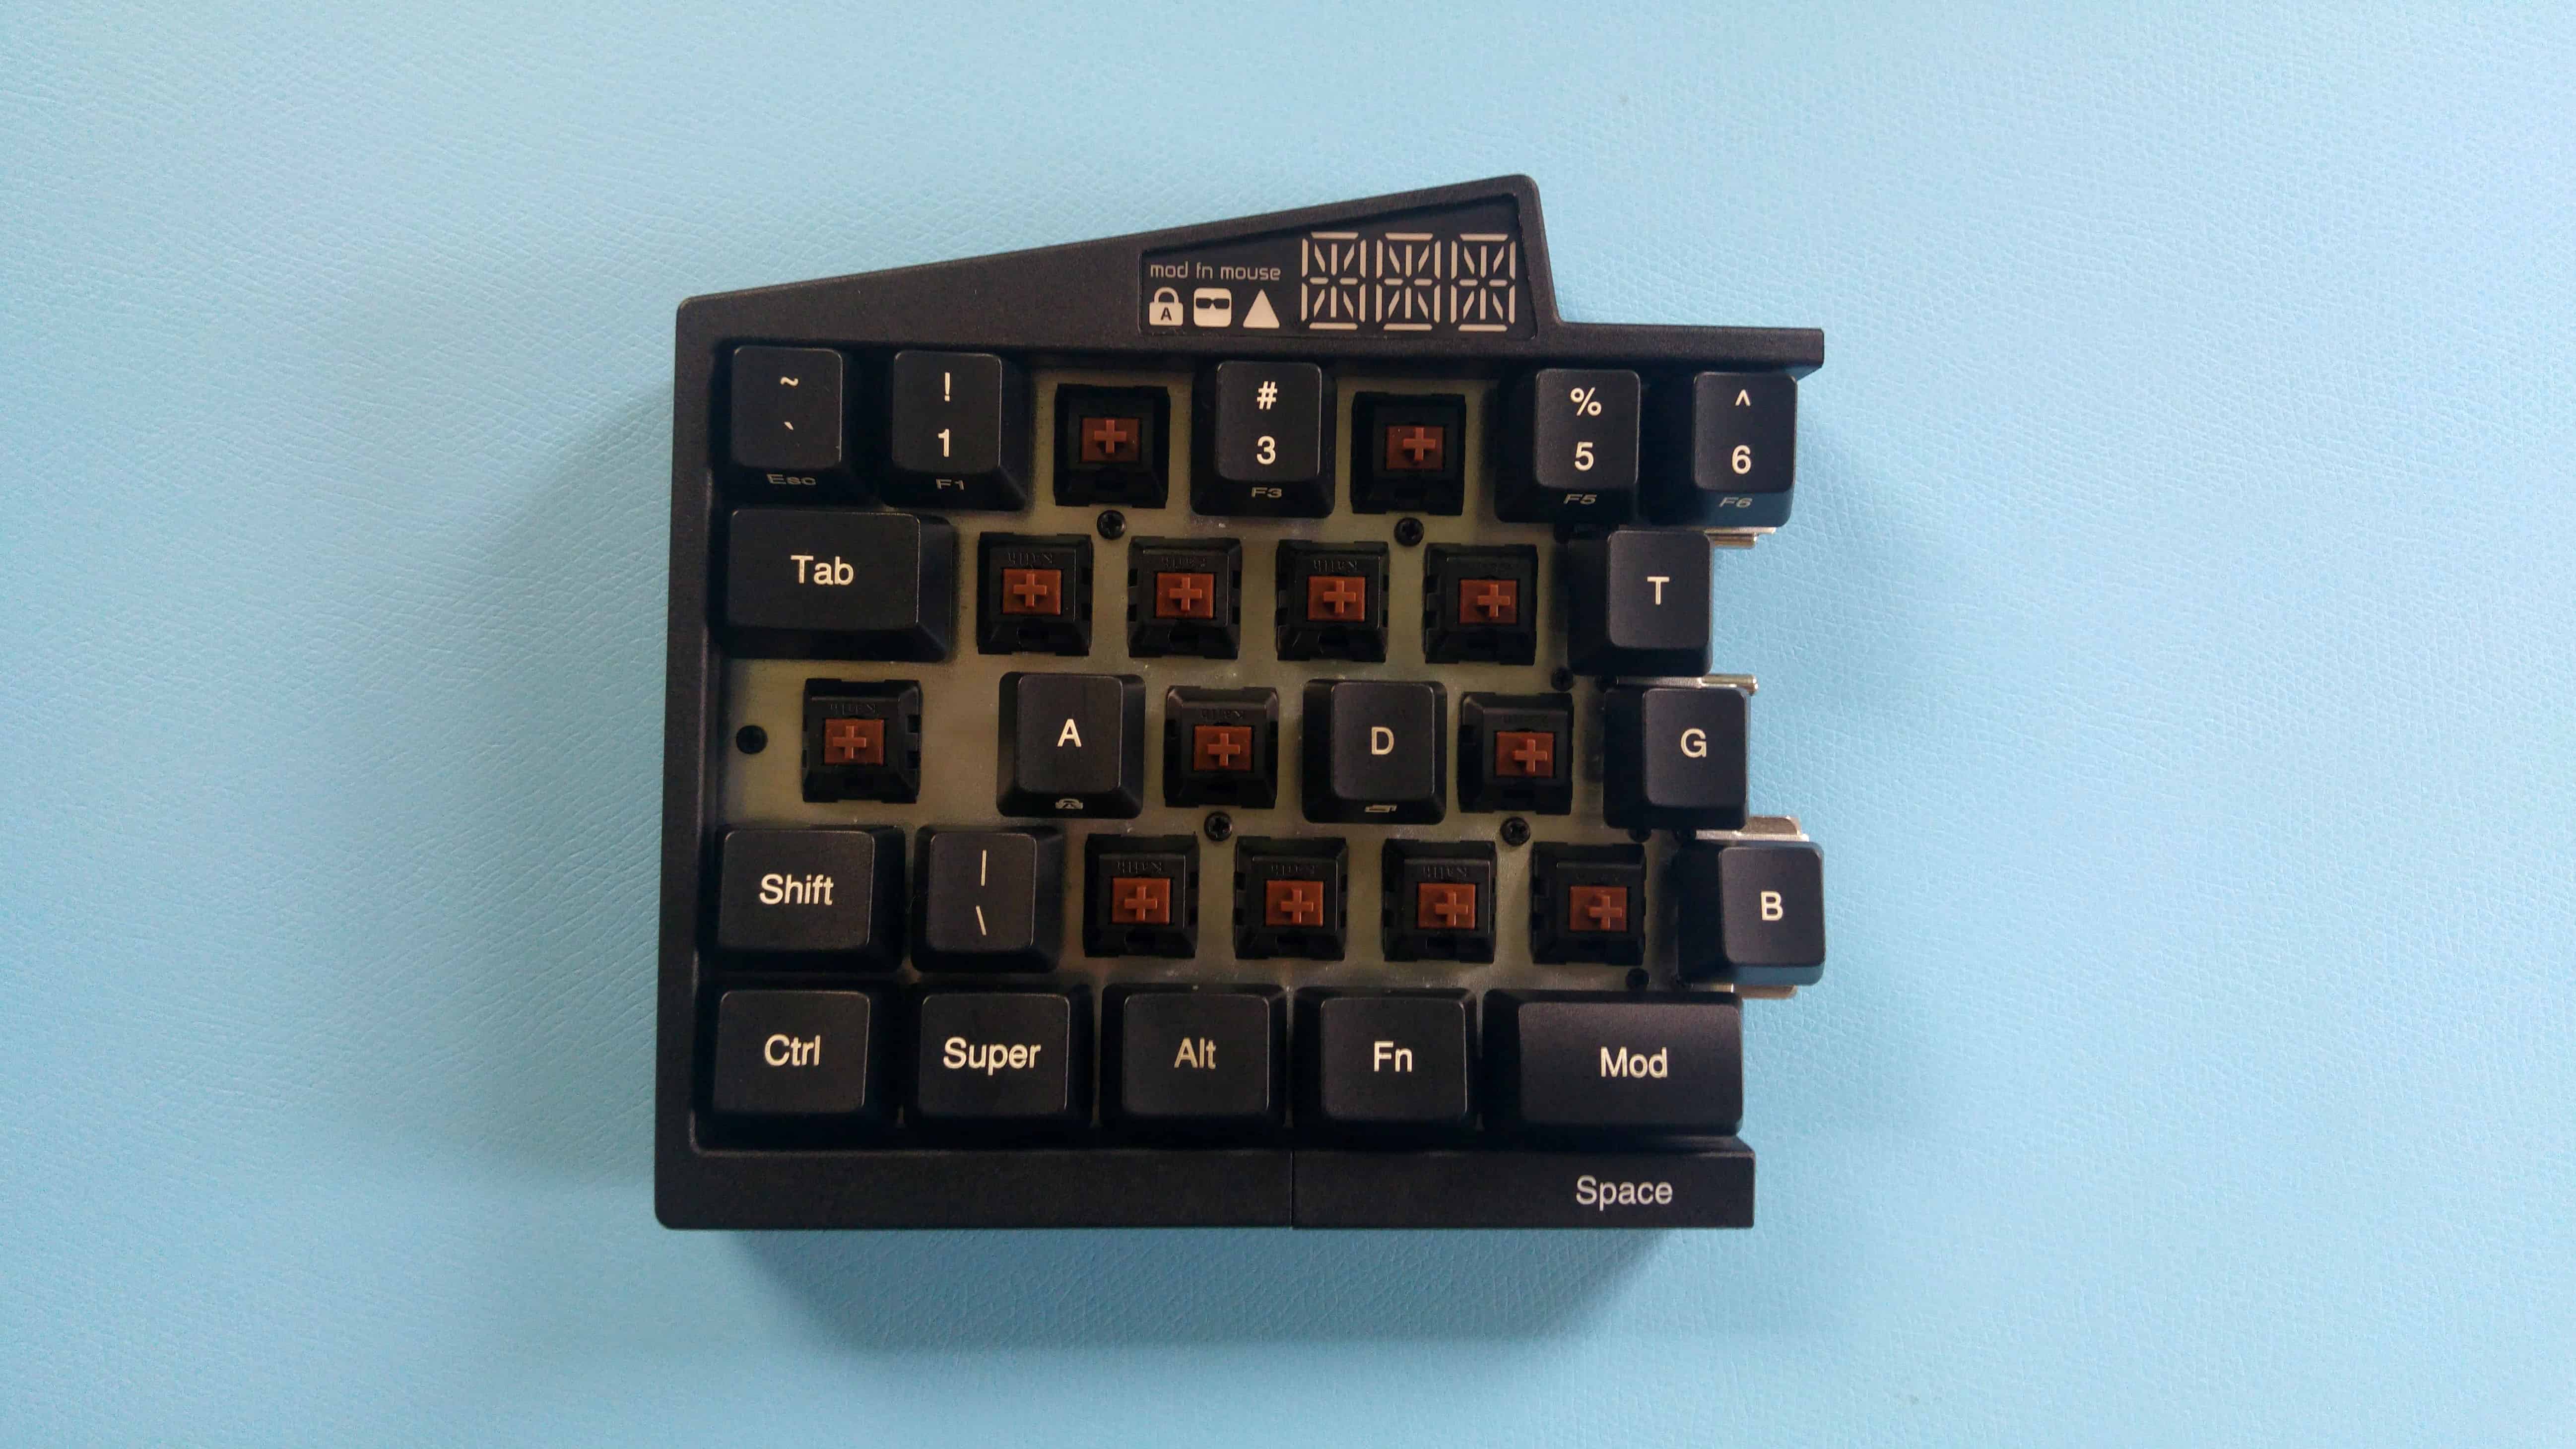
Remove the keycaps according to the following picture, then unscrew the 1 PH0 screw at the top and then the 5 plate screws (PH0 for the UHK 60 v2 and PH1 for the UHK 60 v1) per keyboard half.

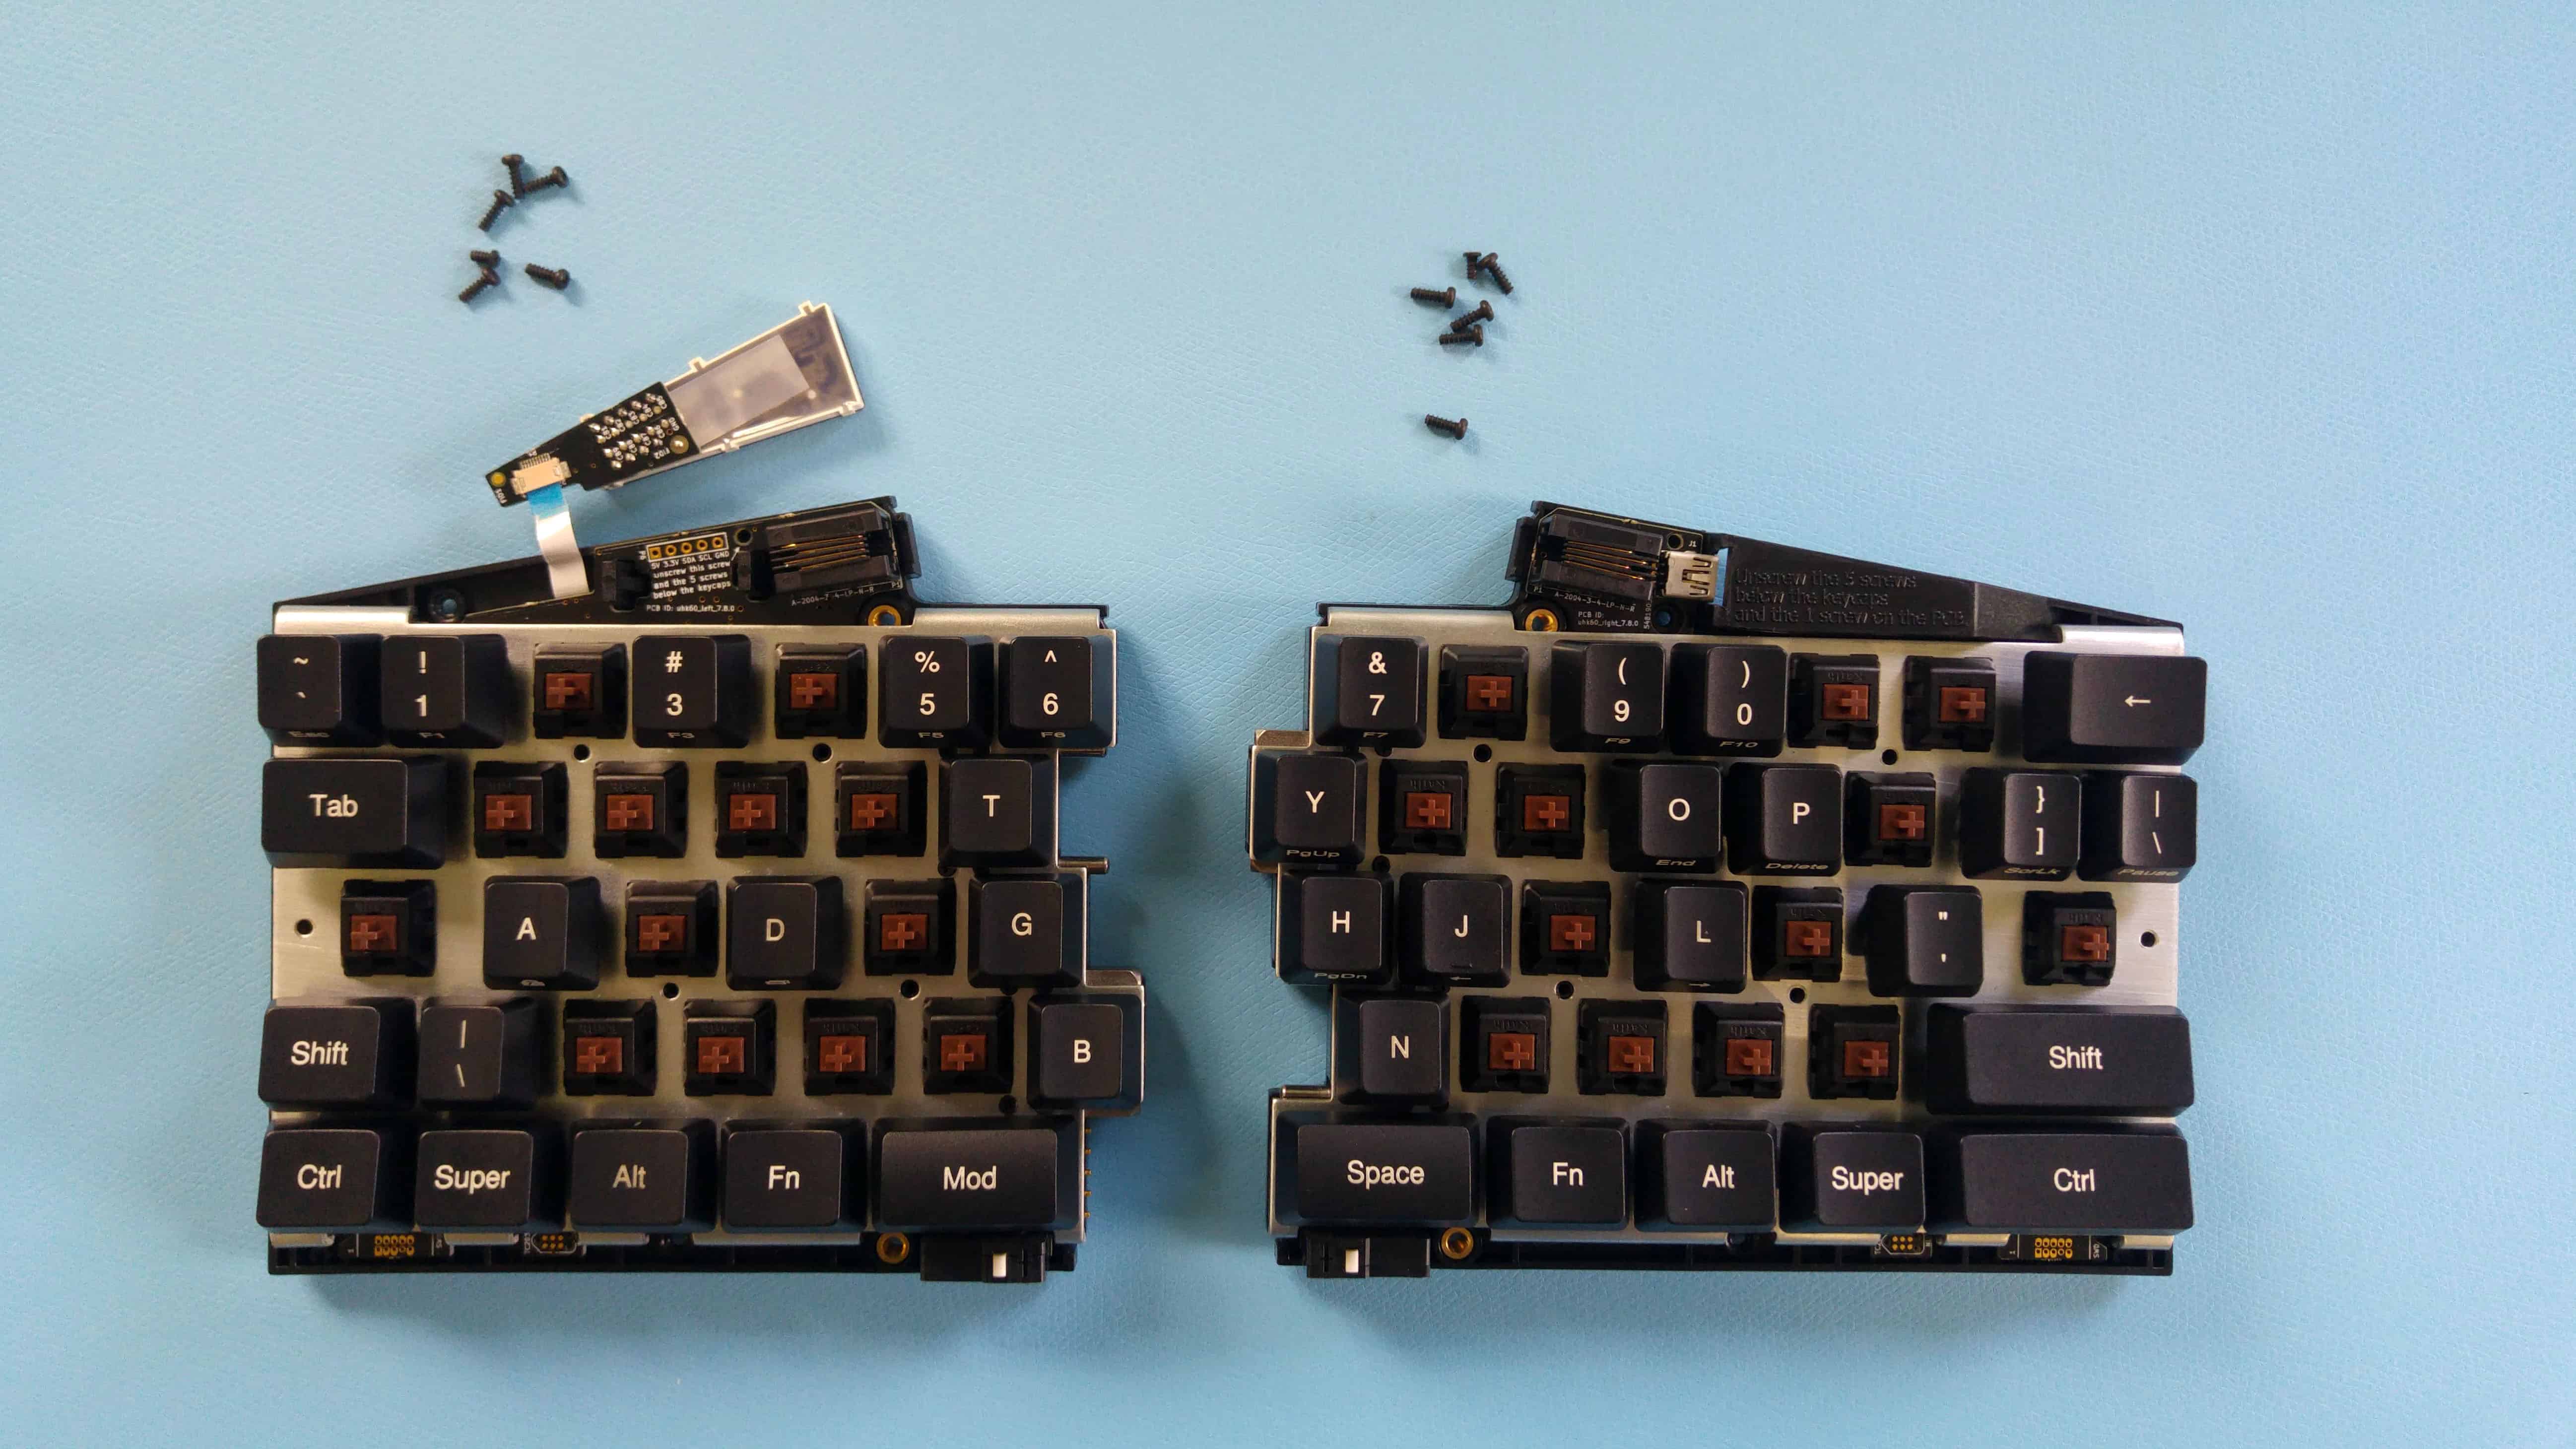
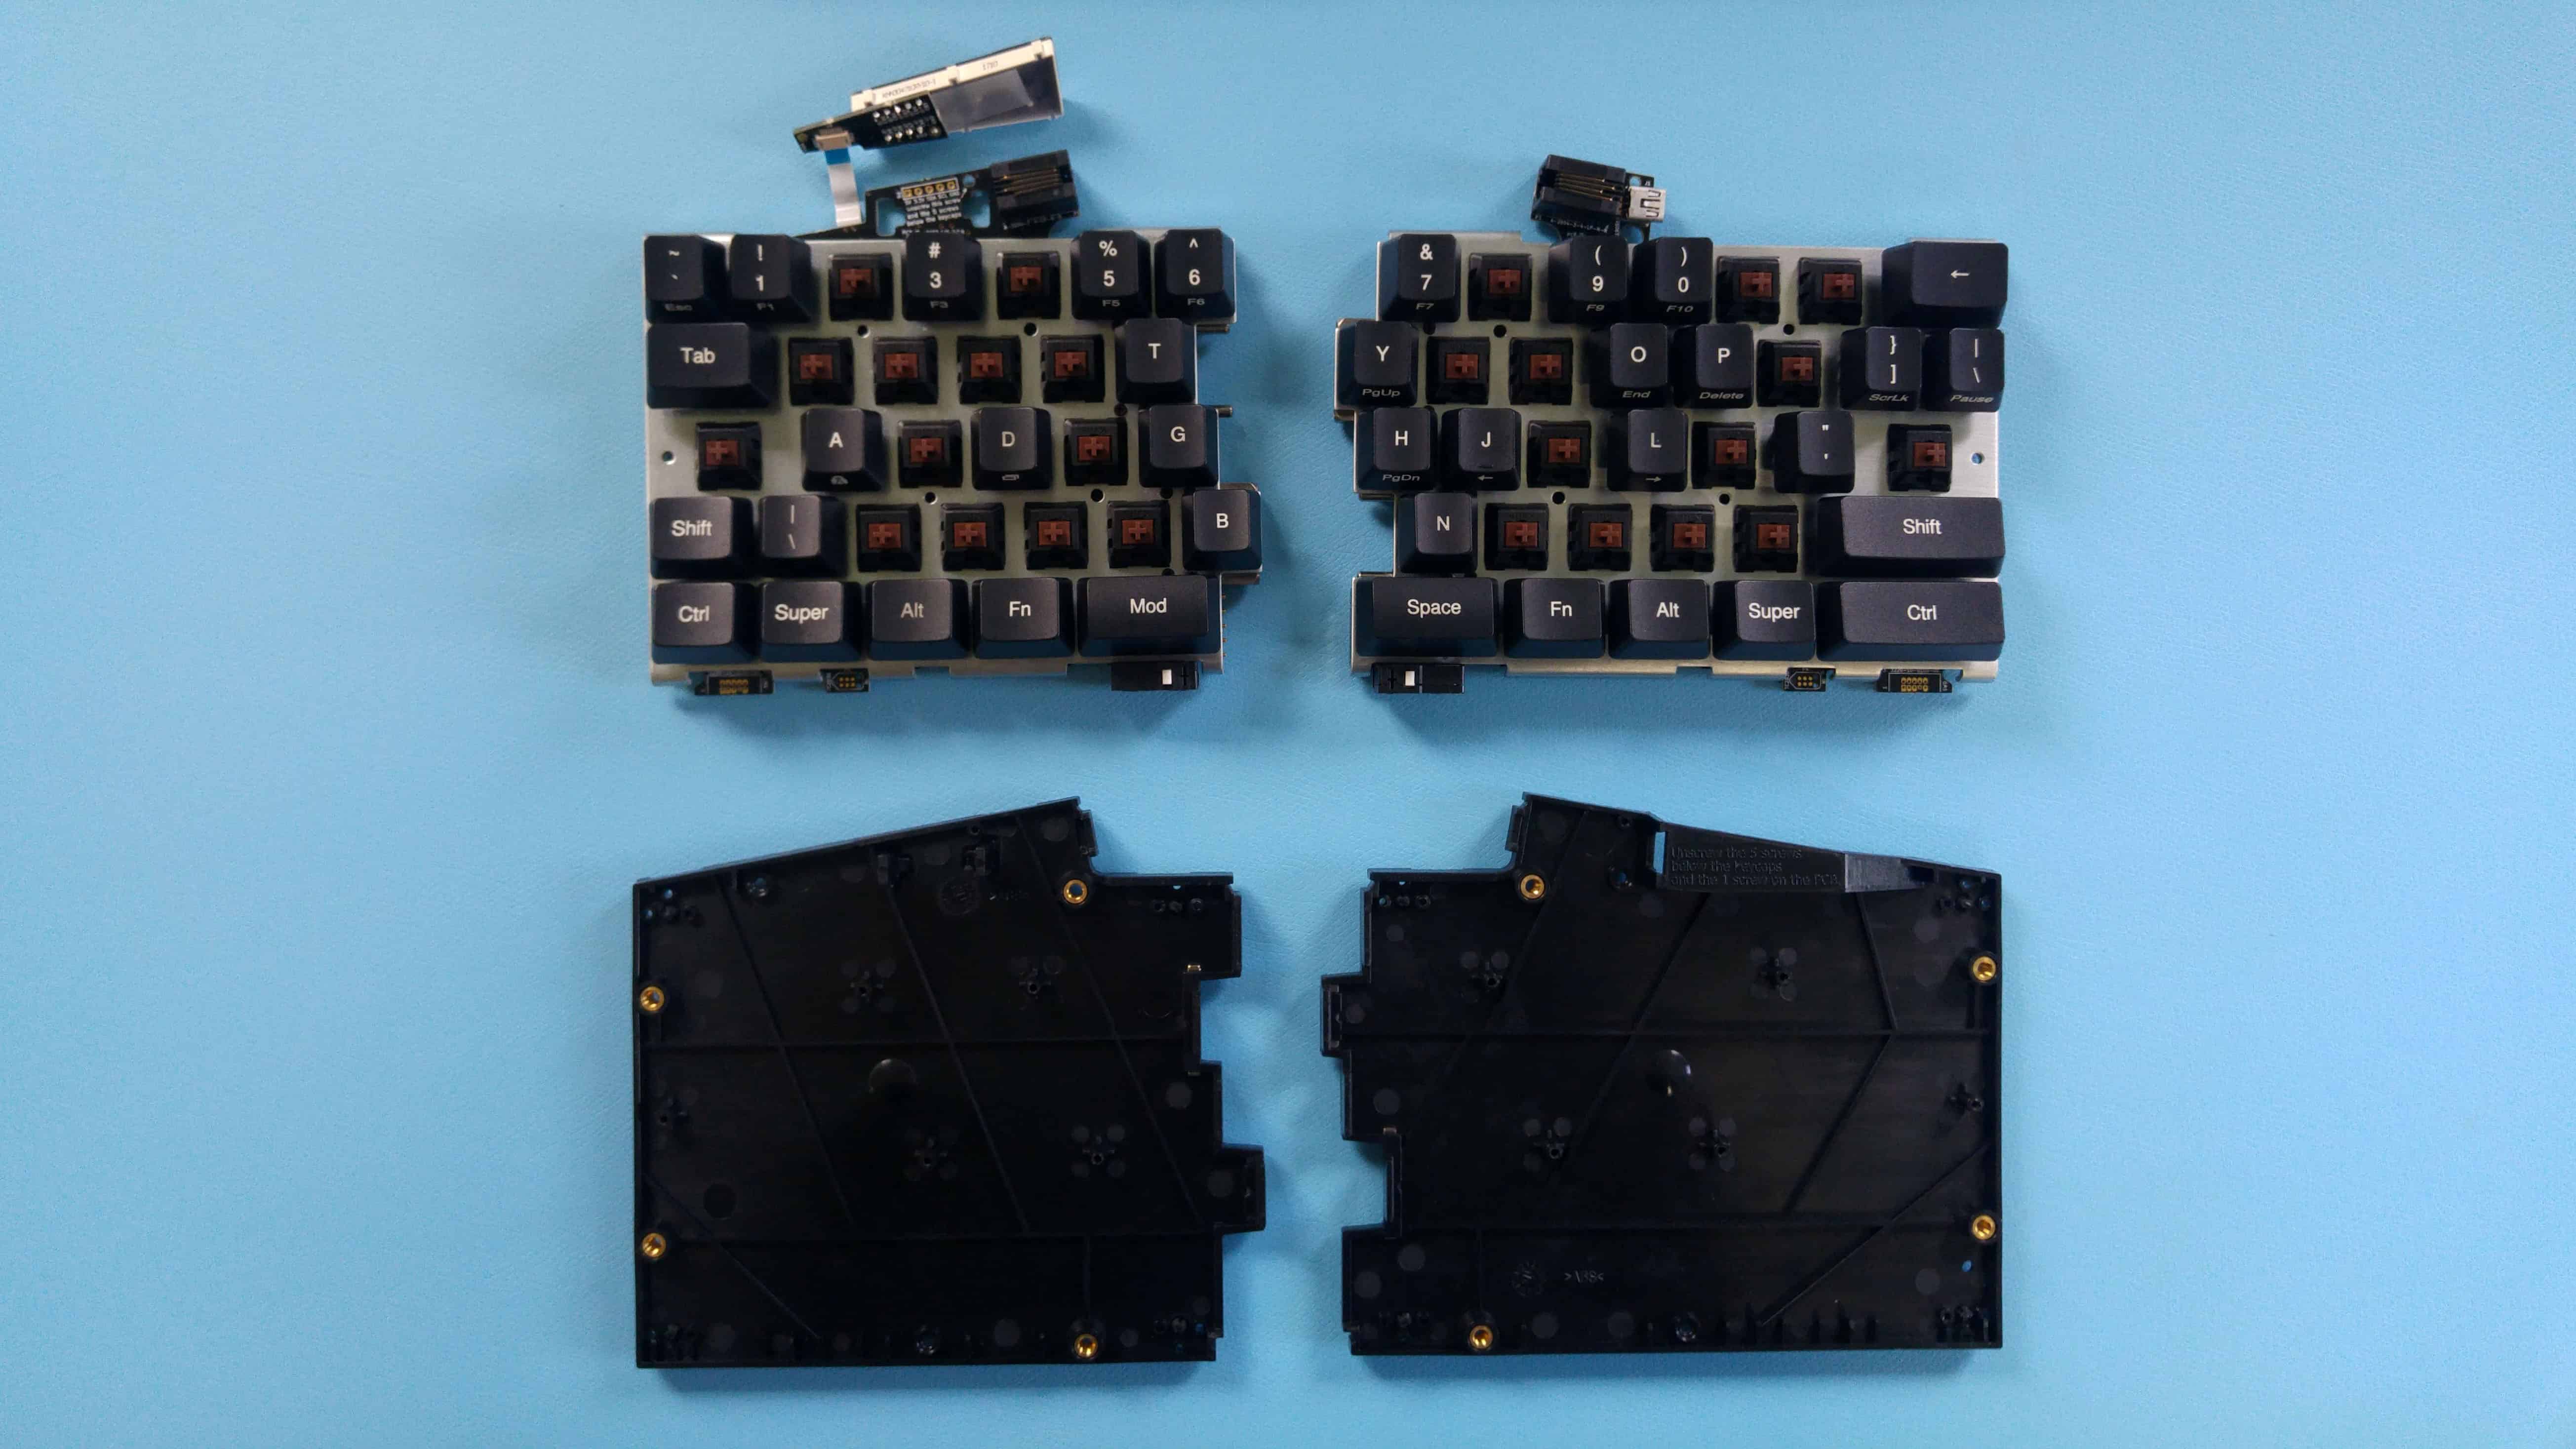
Extract the inner assembly from the bottom cases.
Reassembly
If you reassemble a used case, ensure that you screw it properly; otherwise, the screw holes may become damaged. This is not relevant for a new, unused case.
When placing the inner assembly back into the case, make sure it’s aligned with the two highlighted bosses.

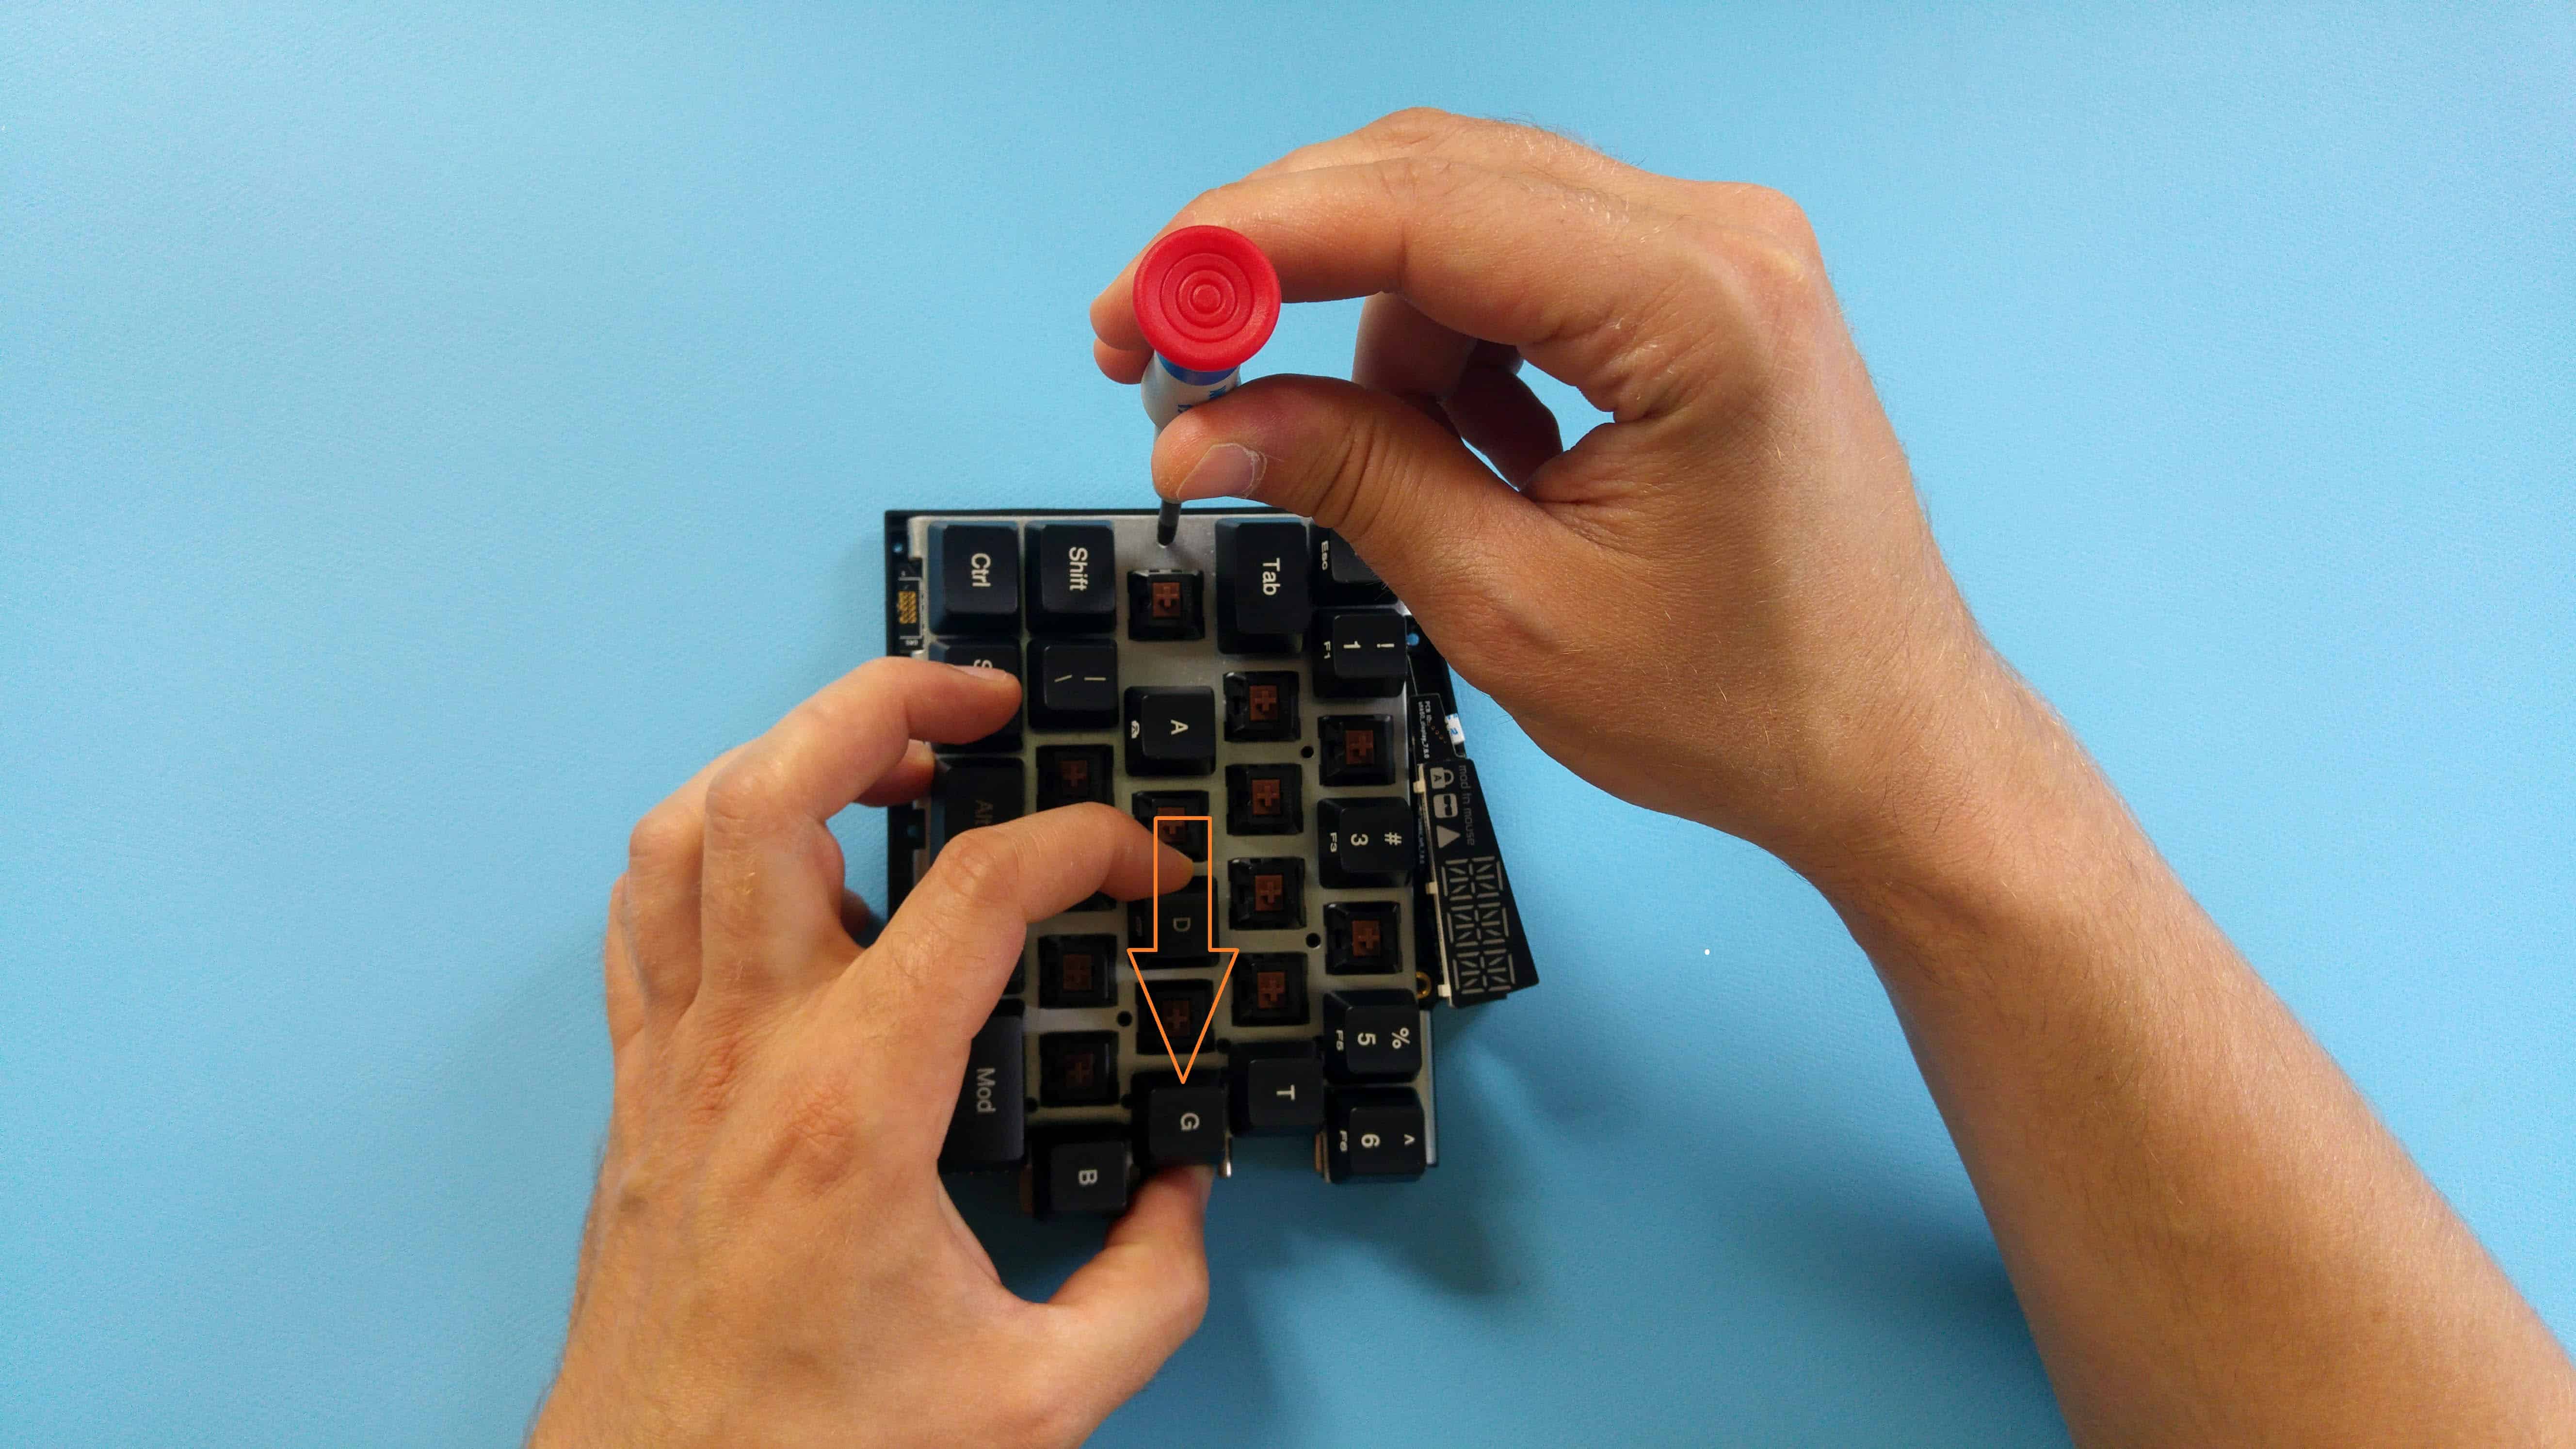
Pull the inner assembly towards yourself during screwing (downwards in the following picture). Start with the farthest screw, and make sure that the screw hole and the boss are concentric. Screw in the five plate screws and the 1 PCB screw.
Let’s snap the top and bottom case parts and start with the right keyboard half. Snap the tab near the bottom right.
Then the one on the opposite side.
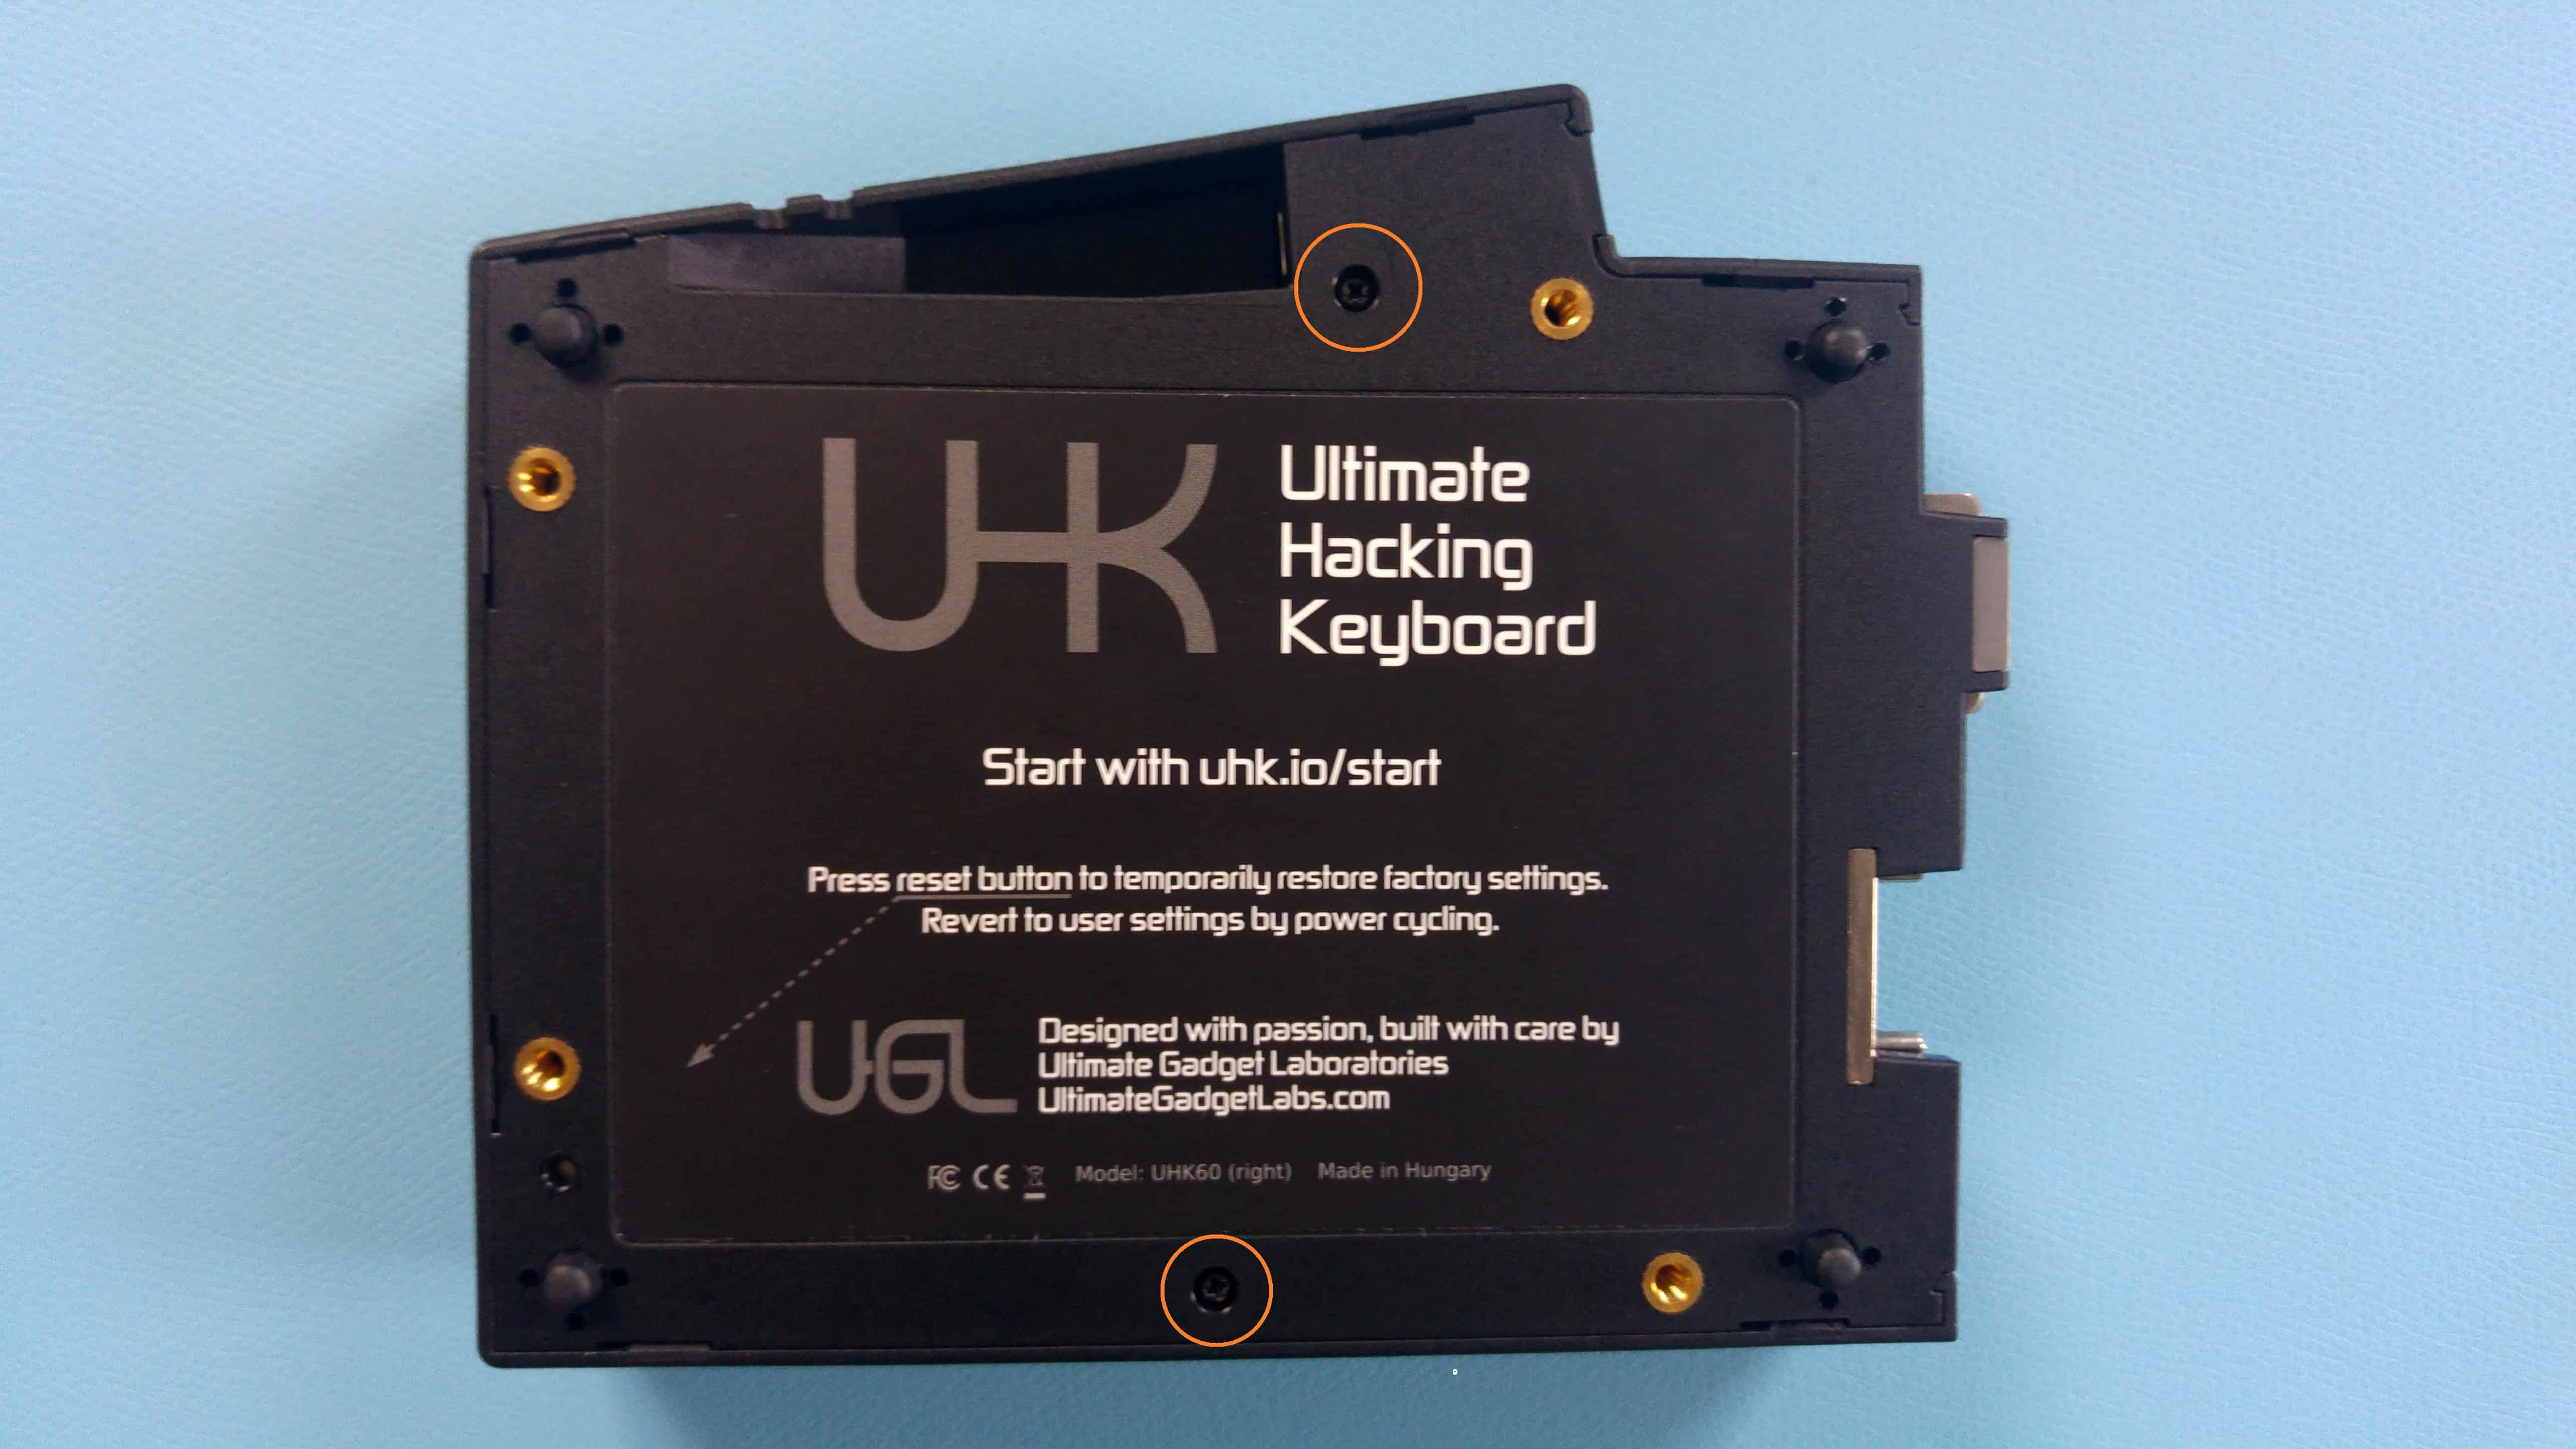
When every tab has snapped together, screw the two screws.
Now let’s snap the top and bottom case parts of the left keyboard half. Make sure that the LED display is in the correct position.
Snap the tab near the case button.
Then the one on the opposite side.
Before snapping the rest of the tabs, check the last time that the LED display is in the correct position.
When all tabs have been snapped, screw in the two screws.

Some of the case buttons might get stuck after reassembly. If this happens, push them gently away from the keycaps.
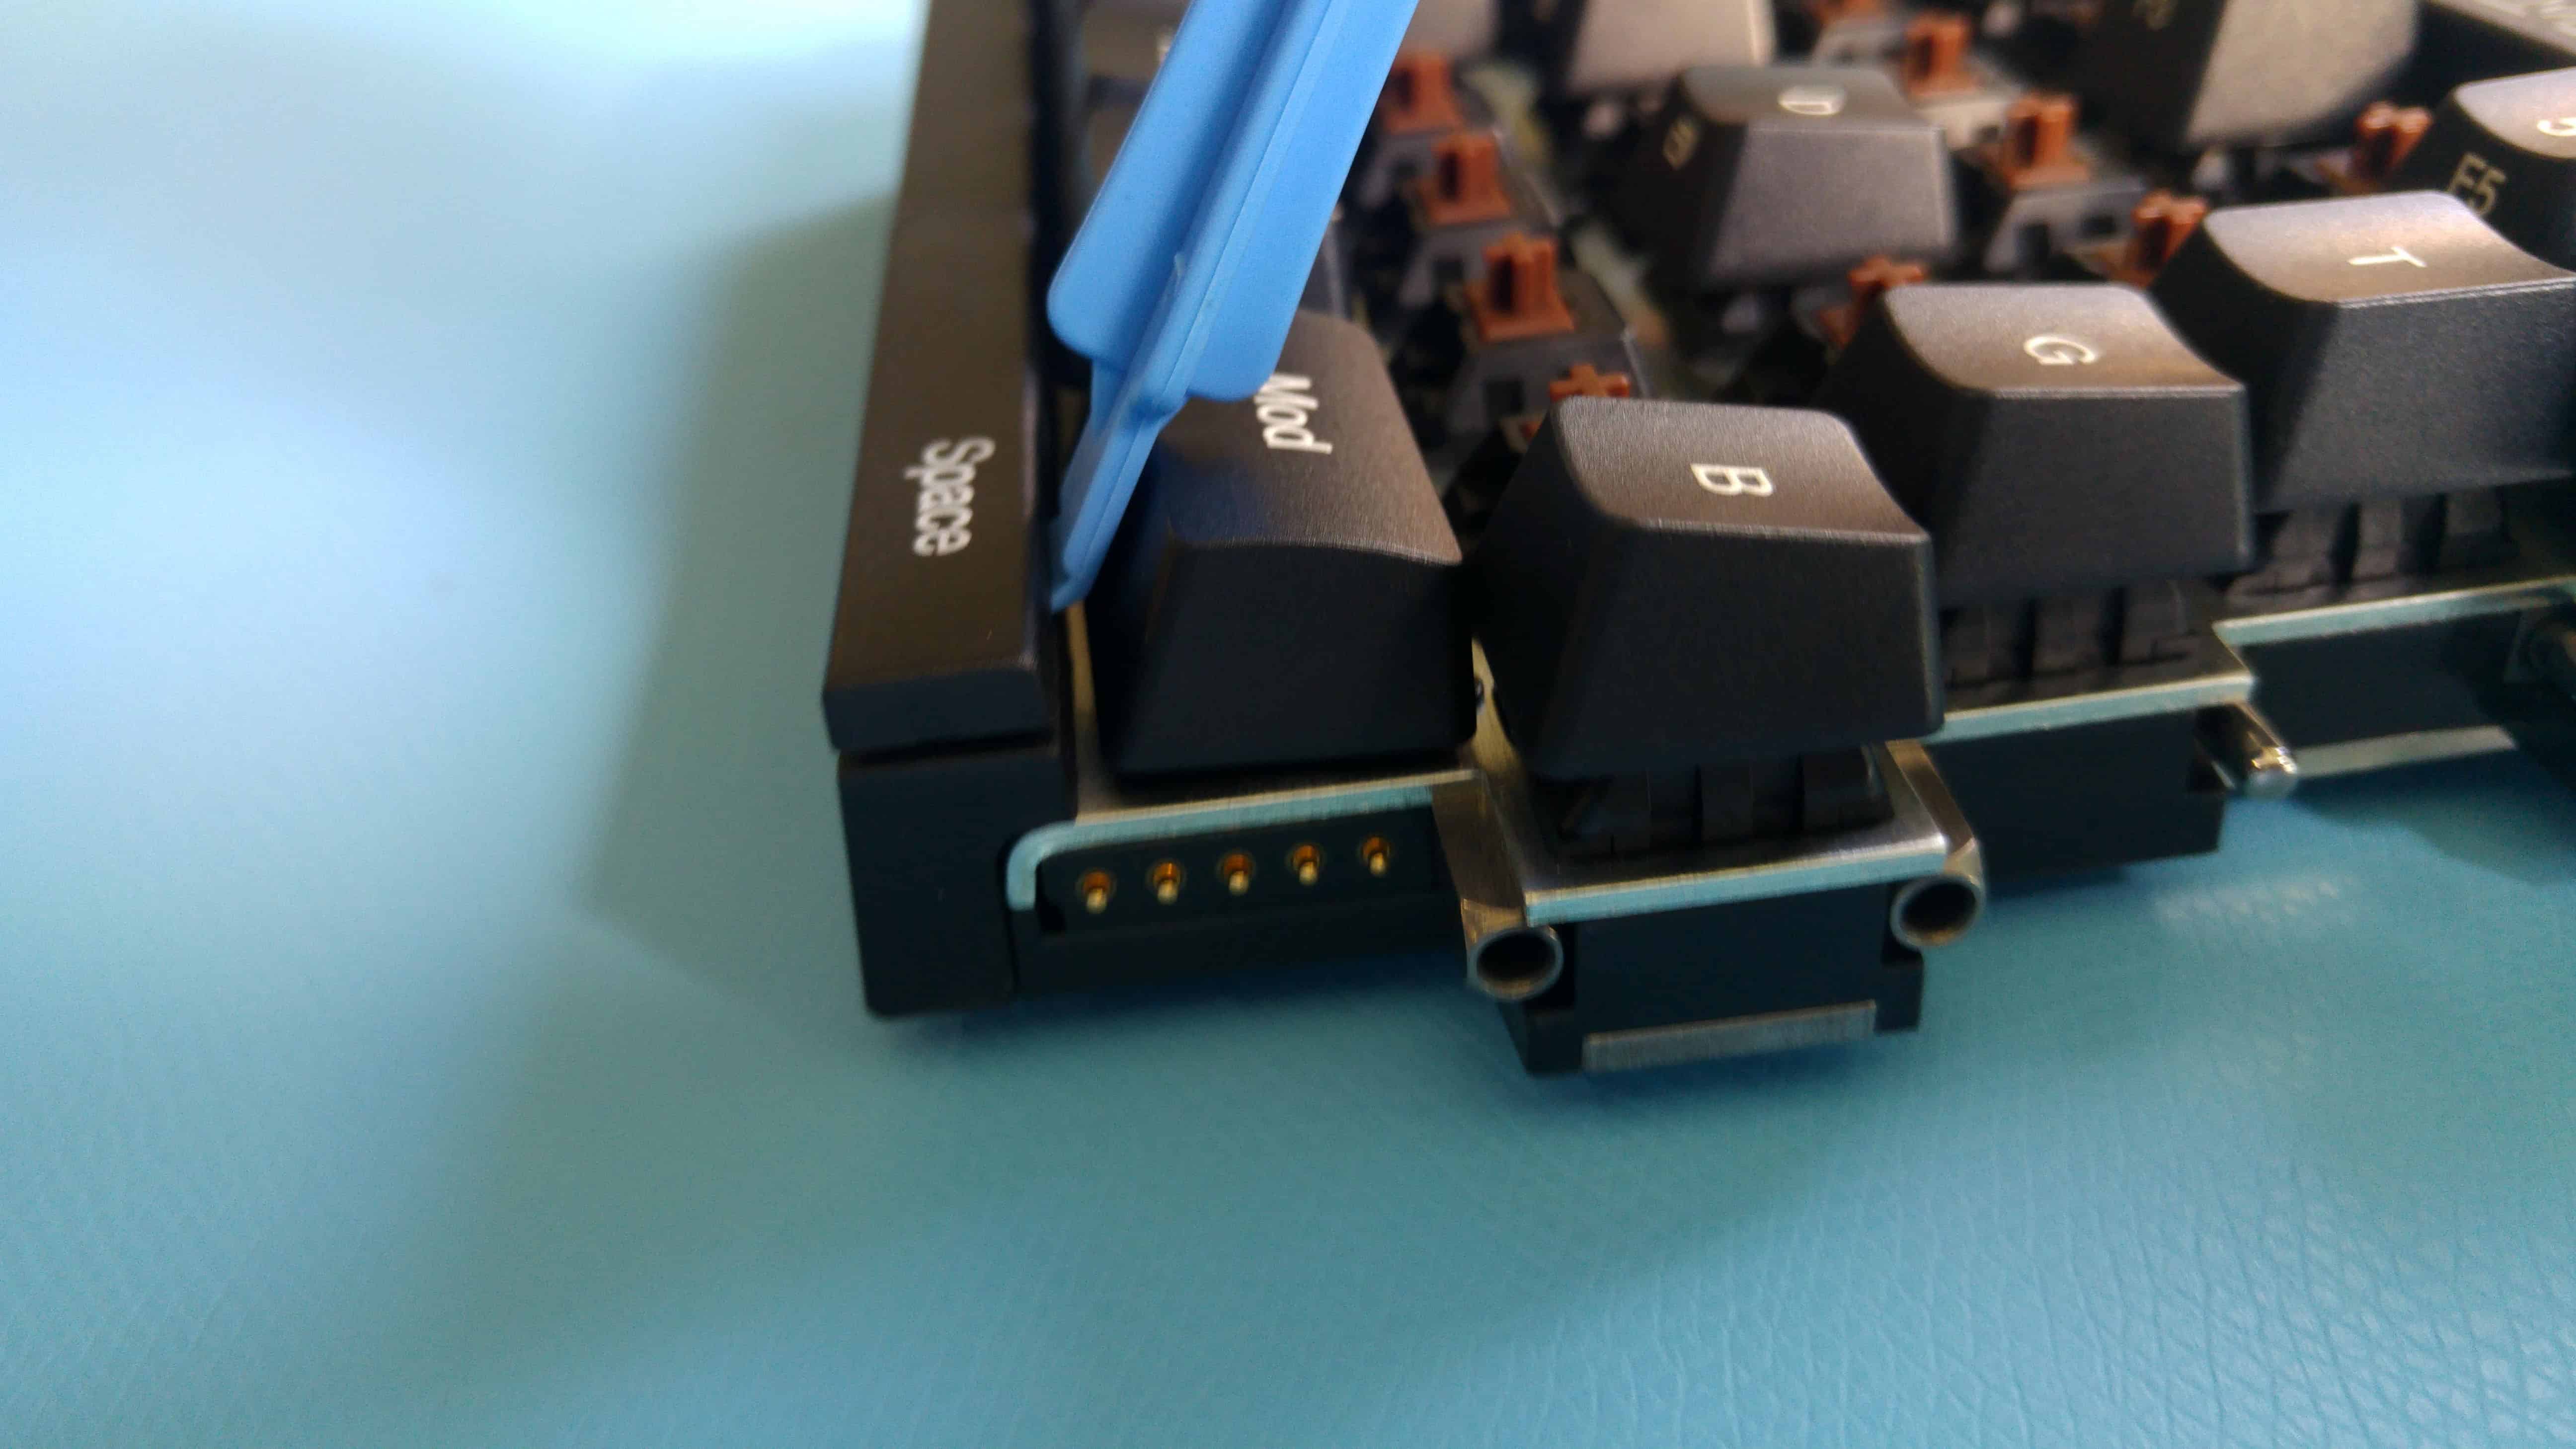
Finally, put the keycaps back onto the switches.